PCGamesN Wednesday, March 4, 2026 7:16 AM If you're looking to snag some extra cosmetic goodness in Bungie's extraction shooter, we've got the latest on the Marathon Twitch drops. |
PCGamesN Wednesday, March 4, 2026 7:06 AM Is your PC on fire, or is it just a case of the Marathon servers being down? We'll help you narrow the cause of your issue down right here. |
PCGamesN Wednesday, March 4, 2026 6:57 AM Prominent leaker TheGhostOfHope says Activision has "legally demanded" they stop sharing information about Call of Duty's future plans. |
PCGamesN Wednesday, March 4, 2026 6:34 AM The Trump administration is supposedly looking into Tencent's investment in major videogame brands like Epic Games and Riot Games. |
PCGamesN Wednesday, March 4, 2026 6:24 AM Neva's DLC doesn't hurt as much as the base game, but Nomada Studio's tender exploration of childbirth still brings a tear to the eye. |
PCGamesN Wednesday, March 4, 2026 6:19 AM Valve has given Counter-Strike Global Offensive its own page separate from CS2, but you can't search the Steam store for the classic FPS. |
PCGamesN Wednesday, March 4, 2026 6:01 AM Here is our Arknights Endfield tier list for 1.0, alongside our insights on the best characters in the gacha RPG as of March 2026. |
PCGamesN Wednesday, March 4, 2026 3:00 AM Thymesia is an indie gem from 2022, and a solid soulslike game with immaculate Bloodborne vibes, and it's cheaper than ever right now. |
Rock Paper Shotgun Latest Articles Feed Wednesday, March 4, 2026 7:25 AM Ahead of Myrient's RAM crisis-linked demise, volunteers are working to archive its entire collection 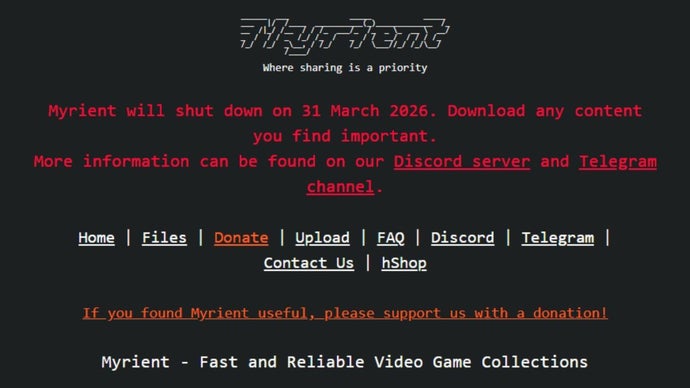 Earlier this week, the operator of ROM distribution site and self-described "video game preservation service" Myrient announced plans to shut it down as of the end of this month. They advised folks to download any files from the collection that said folks were keen to hold onto ahead of the closure. A group of volunteers have decided to take that to another level, working together to archive all of Myrient's files so they can be preserved for posterity. |
Rock Paper Shotgun Latest Articles Feed Wednesday, March 4, 2026 7:07 AM The Division 2's new Realism Mode chops back the HUD, ammo and health regen, and is free for a month  It seems like a million years have passed since the release of Tom Clancy's The Division 2, the squalid shooter-looter set in banged-up Washington D.C. In fact, it's only been seven. Which is quite a lot of years, in fairness, but that period also spans a lot of upheaval - the Covid pandemic, Trump's re-election, the exploding popularity of generative AI, the onset of chronic live service apathy, the lingering undeath of NFTs, and the literal invasion of Washington D.C. by the National Guard. Both The Division 2's original looting mechanics and its 100% apolitical regime change storyline now feel to me like the products of a different universe, though Ubisoft have been updating the game and releasing new stuff for it throughout. Their latest addition is a Realism Mode, exclusively available through the existing Warlords of New York expansion, which will itself be freely available to all players until 2nd April. |
Rock Paper Shotgun Latest Articles Feed Wednesday, March 4, 2026 6:37 AM 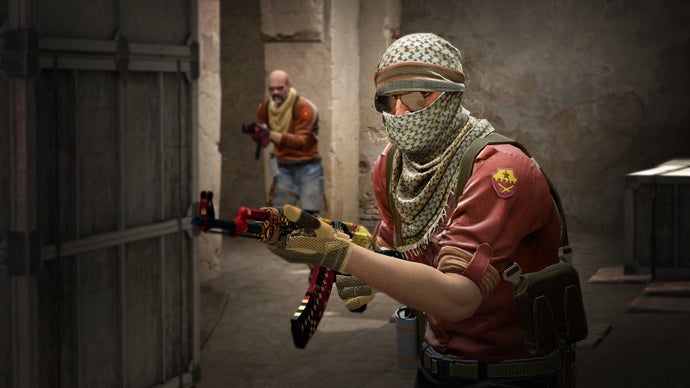 Counter-Strike: Global Offensive has its own dedicated Steam listing once more, separate from follow-up Counter-Strike 2, which was neatly slotted over the top of CS:GO on release a few years ago. |
Rock Paper Shotgun Latest Articles Feed Wednesday, March 4, 2026 6:37 AM |
Rock Paper Shotgun Latest Articles Feed Wednesday, March 4, 2026 6:22 AM  The highest legal authority in the USA has refused to take a case involving a Missouri computer scientist who wants to copyright art created by his own generative AI system. The compsci guy in question, Dr Stephen Thaler, appealed to the Supreme Court justices after lower courts upheld a US Copyright Office decision that his art doesn't make the cut for copyright protection, because it wasn't created by a human. As reported by Reuters, Thaler's generative AI tech is the winningly dorkish "Device for the Autonomous Bootstrapping of Unified Sentience", aka DABUS. He applied for a US federal copyright registration in 2018, asking for DABUS to be recognised as the author of a picture of a train tunnel surrounded by mucky green and purple vegetation, called "A Recent Entrance to Paradise". |
Rock Paper Shotgun Latest Articles Feed Wednesday, March 4, 2026 5:06 AM  Have you ever noticed your next company-wide meeting's due and thought the following: 'Oh, we should post an image prominently featuring a screen from a game rumoured to potentially be getting the remake or remaster treatment, but solely to illustrate how much we love meetings'? Well, Iron Galaxy Studios - co-developers of Skyrim's Switch port and support studio on Fallout 76 - say was what happened late last week. The studio say their social media posts featuring Fallout: New Vegas' 'Please Stand By' screen have "nothing to do with anything Fallout being worked on". |

Destructoid Wednesday, March 4, 2026 7:50 AM
Your Stand Awakening is essentially a damage boost state that allows you to perform your Stand's ultimate move. While the unlock process is simple on paper, it'll require a lot of grinding. Here's how to get Stand Awakening in Bizzare Lineage.
Table of contents
How to Get Stand Awakening in Bizzare Lineage
To unlock your Stand Awakening in Bizzare Lineage you have to do the following steps:
This will start the Stand Awakening questline. Upon completing it you will receive both the Awakening and the Ultimate move for your current stand. Activate your Awakening state with H and then while in this state you can perform the Ultimate move with H. Let me give you some tips for the questline.
Stand Awakening Quest Guide
Here are some tips for finishing the questline:
Once you unlock your Stand Awakening you can activate it using H and then press H again for your ultimate move. Note that some stands might not have a Stand Awakening yet. That's it and for more Bizzare Lineage guides check out our full list of Perks and Personalities and how to get/reroll them.
The post Bizzare Lineage Stand Awakening Guide & How to Get appeared first on Destructoid. | ||||||||||||||||||||||||||||||||||||||||||||||||||||||||||||||||||||||||||||||||||||||||||||||||||||
Destructoid Wednesday, March 4, 2026 7:47 AM
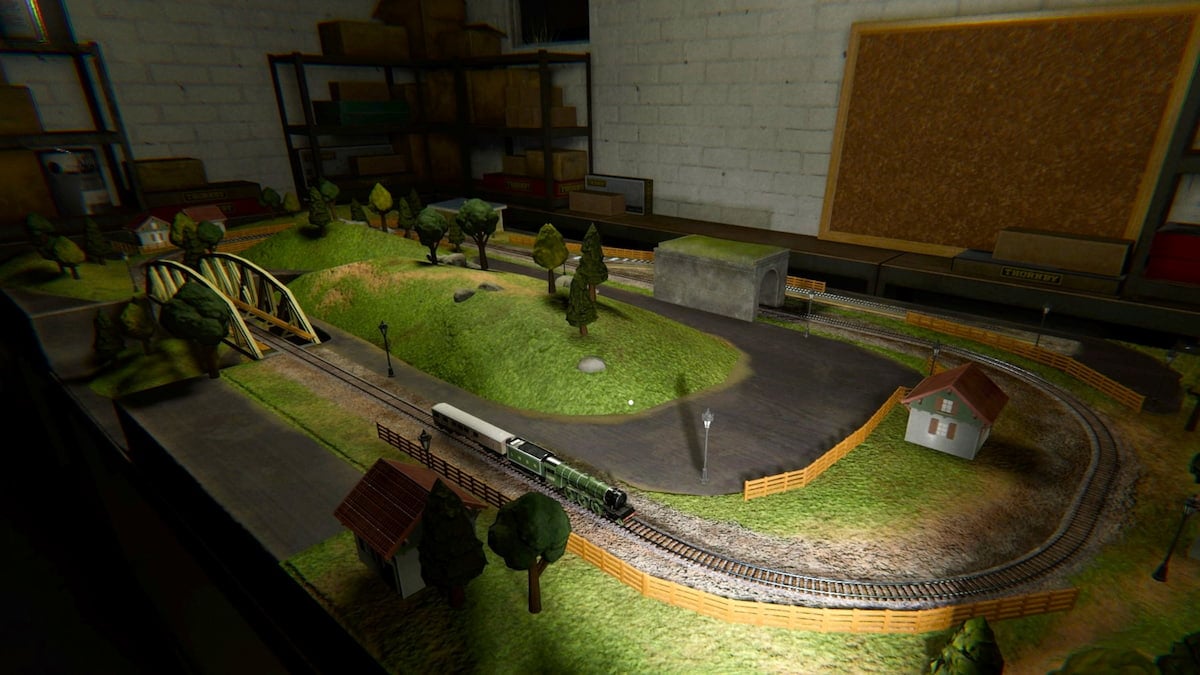
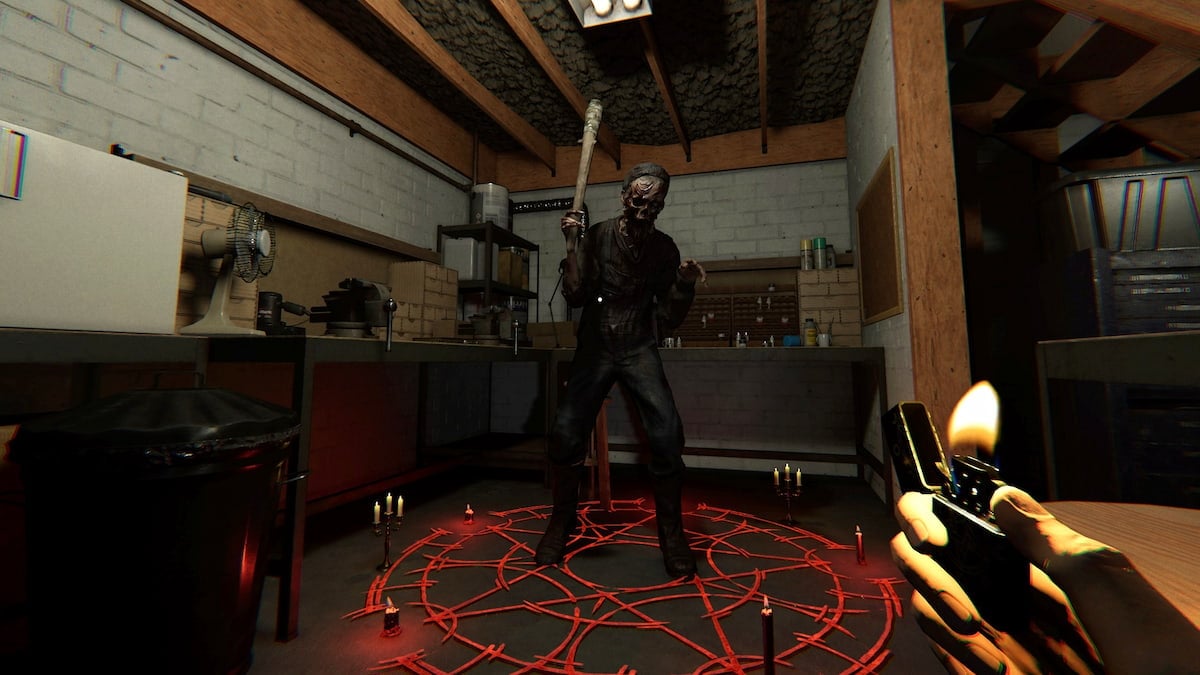
The many locations you can explore in Phasmophobia hide all kinds of secrets waiting to be uncovered. One such secret is the train set, a fun, interactive feature for both you and the ghost that can only be found on one map.
The train set is one of the coolest map features you'll encounter while investigating, but figuring out how it works can be tricky. There are a couple of unique controls you'll have to get used to if you want to make it work or shut it off after the ghost messes with it, so here's how to turn on and use the train in Phasmophobia.
Table of contents
Where to find the train set in Phasmophobia

The train set can be found in the basement at 6 Tanglewood Drive. It's fully interactive, with some fun features you can toggle on and off. The ghost that's haunting your contract can also mess with it, so if you hear any odd noises while investigating, be sure to check out this area in case it happens to be the ghost's favorite room.
To find the basement on this map, enter the front door, walk down the main hallway, and stop right before you reach the living room. Turn right and walk forward a few feet before turning left through the next door you spot. Head down the stairs to find the basement. The train set takes up most of the room, so it's easy to spot once you're in the right region.
What does the train do in Phasmophobia?
You might be curious if there's any larger Easter egg, secret, or puzzle tied to the train at 6 Tanglewood Drive, but unfortunately, it's purely a fun interactive element you or the ghost can mess with while playing on this map.
How to turn on the train in Phasmophobia
The train can be turned on by activating the second button sitting on the table at the end of it. For the train controls to work, the power must be on, so make sure you find and turn on the fuse box if it's off. There are a couple of fuse box spawn locations around 6 Tanglewood Drive, so it might take you a bit to track them down.
All train controls in Phasmophobia

There are four train controls you can find and interact with, all of which are located on a table near the back end of the train set, close to the back wall in the basement. Here's what each one does.
There's plenty more to uncover around 6 Tanglewood Drive after interacting with the train set. Next, you may want to learn all 6 Tanglewood Drive rework Cursed Possession locations and how to complete the Entangled Terror challenge.
The post How to turn on and use the train in Phasmophobia appeared first on Destructoid. | ||||||||||||||||||||||||||||||||||||||||||||||||||||||||||||||||||||||||||||||||||||||||||||||||||||
Destructoid Wednesday, March 4, 2026 7:45 AM
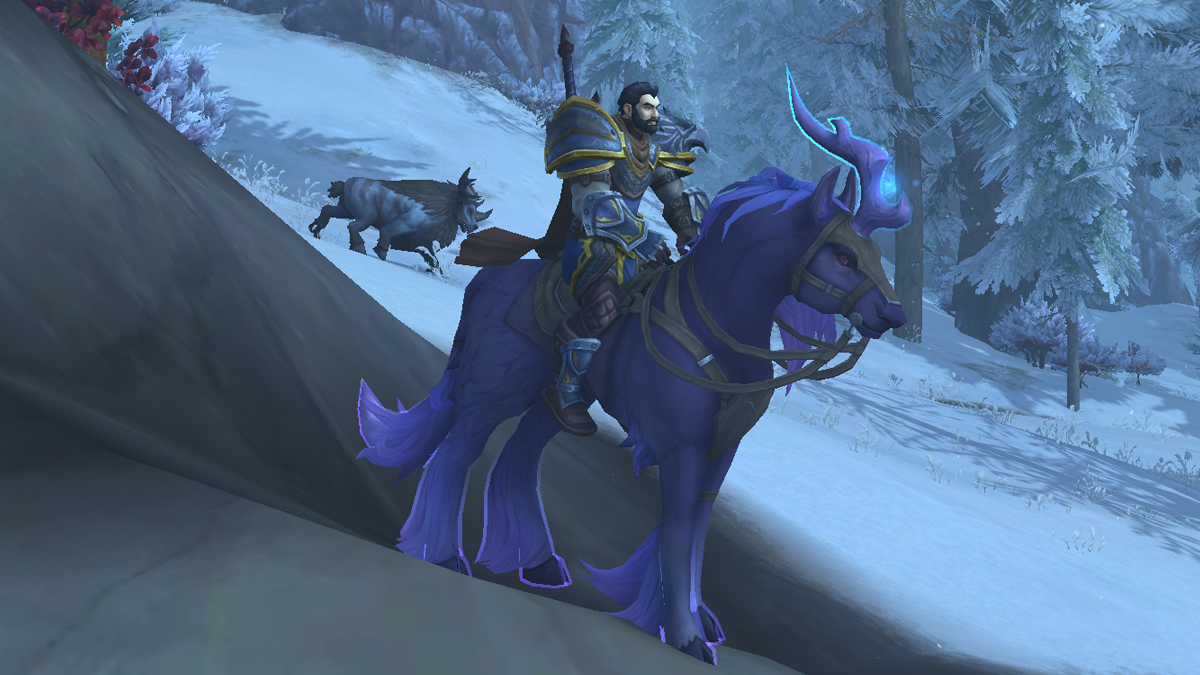
The One Adventurous quest is a fun side activity to complete in WoW Midnight, and you can get the Hawkstrider Hatchling pet after doing the task.
While the quest in itself is pretty simple, it doesn't activate on its own. Moreover, it will be helpful if you know what needs to be done to get your rewards. Let's find out how you get your own pet in WoW Midnight.
WoW Midnight One Adventurous Hatchling walkthrough
To start the quest, you'll need to head to the Eversong Woods zone. Before that, you have to complete Eversong in Reprise achievement. You finish the achievement once you complete the main scenario quests in the Eversong Woods zone. Getting the achievement isn't that hard; it's more a matter of how long it will take.
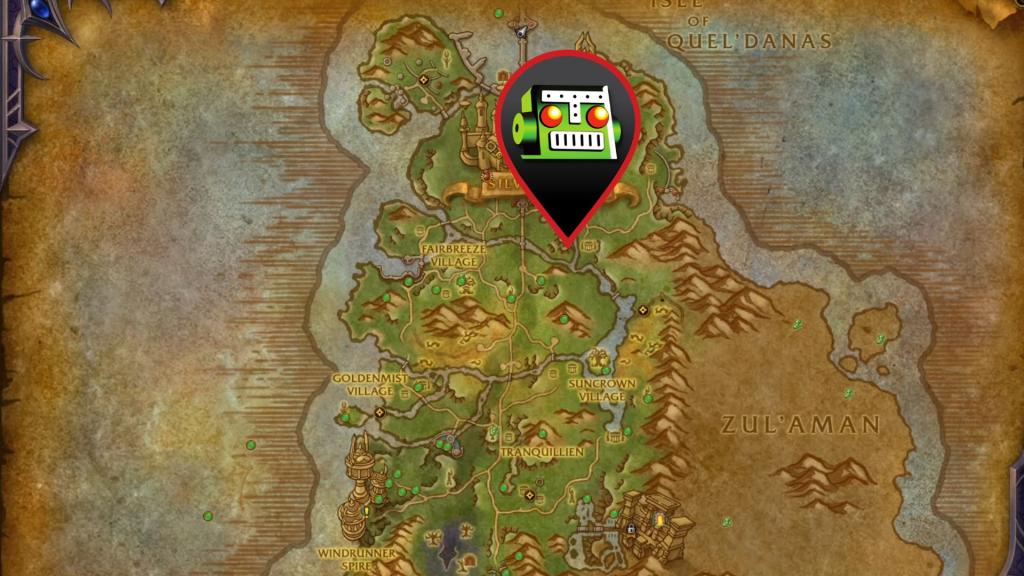
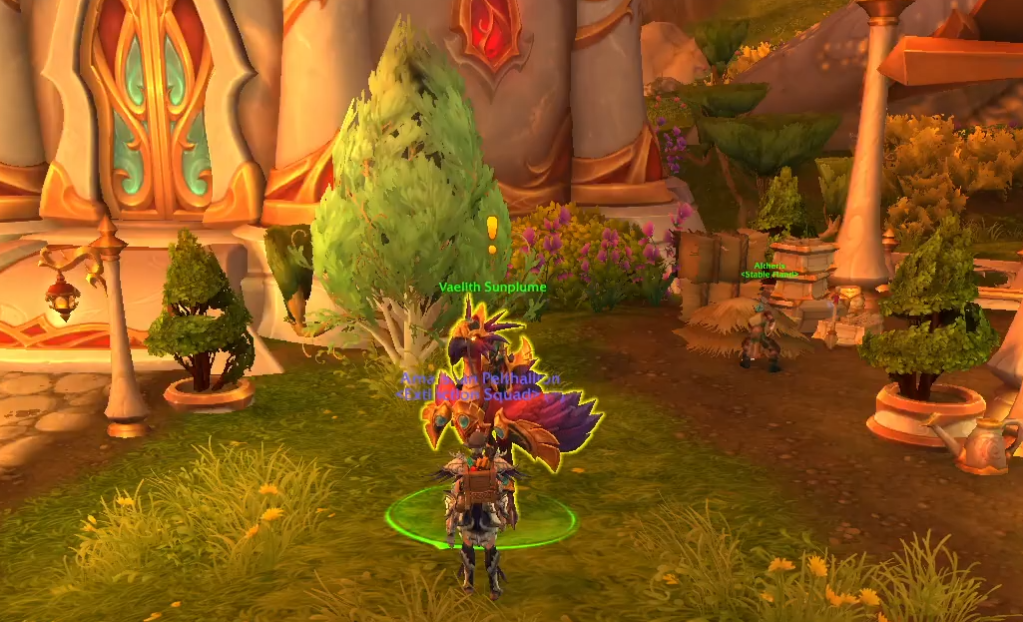
You'll also need to be at level 80 or higher and then complete the required quests. Head to the following coordinates (56.8, 35.6) and speak with Vaelith Sunplume.
Then, pick up and complete the following quests:
All the quests are easy to complete. To complete A Hungry Flock, farm the nearby lake and kill Gloombelly Toads to get six Frog Legs. Then, follow the quest marker for the One Adventurous Hatchling, and you'll find the Hatchling on a table. Interact with it to send it to your home.
Finally, A Roost-ed Development requires you to farm Golden Sunleaf in the lake (same area where you slay the toads). You'll find highlighted plants in the location, so you'll know what to pluck.
Once the three quests are done, return to Vaelith Sunplume to get the First Step into Parenthood, which rewards you with 250 Silvermoon Court rep, a Hawkstrider Egg, and progress around the One Adventurous Hatchling quest.
Getting the Hawkstrider Egg is key; once done, you have to wait for 24 hours. Interact with the egg after 24 hours have passed, and you'll get your Hawkstrider Hatchling pet.
The post How to get Hawkstriker Hatchling in WoW Midnight – One Adventurous Hatchling guide appeared first on Destructoid. | ||||||||||||||||||||||||||||||||||||||||||||||||||||||||||||||||||||||||||||||||||||||||||||||||||||
Destructoid Wednesday, March 4, 2026 7:10 AM
Following the remodel of 6 Tanglewood Drive in Phasmophobia, a new trial focused on exploring this location was added to the event board. The Entangled Terror challenge asks you to spend many investigations at this one location.
This special trial is designed to be a tough one with a lofty goal that will likely take you a long time to work through. It does come with an exclusive reward, though, so it's certainly worth tackling. Here's how to complete the Entangled Horror challenge in Phasmophobia.
Table of contents
How to get the Entangled Terror ID Card and Badge in Phasmophobia

To finish the Entangled Horror challenge, you need to have 50 successful investigations while exploring the 6 Tanglewood Drive map. There are a few specific goals that must be met to officially earn the prizes that come with completing it.
This challenge was added in the March 3, 2026, update, so any investigations you had prior to this date around 6 Tanglewood Drive won't count. Instead, you must embark on fresh investigations to make progress.
Phasmophobia Entangled Terror challenge tips
The Entangled Terror challenge is tough by design, so working through it can be a tricky endeavor. If you're struggling to make progress, here are the best tips you can use to make this process easier to navigate.
Spend time learning the map
Ghost hunting is so much easier when you're familiar with the location you're exploring, so start by spending some time learning the map layout for 6 Tanglewood Drive. I recommend creating a custom match with the friendly ghost option turned on to freely explore this location without the ghost trying to hunt you down.
Play with friends
Every ghost hunt is much easier with allies at your side, so try tackling this challenge with friends. Working with other ghost hunters helps you cover more ground quickly, test out more equipment early on, and ensures you have multiple investigators watching and listening for clues.
Rely on hard evidence
When possible, you should always rely on hard evidence rather than unofficial behaviors or signs. This is the only way to guarantee with certainty that you guess the ghost right. If you check off a ghost without all three pieces of evidence gathered, you may be wrong, which will result in the round not counting at all for the Entangled Terror trial. For the purposes of this challenge, you should always try to play it safe and get all three official pieces of evidence before leaving.
Try out some Cursed Possessions
Although they're quite dangerous, Cursed Items are also extremely powerful, so if you're ever struggling to get the evidence you need, consider using one of the Cursed Objects around 6 Tanglewood Drive. Exercise caution when doing so, and generally try to stick to the somewhat safer ones that are guaranteed to give you useful information, like the Ouija Board and Haunted Mirror.
Take your time
The Entangled Terror challenge is permanent, so take your time with it and don't worry about getting it done quickly. It's meant to be more of a long-term goal you slowly chip away at rather than one you work through in a few days.
Entangled Terror challenge reward in Phasmophobia
Successfully finishing the Entangled Terror challenge unlocks the Suburbanite ID Card and Badge as a reward. This is a set of excsuive cosmetic items you can apply to your namecard. They can only be unlocked through this trial, so you must fully complete it to get them.
Entangled Terror ID Card and Badge appearance in Phasmophobia
The Suburbanite ID Card and Badge feature the exterior of the 6 Tanglewood Drive map for the overall ID Card background and a small gnome for the Badge slot. It also has the Suburbanite title at the top.
If you're up for more trials, there are plenty of other ones you can check off next. Some good ones to focus on are Farmhouse Fieldwork, the weekly challenge mode, and facing Blood Moon weather.
The post How to complete Entangled Terror in Phasmophobia appeared first on Destructoid. | ||||||||||||||||||||||||||||||||||||||||||||||||||||||||||||||||||||||||||||||||||||||||||||||||||||
Destructoid Wednesday, March 4, 2026 5:54 AM
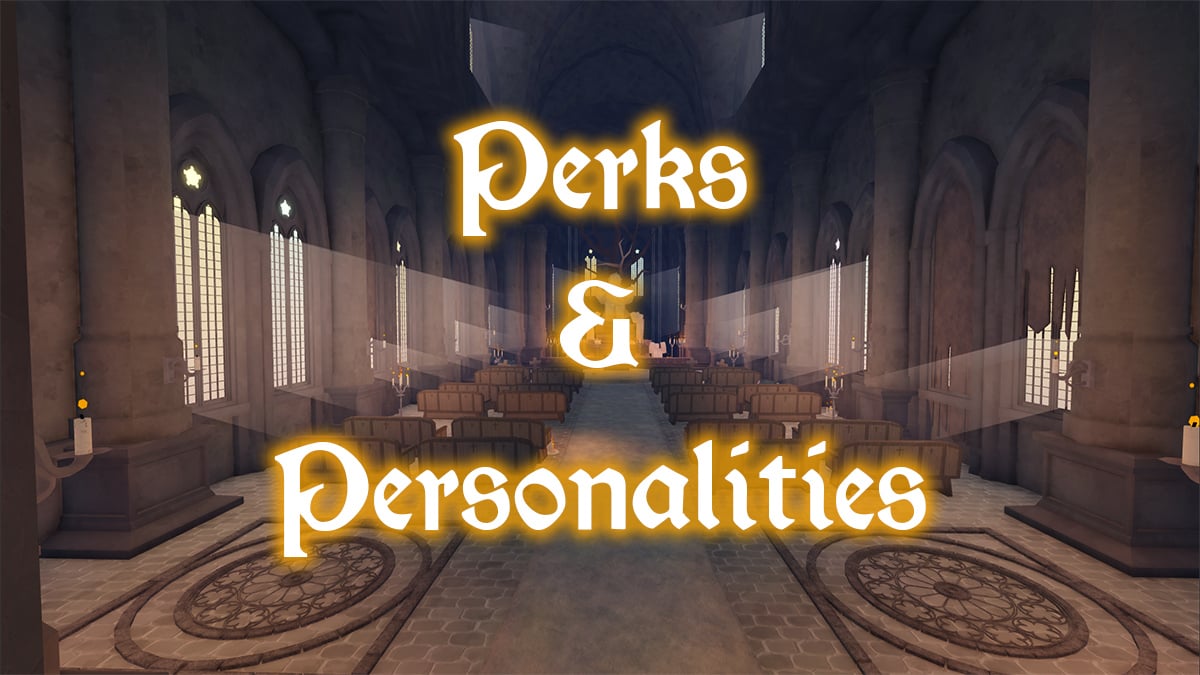
Bizzare Lineage Perks and Personalities are just another way to further customize your builds. Both give you minor but noteworthy benefits that you can mix and match to optimize for PVE or PVP. Here are all Bizzare Lineage Perks and Personalities and how to get them.
Table of contents
All Perks in Bizzare Lineage
There are two types of perks in Bizzare Lineage which are the location/quest-based ones (Like from Rose at BS1) and the ones you get from stands. I'll include a guide on how to get the location-based perks. As for the Stand perks you simply get all of them by obtaining their respective stands via regular and lucky Arrows or Evolutions. You keep all perks from each stand you get so you can use perks from other stands even if you don't have that stand anymore.
Location-based Perks
Stand Perks
All Personalities in Bizzare Lineage
Personalities are minor bonuses that are locked to your stand once you roll a stand and unlike perks you can only have one. That said, you can reroll Personalities with regular and lucky Personality Essence. You get these either for Robux in the Shop or via the Prestige Shop F2P once you Prestige. I'll list all of them below sorted by rarity with the high rarities having lower chances to be rolled.
Bizzare Lineage Perk and Personality FAQ
Can you use perks from other stands in Bizzare Lineage? Yes, you can use stands from other perks. For example, if you have Anubis, and then spin to Star Platinum and then to The World, you will have perks from all three stands that you can mix and match. How to reroll personalities in Bizzare Lineage? You reroll personalities using Personality Essence which you can either buy for Robux in the Shop or farm for them F2P in the Prestige Shop once you Prestige. How to find Night Vampires for The High Priestess perk quest from Rose at Bus Stop 1? You can find them at Bus Station 1 by heading toward the cafe left of the Kira raid until you see the sunflower then head left of the sunflower toward some trees past Thug enemies. Also check in front of the Jotaro Raid NPC at left side of the Gym at Bus Station 2 and at Bus Station 11 near the George NPC. Plus, PVE Board Quests can spawn Night Vampires as well.
That's it for my full list of all Bizzare Lineage Perks and Personalities. Check out our Fighting Style and Sub Ability tier list for more Bizzare Lineage guides.
The post All Bizzare Lineage Perks & Personalities Guide appeared first on Destructoid. | ||||||||||||||||||||||||||||||||||||||||||||||||||||||||||||||||||||||||||||||||||||||||||||||||||||
Destructoid Wednesday, March 4, 2026 5:33 AM
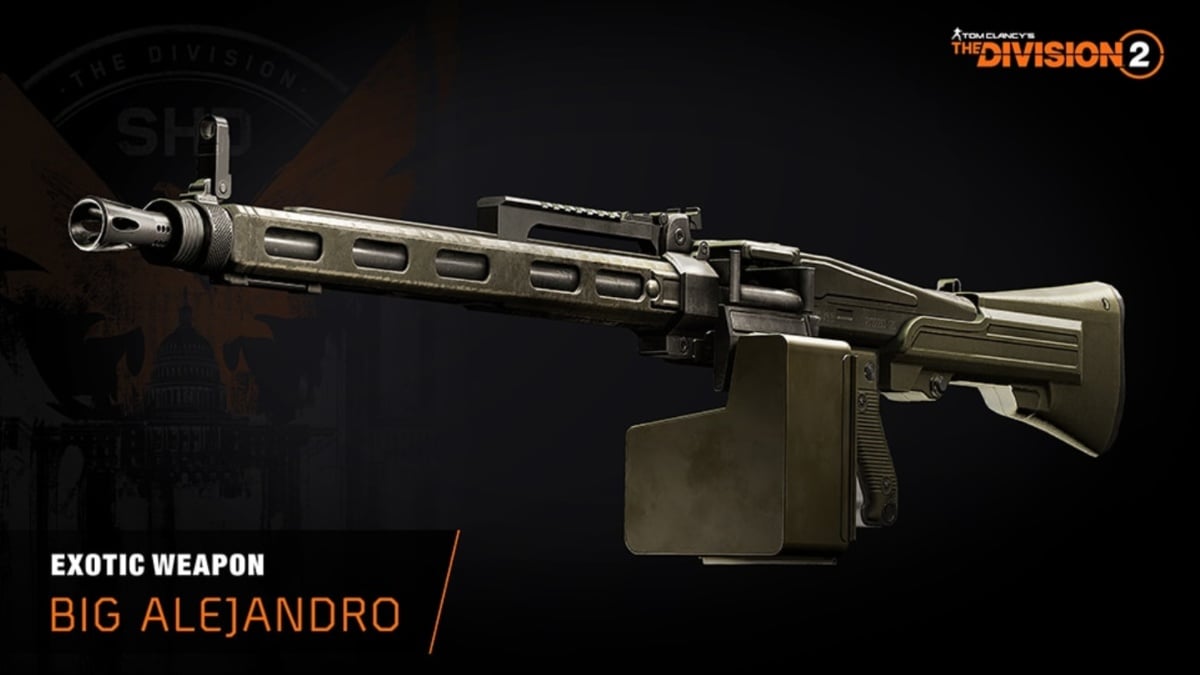
The Anniversary season in The Division 2 has introduced new weapons and gear, including two exotics, which will help you immensely in your hunts.
All gadgets and weapons can be obtained for free, and they have their own unique abilities. Let's find out how these new toys work in The Division 2.
The Division 2 Anniversary season gear and weapon overview
There's a new Exotic in the form of Big Alejandro. This LMB has been a staple of the first Division title, and it's now available in The Division 2.
Here's a quick overview of how its Talent: Cover Shooter works.
You can obtain the Big Alejandro from the Anniversary pass (available from the free track).
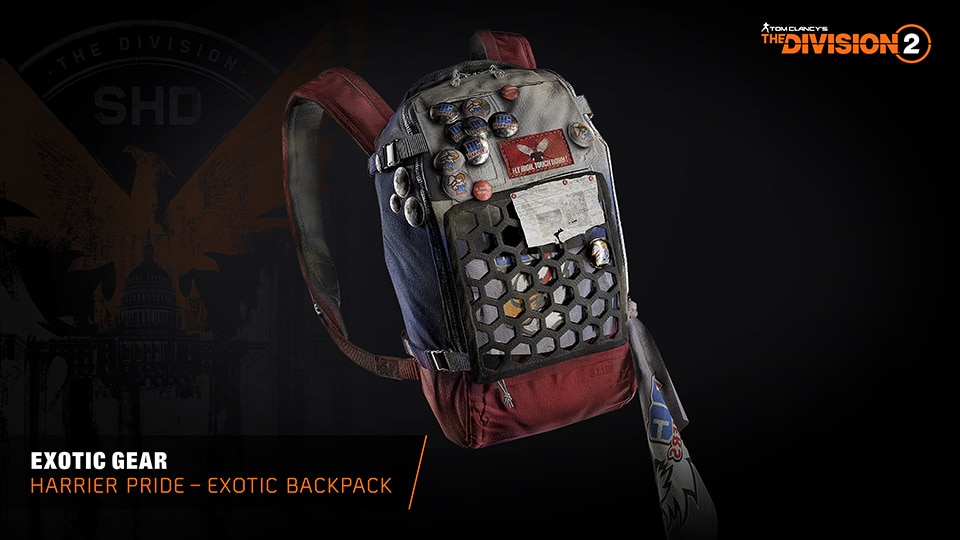
You can also get the Harrier Pride, which is a new Exotic backpack. This backpack, like Big Alejandro, is also obtainable from the pass. Here's how Talent: Rebalance works.
There are two new non-exotics as well that will be part of the Anniversary season.
That's not all, as you can get 10 Year Anniversary caches throughout the course of the season. You can open them to get seasonal exotics if you're lucky.
The post All new The Division 2 Anniversary season weapons and gears: Stats, Perks, and more appeared first on Destructoid. | ||||||||||||||||||||||||||||||||||||||||||||||||||||||||||||||||||||||||||||||||||||||||||||||||||||
Destructoid Wednesday, March 4, 2026 3:28 AM
The Anniversary Journey is now available in The Division 2, and you can earn Stars to exchange them for some amazing rewards as part of the new season.
The new event is part of the Anniversary Season that will be live until the end of March. This guide will provide you with all the information you need to complete every task.
Table of contents
All The Division 2 Anniversary Journey tasks and rewards
The tables below have a list of all the tasks in the Anniversary Journey. Spread across four parts, finishing the tasks will get you Stars. You can then exchange the Stars at the Seasons vendor to get different rewards.
Anniversary Journey Mission 1 tasks (complete any six)
Anniversary Journey Mission 2 tasks
Anniversary Journey Mission 3 tasks
Anniversary Journey Mission 4 tasks
Completing every step will also reward you with more rewards and unlock the next one.
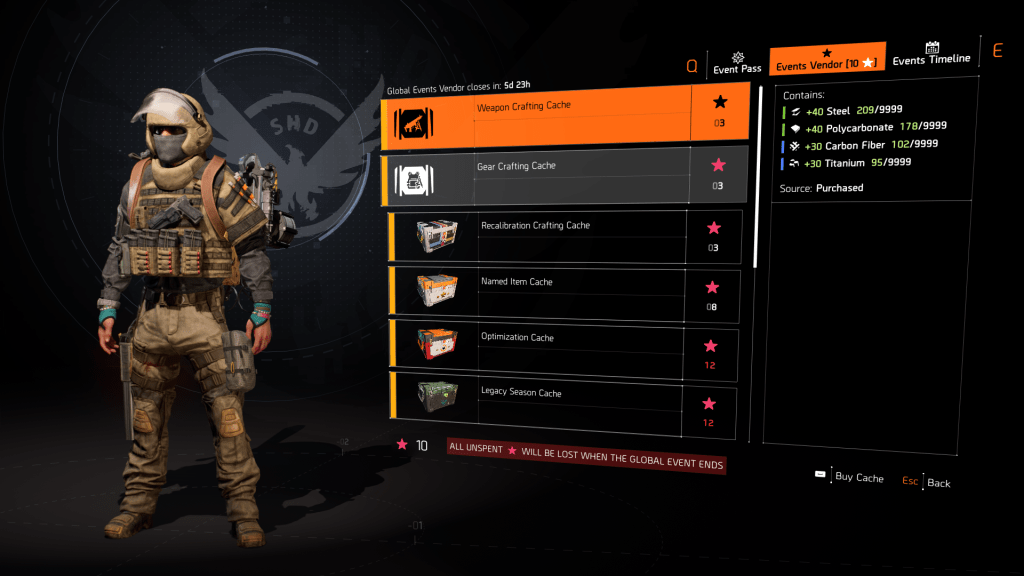
To use the Stars, head to the White House, and then go to the Seasons shop. You can then pick what you want by using your Stars. There's a fair amount of options available to choose from, with the Exotic Cache being the most expensive of all at 20 Stars.
The post All The Division 2 Anniversary Journey missions and how to complete them appeared first on Destructoid. |


MonsterVine Wednesday, March 4, 2026 1:48 AM Swedish developer Something We Made and co-publisher popagenda have announced that TOEM 2 will launch this summer on Nintendo Switch, PlayStation 5, and PC. The reveal came during Nintendo's latest Indie World presentation, confirming that players won't have long to wait to return to the series' cozy, photography-driven world. The sequel follows the success of […] |
MonsterVine Wednesday, March 4, 2026 1:28 AM Toronto-based Drinkbox Studios, known for the Guacamelee! series, Severed, and Nobody Saves the World, has announced that its new Search Action-RPG Blighted is coming to Nintendo Switch 2 later this fall. The game will launch simultaneously on PC. Revealed during the latest Nintendo Indie World presentation, Blighted blends intense combat with a psychedelic western aesthetic, placing […] |
MonsterVine Wednesday, March 4, 2026 1:14 AM Indie developer Studio BBB has revealed that its heartfelt puzzle-adventure platformer Monowave will launch in 2026 on PC via Steam, Nintendo Switch, and additional consoles. The announcement came alongside a new full-length trailer and the release of a playable Chapter 1 demo. A Journey Through Emotion Monowave follows Mono, a newborn Guardian spirit tasked with […] |