GamersHeroes Tuesday, January 20, 2026 2:59 PM A full-length adventure, the iconic Max Caulfield and Chloe Price will reunite once more when Deck Nine Games and Square Enix's Life is Strange: Reunion launches for PC and consoles March 26. The post Life is Strange: Reunion Launching March 26 appeared first on GamersHeroes. |
GamersHeroes Tuesday, January 20, 2026 11:24 AM The roguelite turn-based strategy world of Unfinished Pixel and Kepler Ghost's Blightstone is now available in Steam Early Access. The post Blightstone Now Available in Steam Early Access appeared first on GamersHeroes. |
GamersHeroes Tuesday, January 20, 2026 10:55 AM Players will be able to lead troops through the fires of the Napoleonic Wars when Tactical Boar's real-time battler Veterans: Napoleonic Wars releases this year for Steam. The post Fast-Paced Tactical Battler Veterans: Napoleonic Wars Revealed appeared first on GamersHeroes. |
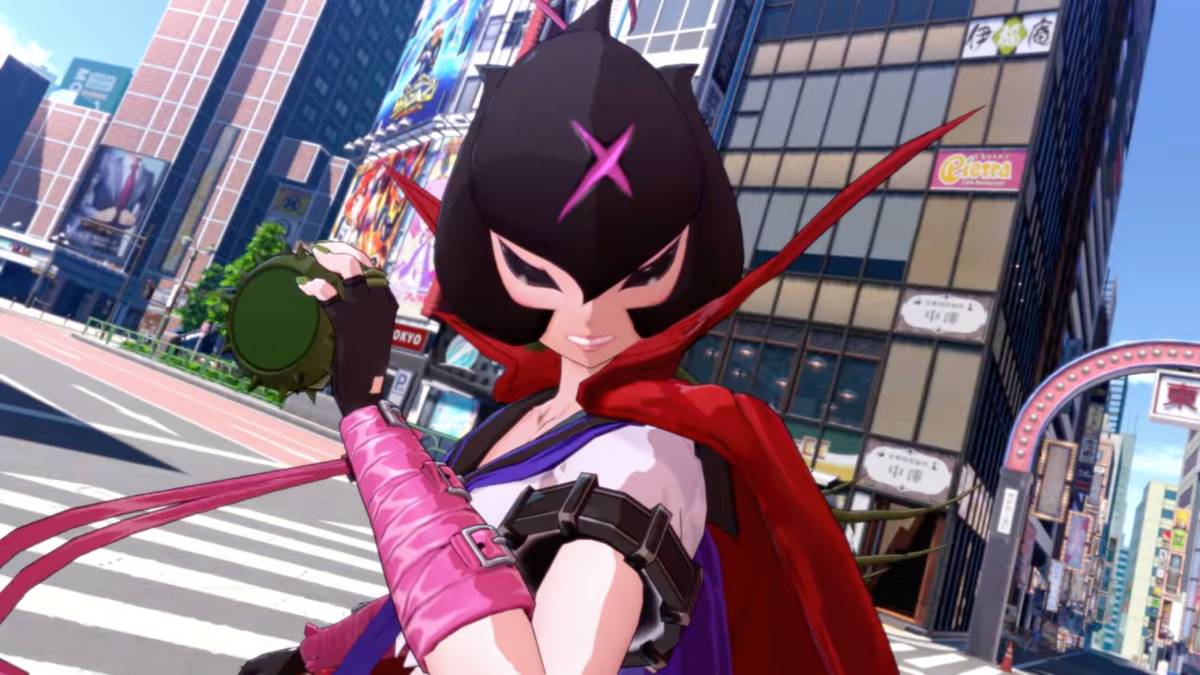
GamersHeroes Tuesday, January 20, 2026 10:53 AM With Season Pass 2 of Fatal Fury: Mark of the Wolves starting January 22, we recently experienced Kim Jae Hoon's potential firsthand - learn more with our preview. The post Fatal Fury: City of the Wolves Kim Jae Hoon Preview – Kickstart My Heart appeared first on GamersHeroes. |
Kotaku Tuesday, January 20, 2026 3:40 PM
For years the game didn't call to me, but now I really value the escape it provides The post It Took Five Years For <i>Forza Horizon 5</i> To Become My Antidote To Doomscrolling appeared first on Kotaku. |
Kotaku Tuesday, January 20, 2026 2:55 PM
BioWare's loot shooter was shut down earlier this month The post Someone Already Brought <em>Anthem</em> Back To Life And Has It Running On A Private Server appeared first on Kotaku. |
Kotaku Tuesday, January 20, 2026 2:00 PM
You and a few friends can slay monsters together or just chill in a tavern for a few hours The post New <i>Witcher 3</i> Online Mod Lets You Hang Together With Friends appeared first on Kotaku. |
Kotaku Tuesday, January 20, 2026 1:50 PM
Is there a game you've been trying to play or finish for years, but for whatever reason haven't? Tell us about it! The post What Games Are Forever Stuck In Your Backlog? appeared first on Kotaku. |
Kotaku Tuesday, January 20, 2026 1:00 PM
Mark Darrah says the ill-fated looter shooter wasn't all EA's fault The post Ex-BioWare Dev Disputes The Idea That It Shouldn't Have Made <em>Anthem</em> appeared first on Kotaku. |
Kotaku Tuesday, January 20, 2026 12:29 PM
Chloe is returning as a playable character alongside Max in the 'definitive close' to their story The post <em>Life Is Strange: Reunion</em> Leaks Early, Coming Sooner Than We Thought [Update] appeared first on Kotaku. |
Kotaku Tuesday, January 20, 2026 12:13 PM
Also: Divinity: Original Sin 2 is selling better than it has at any time since its original 2017 launch The post The <i>Borderlands 4</i> Switch 2 Port Might Not Be Missing For Much Longer appeared first on Kotaku. |
Kotaku Tuesday, January 20, 2026 11:35 AM
Work, play, and keep yourself entertained on the go. The post Samsung Drops Galaxy Tab A9+ to a Record Low to Clear Out Older Tablets, No Need to Look for Budget Brands appeared first on Kotaku. |
Kotaku Tuesday, January 20, 2026 11:35 AM
Ubisoft's ongoing efforts to update games from the past and make them run better is awesome and helpful The post Every Old Game Deserves A 60FPS Update appeared first on Kotaku. |
Kotaku Tuesday, January 20, 2026 11:16 AM
Host Finn Wolfhard appeared in a skit that referenced the ongoing conspiracy theory proposing the existence of a 'better' ending to the Netflix series The post <em>SNL's Stranger Things</em> Skit Stokes The Flames Of A Dying Fan Fire appeared first on Kotaku. |
Kotaku Tuesday, January 20, 2026 11:05 AM
The Home & Business version is going at a 60% discount, but not for long. The post Microsoft Office 2024 Lifetime License Hits Its Lowest Price of the Year With 60% Off, No Subscription Required for Mac or PC appeared first on Kotaku. |
Kotaku Tuesday, January 20, 2026 10:54 AM
Space Marine II and Death Stranding Director's Cut make the month even better The post Game Pass Continues A Killer New Year With Two More Epic Games appeared first on Kotaku. |
Kotaku Tuesday, January 20, 2026 10:35 AM
You'll want to make sure you grab this gadget while it's still in stock at Amazon. The post DJI's New Released Osmo Mobile 8 Gimbal Stabilizer Crashes to All-Time Low After Two Surprise Price Drops, Built-in Extension Rod and Tripod appeared first on Kotaku. |
Kotaku Tuesday, January 20, 2026 10:30 AM
Tale of Two Wastelands will stay locked in the past The post One Of <i>Fallout 3</i> And <i>New Vegas'</i> Most Ambitious Mods Won't Get Ported To The Rumored Remasters appeared first on Kotaku. |
Kotaku Tuesday, January 20, 2026 10:10 AM
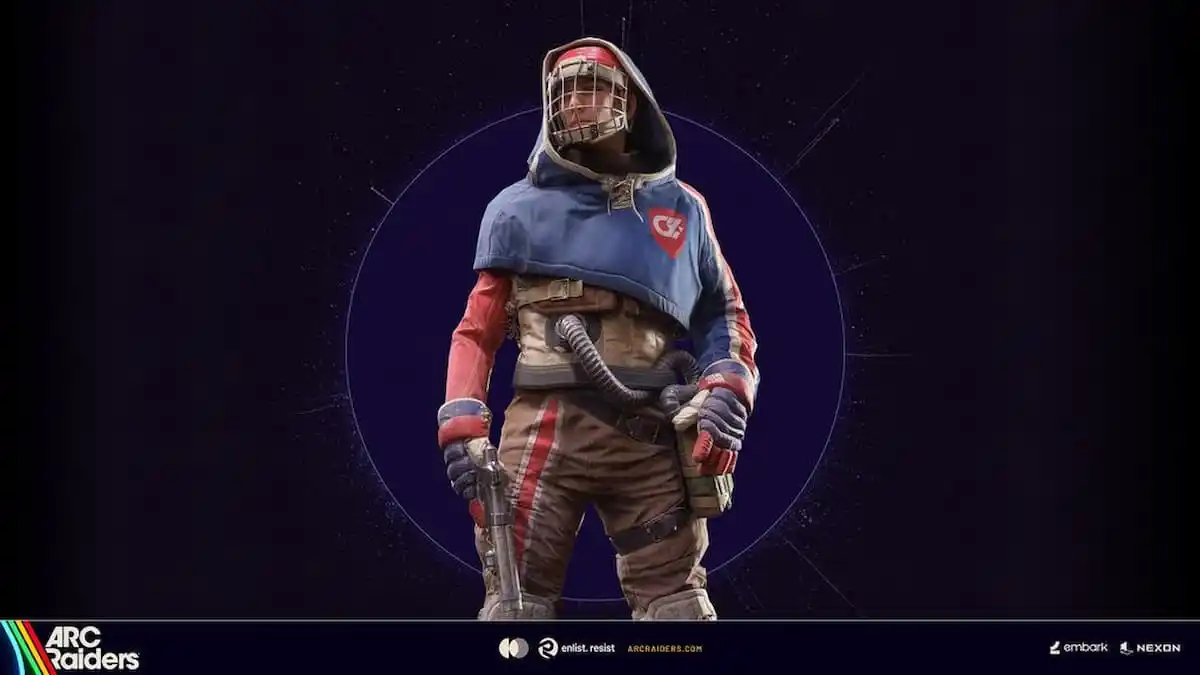
Patch 1.12.0 takes care of two of the most irritating PvP exploits that have riled players The post <i>Arc Raiders'</i> Latest Patch Is A Major Blow To Cheating Scum appeared first on Kotaku. |
Kotaku Tuesday, January 20, 2026 10:05 AM
Enjoy all your favorite content on this TV without having to add an extra streaming stick. The post Roku's 2025 55″ Smart TV (2025) Is Now Cheaper Than the 50″ Model After Four Price Drops Ahead of the Super Bowl appeared first on Kotaku. |
Kotaku Tuesday, January 20, 2026 9:51 AM
The Grok-powered Ava waifu AI is about the most sensible part of the conversation The post Razer CEO Can't Get Out Of His Own Way In Car Crash Interview On AI appeared first on Kotaku. |
Kotaku Tuesday, January 20, 2026 9:35 AM
Amazon has cut the price of the Anker laptop charger (140W) to just $65 for a limited time. The post Anker 140W Charger Crashes to Its Lowest Price of the Year as Amazon Clears Out Best-Selling Power Adapter appeared first on Kotaku. |
Kotaku Tuesday, January 20, 2026 9:18 AM
The extraction shooter was put through the pre-release wringer last year The post Ex-Bungie Dev On <i>Marathon</i>'s Summer Of Hate: 'You Can't Take The Thing I Care About The Most Away' appeared first on Kotaku. |
Kotaku Tuesday, January 20, 2026 9:05 AM
Save space, plus your hard-earned money. The post Forget Mac Mini, Amazon Clears Out Ryzen 7 Mini Gaming PC at Record Low (Windows 11 Pro, 32GB RAM, 1TB SSD) appeared first on Kotaku. |


PCGamesN Tuesday, January 20, 2026 12:44 PM It's a Metroidvania, so of course there are plenty of tough MIO bosses to take down, some even hiding important items and abilities. |
PCGamesN Tuesday, January 20, 2026 12:34 PM Redeem the Arknights Endfield codes as soon as they drop with this handy guide for free Oroberyl and more rewards in Hypergryph's new gacha. |
PCGamesN Tuesday, January 20, 2026 12:22 PM As if one Geralt wasn't enough, this Witcher 3 mod allows you and your friends to play as monster hunters together. |
PCGamesN Tuesday, January 20, 2026 12:20 PM Fortnite now has five Dungeons and Dragons islands, and if you're anything like me, you're redownloading the game and trying out the codes. |
PCGamesN Tuesday, January 20, 2026 12:18 PM Prepare for launch with the Arknights Endfield pre-download, so you can jump right into the gacha game at the release time for your region. |
PCGamesN Tuesday, January 20, 2026 12:05 PM Find out what's coming to Hytale as the developers continue to add missing features over the course of the early access period. |
PCGamesN Tuesday, January 20, 2026 11:17 AM Find out if an Arknights Endfield reroll is worth it for the characters you pull, and if so, how to reroll in Hypergryph's gacha game. |
PCGamesN Tuesday, January 20, 2026 11:00 AM With dozens of players per run and plenty of reasons to get down to the grind, 33 Immortals could be set to pop off on Steam this summer. |
PCGamesN Tuesday, January 20, 2026 10:44 AM Find out if your PC is able to run Marathon and hit either the recommended specs or minimum requirements of Bungie's new hero shooter. |
PCGamesN Tuesday, January 20, 2026 10:21 AM Part Balatro, part pinball, Ball x Pit's first major update promises to make the numbies bigger than ever, and I for one can't wait. |
PCGamesN Tuesday, January 20, 2026 10:16 AM Complete Your Collection bundles have been integrated into Steam's gifting system, but there is one thing you need to watch out for. |
PCGamesN Tuesday, January 20, 2026 10:03 AM Our comprehensive guide to Laevatain is all you need to master this six-star operator's AoE burst damage and Melting Flame stacks. |
PCGamesN Tuesday, January 20, 2026 9:19 AM Find out whether your gaming PC is able to run Arknights: Endfield and if it hits the recommended specs for Hypergryph's new gacha RPG. |
Rock Paper Shotgun Latest Articles Feed Tuesday, January 20, 2026 1:01 PM 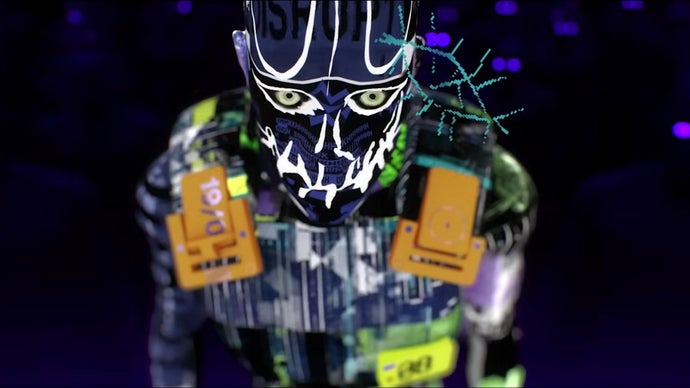 Marathon's franchise art director Joseph Cross left Bungie in December, shortly after the Destiny developers announced a March 2026 release window for the sci-fi shooter reboot. Now, he's talking about what it was like to work on the game, which has a fair bit of lingering negative press to contend with – extended delays, mass studio layoffs and restructuring, repeated accusations of plagiarism, money troubles owing to Bungie's ailing shooter Destiny 2, and apathy about blockbuster live service games at large, epitomised by the cancelling of Sony's once-touted Concord. |
Rock Paper Shotgun Latest Articles Feed Tuesday, January 20, 2026 12:05 PM  Following such recent news highlights as "It's out on March 5th" and "It's got that Ben Starr guy in it," Marathon's announce-o-blaster continues firing with a newly unveiled set of PC system requirements. As seen on the Bungie FPS's Steam page, they're nicely accommodating to cheapo rigs and older tech, though are missing any storage requirements. |
Rock Paper Shotgun Latest Articles Feed Tuesday, January 20, 2026 11:48 AM  Rubato is "an experimental, 2D physics-based take on the collect-a-thon genre", according to developer dconn, which doesn't really do justice to the below trailer full of screaming skulls and Mode 7 first-person driving bits and fleeting Minecraft references and PS1-era dancefloors. I guess I'm too used to the watering down of "experimental" as a descriptor. The blurb doesn't even communicate that you play as a frog. Seemingly. Fortunately, there is a demo. Please watch the trailer while I go play it. |
Rock Paper Shotgun Latest Articles Feed Tuesday, January 20, 2026 11:21 AM  As we sink ever deeper into a squelching mire of memory shortages, price gouging, and abandonment in favour of AI fantasy farms, there is one word above all that game-playing PC owners should keep front and centre in our doomscroll-addled brains: "relatively." |
Rock Paper Shotgun Latest Articles Feed Tuesday, January 20, 2026 10:42 AM Steam's 'complete the set' bundles can now be gifted, with bits your mates already own accounted for 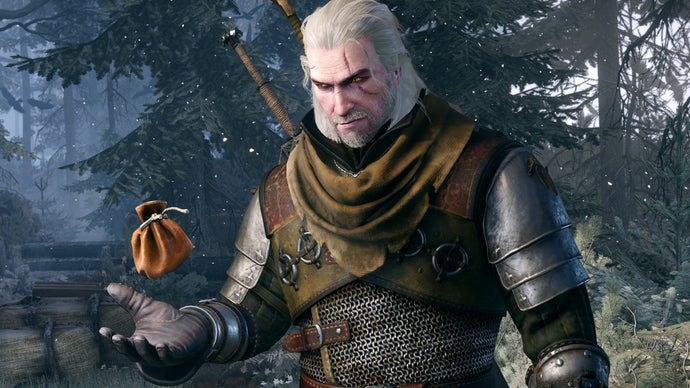 If you've been waiting to bless one of your friends with an entire dump truck worth of games in a series they've enjoyed one entry of, then good news. Valve have made Steam's 'complete the set' bundles giftable, with prices adjusting to match whichever bits the recipient might already own - so you're not in danger of hurling someone their second copy of Fallout 4 on one storefront. |
Rock Paper Shotgun Latest Articles Feed Tuesday, January 20, 2026 10:38 AM |
Rock Paper Shotgun Latest Articles Feed Tuesday, January 20, 2026 9:42 AM  Integrity. Inteh-gritty. In-teh-grih-teh. That's the word of the day when it comes to 2026 RuneScape, or at least it will be if the plans Jagex have just laid out work as intended. To be fair, pushing the big button that finally gets rid of those Treasure Hunter microtransactions folks vocally disliked is a good start. |

Siliconera Tuesday, January 20, 2026 3:00 PM
Bandai Namco announced a release date for the Digimon Story: Time Stranger Additional Digimon & Episode Pack 2: Gaku-Ran DLC, and it brings the Bancho characters to the game on January 22, 2026. It also seems to feature Inori Misono's friend Hiroko Sagisaka, who appeared in the main game.
The video begins with one of these new Bancho Digimon, presumably BanchoLeomon, mentioning how Parallelmon is the cause of them coming to "this world." We then see flashes of that character and our avatar encountering BanchoGolemon, BanchoStingmon, BanchoLillymon, and BanchoMamemon. They all unite and decide to work together, and we see them teaming up and fighting together against Parallelmon.
Here's the full trailer showing the five Bancho characters in Digimon Story: Time Stranger.
Each of these Digimon Story: Time Stranger add-ons so far tended to focus on a supporting character from the series while also adding additional characters. The first was Alternate Dimension and appeared in December 2025. That featured Kyoko Kuremi, who also showed up in Digimon Story: Cyber Sleuth. It also provided an opportunity to face Parallelmon in battle. Getting it also provided us access to the Mega Digimon BlitzGreymon, CresGarurumon, Omnimon Alter-B, Omnimon Alter-B, and Omnimon Zwart.
There is still one final piece pack in the Digimon Story: Time Stranger season pass. That has an April 2026 to June 2026 launch window.
Digimon Story: Time Stranger is available on the PS5, Xbox Series X, and PC, and its Additional Digimon & Episode Pack 2: Gaku-Ran DLC debuts on January 22, 2026.
The post Digimon Story: Time Stranger Gaku-Ran DLC Debuts This Week appeared first on Siliconera. |
Siliconera Tuesday, January 20, 2026 2:00 PM
The manager of Akai Haato has posted some shorts on the YouTube channel for the Hololive Vtuber YouTube for her fans while she's still on break. There is still no information on when she'll come back, following the performer going on a hiatus starting in October 2025.
Akai Haato's manager posted the first short on January 19, 2026. It was a video of her doing the "Fujiyama Charisma" dance. The second one, posted on January 20, 2026, shows her doing "Oshare Banchou." In both shorts, you can hear her mic recordings, such as when she murmurs to herself, "Oh, this way," in the "Fujiyama Charisma" video. Some of the top comments on the shorts have picked up on this and enjoyed this aspect of the dances, saying that they add a lot of character, are cute, and are very on-brand for her.
The manager stated on January 19, 2026 that they hope the fans will enjoy these shorts, even if only a little, as Akai Haato continues to recover. At the end of the first tweet, they hoped that people would continue to watch over her. Akai Haato has been on hiatus officially since October 2025. She stated that, after discussing things with her family, she needed to take a break to recover "due to her current mental state."
Here's the "Fujiyama Charisma" dance short.
And here's "Oshare Banchou."
Akai Haato currently has over 1.58 million subscribers on her YouTube channel. There is no information on when she will return from her break.
The post Hololive Vtuber Akai Haato Update Involves New Video appeared first on Siliconera. |
Siliconera Tuesday, January 20, 2026 1:31 PM
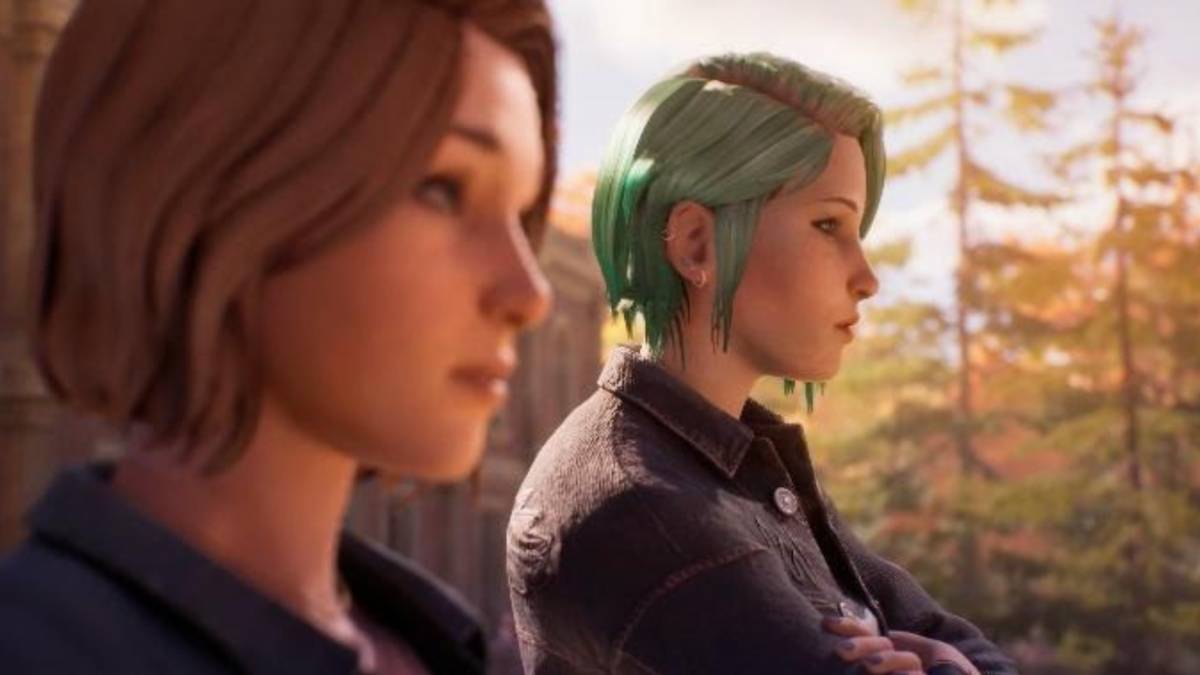
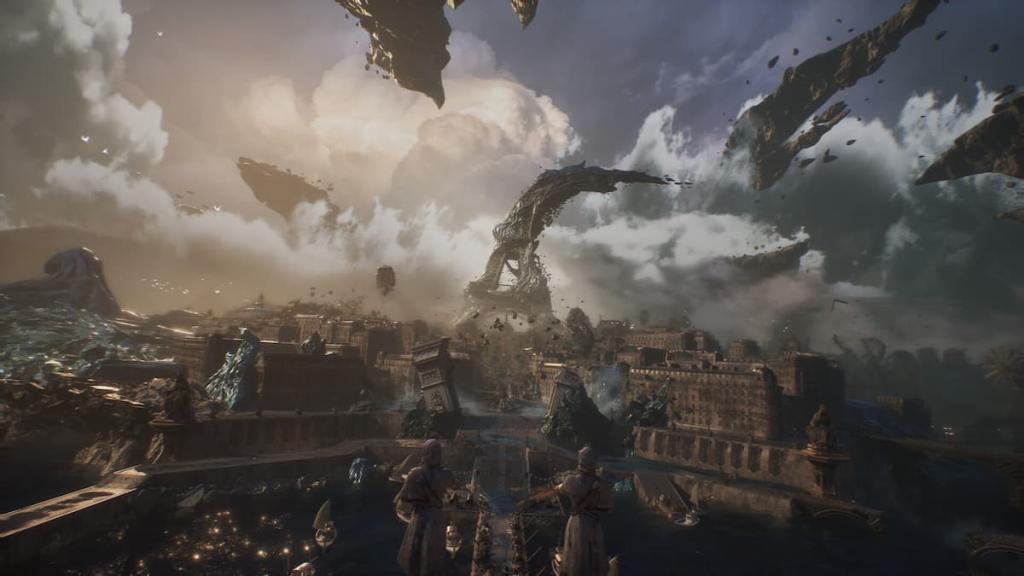
Square Enix and Deck Nine confirmed there will be a new Life is Strange game set after Double Exposure. Life is Strange: Reunion will come to the PS5, Xbox Series X, and PC on March 26, 2026. A $39.99 standard, $49.99 deluxe, and $99.99 collector's edition will be available, and it will also be possible to get a twin pack that includes the second and third games in the Max Caulfield storyline. Deck Nine also confirmed that both Max and Chloe Price will be playable characters in this entry.
Editor's Note: There will be some spoilers for Life is Strange: Double Exposure in the Reunion announcement below.
Life is Strange: Reunion will take place after the events of Double Exposure and take into account both the events of the merged timeline there and the original game. The latest mystery involves an adult Max working as a photography professor at Caledon University as she deals with a fire burning the school to the ground and killing many innocent people. She uses her Rewind ability to undo things and have a chance to solve the mystery so that future never takes place. However, she won't just be trying to figure out what happened with the three days of borrowed time. Chloe shows up after the rewind and reveals she now is remembering things she shouldn't and is aware of other timeline events because of the sequel's events. The two of them together will need to figure out what is going on.
Here's the full Life is Strange: Reunion livestream and reveal.
The most basic versions of the games are both found in the standard and double pack. That gives you either this newest installment alone or it with Double Exposure. If someone gets the Deluxe Edition, it comes with a documentary that features the voice actresses behind Max and Chloe, Hannah Telle and Rhianna DeVries. It also includes a digital art book, comic, and soundtrack. The collector's edition at the Square Enix Store comes with three art cards of Max and Chloe designed to look like Polaroids, three guitar plectrums, a rewind slipmat for a record player, a Drugstore Makeup poster, and a vinyl soundtrack with 12 songs from the game.
Life is Strange: Reunion will appear on the PS5, Xbox Series X, and PC on March 26, 2026
The post Life is Strange: Reunion Follows Life is Strange: Double Exposure in March appeared first on Siliconera. |
Siliconera Tuesday, January 20, 2026 12:00 PM
Arc System Works and Cygames announced that it will start to sunset the original Granblue Fantasy Versus fighting game by ending elements like Ranked Matches and Online Lobby. There will still be time to take part in those sorts of online matches, as the official Server Downscaling won't happen until 6pm PT/9pm ET on April 20, 2026. However, the warning is out now to alert us features and trophies that will be inaccessible for folks who own that title after that time. The sequel Granblue Fantasy Versus: Rising will still be supported and updated.
Basically, some of the online elements are being pulled as a result of the server downscaling. This means that Casual Match will be available and replace Ranked Match, and the online lobby and rankings tied to the Ranked Matches feature will be gone in Granblue Fantasy Versus. Likewise, the player profile tied to that won't be able to be edited, you won't be able to upload or download fight replays in the journal, there will be no announcements shown, and serial codes stop working. As a result, the two trophies "Now the Real Fight Begins" and "Hot Enough for You" won't be able to be earned and the Platinum will be inaccessible.
Arc System Works and Cygames did note that all the following modes will still be accessible in the game:
The original Granblue Fantasy Versus is available for the PS4 and PC, and the sequel Granblue Fantasy Versus: Rising is on the PS4, PS5, and PC.
The post Original Granblue Fantasy Versus Features Sunsetting appeared first on Siliconera. |
Siliconera Tuesday, January 20, 2026 11:00 AM
Back when Bandai Namco opened the official Code Vein II site, it confirmed one of the locations we will be able to visit a hot spring location with characters, and a new Revenant Springs trailer further highlights that gameplay element. It mixes live-action elements behaving as though it is a real location someone can visit with in-game footage showing different allies visiting the spot. However, this is more about showing off visuals rather than explaining benefits or explaining when we can use this spot after the game launches.
The video begins with actual in-game footage. It shows the hot springs location in Code Vein II, with one character looking out the windows next to it and another showing a player avatar walking toward it. We also see Iris Magmell and Jadwiga relaxing in it, showing that both allies and the Revenant merchant could appear there.
Here's the full "Revenant Springs" trailer:
Bandai Namco did already explain how the hot springs will work in Code Vein II. The changing room there will act as a place where we can redesign our avatars and change their appearances. If we do visit with characters we met and fight alongside, then we can get item synthesis recipes from heading there.
This is one of a few features confirmed ahead of the Code Vein II launch. In a PlayStation Blog official interview, it was confirmed that there are multiple endings in the game. After you beat it, you'll also be able to take advantage of the new game+ feature to get a head start on a second run.
Code Vein II will come to the PS5, Xbox Series X, and PC on January 30, 2026, and the Character Creator Demo will debut on January 23, 2026.
The post Code Vein II Revenant Springs Trailer Shows Hot Spring Element appeared first on Siliconera. |
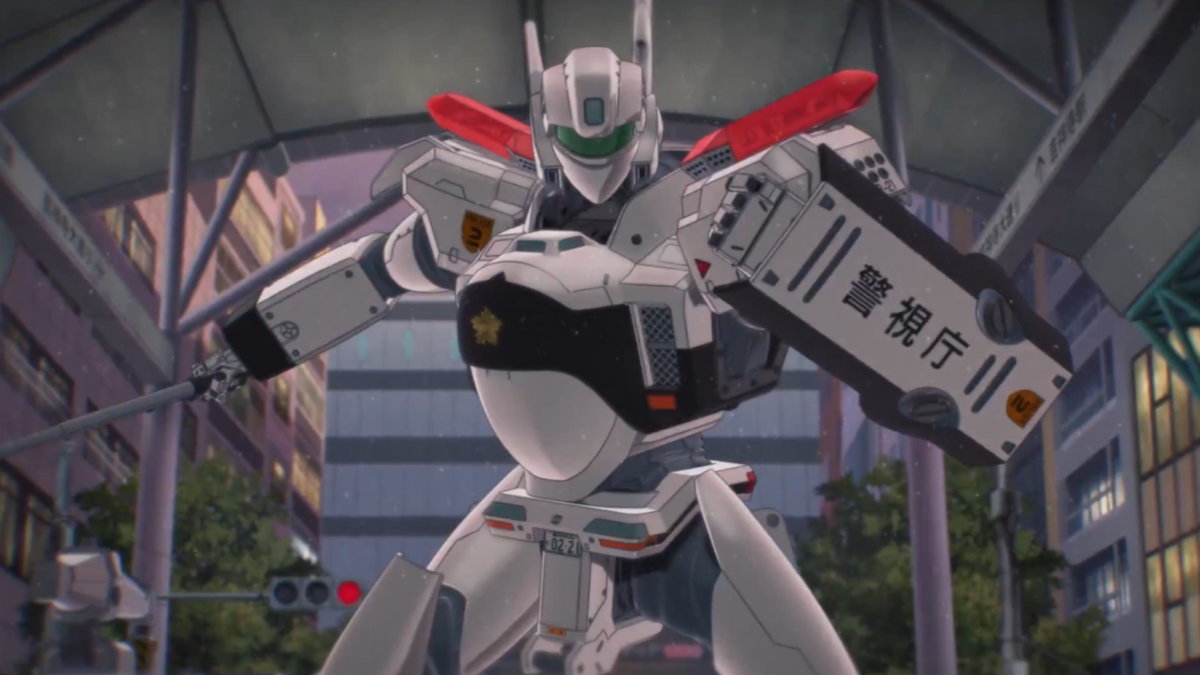
Siliconera Tuesday, January 20, 2026 10:00 AM
Headgear and Bandai Namco have revealed that they will launch Mobile Police Patlabor EZY in theaters across Japan. The new anime project will appear as a series of theatrical films that will be shown throughout 2026 and 2027.
The companies have also published a new trailer that showcases the upcoming movies. While it started with a throwback to the original Patlabor show from the late 1980s, the trailer eventually showed the brand-new movie footage. It also revealed that Sumire Uesaka and Kikunosuke Toya will voice the main characters, Towa and Kippei, respectively.
The new trailer is also available to watch via the Japanese official Patlabor social media account:
The Patlabor EZY project was unveiled as early as 2017. In September 2024, the official Patlabor social media account teased that the new anime would launch in 2026. It has kept that promise with this new reveal.
The Bandai Namco group will not only work on the new movies. Bandai Spirits has also published a teaser for a new Real Grade model kit featuring a unit from the new title, with the Japanese #PatlaborEZY hashtag included in the tweet.
File 1 of Mobile Police Patlabor EZY will appear in Japanese theaters on May 15, 2026. The second chapter will follow on August 14, 2026, with the third and last entry slated for March 2027.
The post Patlabor EZY Will Appear in Japanese Theaters appeared first on Siliconera. |


Destructoid Tuesday, January 20, 2026 2:10 PM
Destiny 2 players may or may not be excited about Marathon, but either way, you can get a few cosmetics for free—including an Exotic ornament for a weapon straight from the world of Tau Ceti.
Bungie promised some free Destiny 2 cosmetics for all players after announcing Marathon's release date (which is unsettlingly close to the next major update). The studio also unveiled some items available as bonuses, and we're bound to see more offerings for Silver.
The pre-order rewards were meant to appear starting on Jan. 19, while some of these items were to become available in the Eververse Store the following day. Here's how you can grab all known Marathon items in Destiny 2—if you can find them.
Table of contents
All free Marathon items in Destiny 2 and how to get them

So far, the only free obtainable Marathon items are available in the Eververse Store, though we'll update this list if and when Bungie releases more of them. We also included special bonuses and one lapsed emblem.
MIDA Multi-Tool ornament, Shader, and Emote (Runner Kit)


The Runner Kit contains the Modern MIDA Multitool ornament for the eponymous Exotic, the Silkworm Weave Legendary shader with a familiar shade of lime green, and the Waiting for Exfil Exotic multiplayer emote.
Though we believed the items in the promo art could be future cosmetics, it's clear they depict the bundle's emote, though there's always room for collab items down the road.
Where are the Marathon items in Destiny 2?

The Runner Kit, containing the three listed items, is available for free in the Eververse Store (now that it's fixed). It's highlighted in the Weekly Offerings tab, at least for the time being.
Other Marathon items
Some of the Marathon items in Destiny 2 aren't available for free, and others aren't even available at all. Here's a look at the rest of the cosmetics that aren't up for grabs in the Tower.
Marathon Pre-Order rewards

If you grab Marathon before March 17, you're eligible for the Destiny 2: Marathon Pack, which contains three cosmetics for the looter shooter. Yes, the game releases on March 5, but you have some wiggle room if you're captivated by Tau Ceti shortly after it releases.
The rewards are the UESC Rover ship, the UESC Sprinter sparrow, and the UESC Echo-type Ghost Shell, drenched in Marathon's signature blocky aesthetic. It's technically free as part of the pre-order, but it still has a price tag.
Destination: Tau Ceti emblem (unobtainable)

If you watched the Marathon gameplay reveal stream last year with a linked Twitch account, you snagged the Destination: Tau Ceti emblem as a freebie. As of now, there's no way to grab this cosmetic, but there's always the slight chance Bungie might bring it back for another occasion or cook up something else in a similar vein.
The post How to get all free Marathon cosmetics in Destiny 2 appeared first on Destructoid. | ||||||||||||||||||||||||||||||||||||||||||||||||||||||||||||||||||||||||
Destructoid Tuesday, January 20, 2026 2:00 PM
Last year was a wild one for video games. We saw tremendous titles left and right, especially coming from smaller or independent studios that proved AAA gaming wasn't king anymore. One stood out among them: Clair Obscur: Expedition 33, which won just about everything it was nominated for.
And it seems the streak won't be stopping in 2026, either.
As first spotted by Game Developer, Expedition 33 has won yet another Game of the Year award at the 15th New York Game Awards. It wasn't its only win, however, as Jennifer English secured an award for Best Acting in a Video Game, replicating her success from The Game Awards. She has thus far played in three GOTY TGA winners, including Elden Ring, Baldur's Gate 3, and, finally, Expedition 33.
This year is yet to see more award ceremonies take place. Though they'll be considering 2025 titles, many of these events do usually take place after the calendar year has closed off, allowing them to avoid situations like the one Dispatch had at TGA, where it'll be considered for the 2026 event despite releasing in October 2025.
Some of the most prominent events we're excited for are the DICE Awards on Feb. 12 and the British Academy Game Awards on April 17. However, I think we can all guess at what the GOTY winner will be. Not that it hadn't won every single time it was nominated for the category.
But some of the others might prove more surprising yet. Or I should hope so, at least.
The post 2025 might be over, but Clair Obscur: Expedition 33's GOTY run certainly isn't appeared first on Destructoid. | ||||||||||||||||||||||||||||||||||||||||||||||||||||||||||||||||||||||||
Destructoid Tuesday, January 20, 2026 1:34 PM
The Ultimate Fullback Evolution is now live in FC 26, and you can use it to improve a couple of fullbacks from your Ultimate Team squad.
There are two versions available, and you can fit an LB in one and an RB in another. Let's look at the best candidates to use in the evolutions, based on the offered requirements and upgrades.
Table of contents
FC 26 Ultimate Fullback Evolution requirements
Here are the requirements for Ultimate Fullback Evolution in FC 26.
FC 26 Ultimate Fullback Evolution upgrades
The Ultimate Fullback has only two levels of upgrades. To obtain the boosts, you'll need to complete specific tasks.
Level 1 upgrades
Level 2 upgrades
Level 1 upgrade requirements
Level 2 upgrade requirements
Best players for Ultimate Fullback Evolution in FC 26
You can include a wide variety of items in this evolution. This is strictly a chain evolution, so that has been kept in mind for the following considerations.
These are arguably some of the best options you can include in this evolution. With no stat boost on offer, you can immediately use the upgraded card in another evolution to continue their improvements. While the Ultimate Fullback evolution is nice, it should have had better requirements and offered upgrades.
The post Best players for FC 26 Ultimate Fullback Evolution appeared first on Destructoid. | ||||||||||||||||||||||||||||||||||||||||||||||||||||||||||||||||||||||||
Destructoid Tuesday, January 20, 2026 1:01 PM
While topside loot can be and oftentimes is quite great, a lot of the best loot is kept in strange, off-the-grid, hidden rooms that few players ever get to access.
Whether it's too many people flocking to the same spot or ARCs standing in the way, many never get their hands on the loot of these rooms, thus missing out on potential goldmines of items and weapons.
One such location is the so-called Power Rod Room, opened exclusively by using Power Rods, items found all around and often sold by those who never realized they have any proper use (myself included).
So, here's where you can find it.
Where to find the Power Rod Room in ARC Raiders

The Power Rod Room is located on the Dam Battlegrounds map, specifically its Power Generation Complex loot zone.
The best way to reach it would be to go around the Dam and find the zipline leading into the Complex. Climb up to the platform, then head left through the sliding door. As soon as you pass through it, the Power Rod Room will be on your right.
ARCs tend to spawn a lot here, but shouldn't be too hard to deal with. It's usually ticks and other room-patrolling ARCs like fireballs, so you'll be able to take them out with a well-placed shot or two.
What you should be mindful of is when you go to this room. Many players report that it is particularly rich in loot during Night Raids. This does come with extra danger and difficulty, so it's either worse loot but during usual conditions, or better stuff but with a lot of risk attached.
Who dares wins, or so the saying goes.
The post How to find the Power Rod Room in ARC Raiders appeared first on Destructoid. | ||||||||||||||||||||||||||||||||||||||||||||||||||||||||||||||||||||||||
Destructoid Tuesday, January 20, 2026 12:33 PM
Destiny 2's Shadow & Order major update seems set to launch on March 3, but some fans are convinced it will be delayed—and they're not exactly happy with the reason. Marathon, the game's shiny new sibling, debuts on March 5, which is too close for comfort between the two releases.
The evident conflict is enough to get the community up in arms about a possible postponement. The major update's release schedule hasn't been officially announced, so there's enough time for Bungie to change its date without it technically being late. That said, here's what we know about the purported Shadow & Order delay.
Shadow & Order delay, explained

Forbes' Paul Tassi reported Bungie would delay D2's next major update because of the proximity to Marathon's release date. The studio already has an audience for its looter shooter, waning as it may be, and the expectation is to get some of those players into Tau Ceti, the setting for its new creation.
Shadow & Order's launch date is based on the in-game countdown for the next major update, which concludes on March 3. Its relative, on the other hand, is steadfastly set for March 5, and D2 players can't dive into Marathon if they're too busy playing Destiny 2.
Changing the date of any content might be wildly controversial, regardless of what happens next. Veterans have been leaving Bungie's looter shooter in droves since The Final Shape, with the maligned The Edge of Fate expansion causing a particularly severe hemorrhage.
Delaying the update means players will have to wait even longer for content, and retaining users is hard enough for Destiny 2 as it is. Pushing it live early, however, can mean some of it is left unfinished or underpolished—and Bungie can't afford that right now either.
Has Destiny 2's Shadow & Order been delayed?
As of Jan. 20, there's no official release date for the game's next major update, so it's impossible to fully confirm or deny if we'll have to wait a bit longer.
Bungie usually publishes news every Thursday on its This Week in Destiny (TWID) blog series. The last few TWIDs have been rather anemic due to the slowdown in content post-Dawning and the end-of-year break, but an announcement this big would be right at home there.
On special occasions, the studio also concocts dedicated blog posts, such as Dev Insights or announcements. It's difficult to argue that delaying Destiny 2's next update is not a special occasion, though a well-packed TWID might be the most likely avenue for sharing that news.
Delays aren't always well-received, and changing the schedule because of Marathon may be particularly bitter to some fans. A narrative in the community is that the new kid on the block has been siphoning resources from D2 since its conception, pulling manpower from the game to invest into the nascent extraction shooter. True or not, it does line up with the decline of Bungie's golden goose.
The post Will Destiny 2's Shadow & Order be delayed? appeared first on Destructoid. | ||||||||||||||||||||||||||||||||||||||||||||||||||||||||||||||||||||||||
Destructoid Tuesday, January 20, 2026 12:14 PM
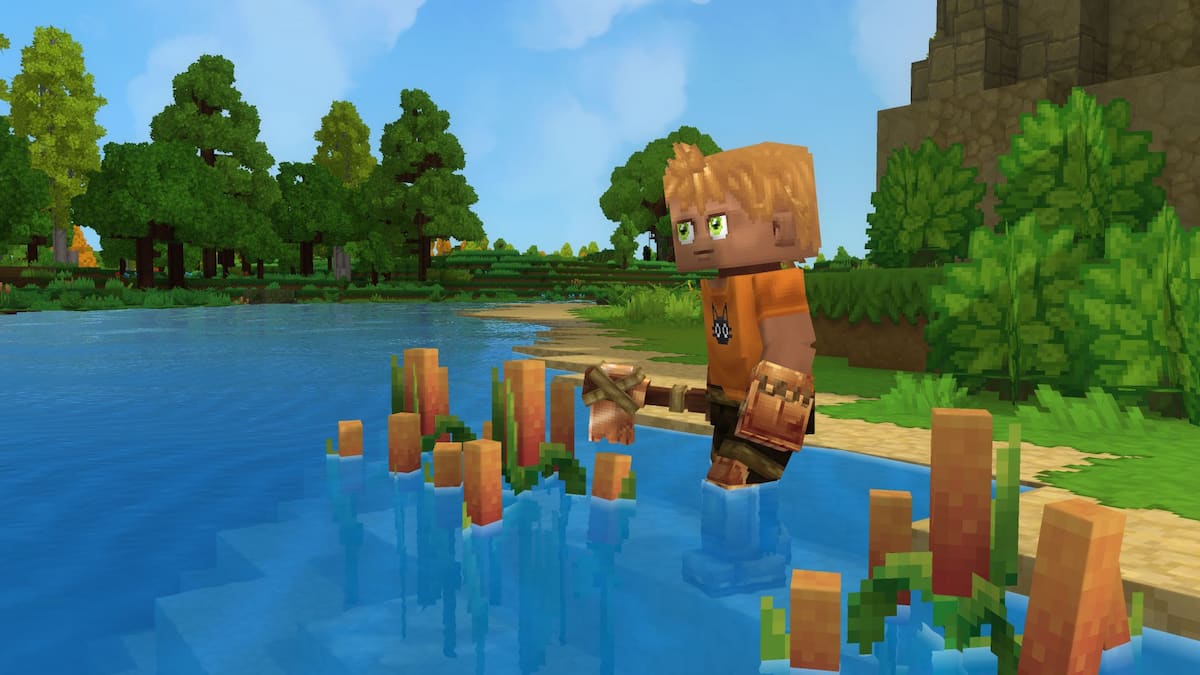
Hytale is an exciting new game that's been long in development, having been suspended in a sort of stasis at Riot Games before being rescued by its original creators.
Very much like Minecraft in both looks and gameplay, Hytale, too, is built with mods in mind, as players are invited to tailor their experience to their liking. With that in mind, thousands of mods have already been released for this early-access title, with many more to come as the game continues toward full release.
Installing these mods is rather straightforward, so here's everything you need to know.
How to download and install Hytale mods
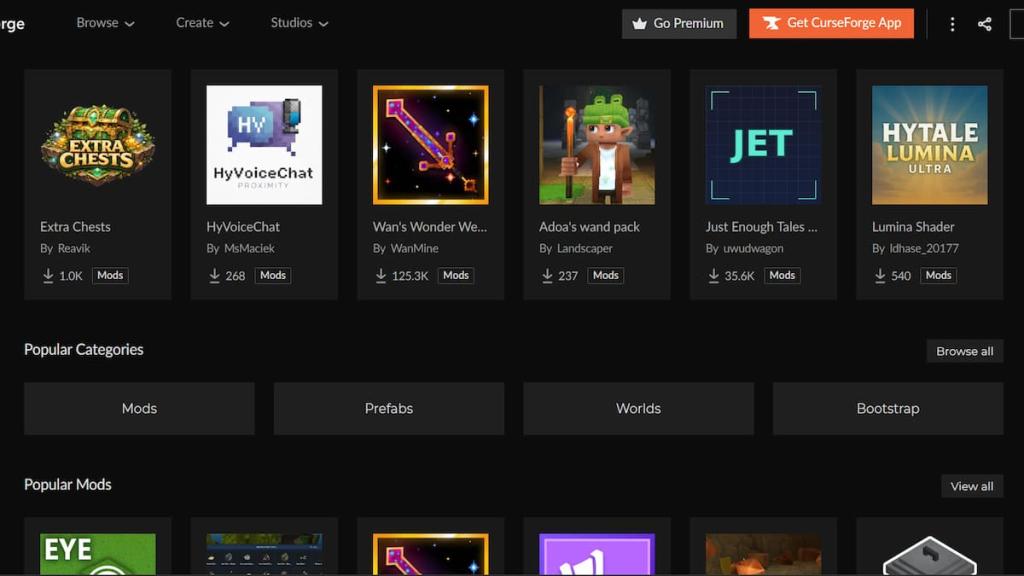
Mods for Hytale are most readily available on CurseForge, where over two thousand mods have been posted since early access started. With over four million downloads thus far, it's the primary platform for hosting Hytale mods, overshadowing the likes of Nexus Mods.
Like many other platforms, CurseForge offers its own mod manager, which you can download and use to install mods. Simply go to the CurseForge website and press "Get CurseForge app," download it, and install it. Then, whenever you want to install a mod, open it up and click "Install via App."
If asked to navigate to the game's directory, you can find it by going into the Hytale launcher, pressing the gear icon, and clicking on "Open Directory."
Mods can also be installed manually. To do so, open up the CurseForge website, navigate to a mod of your choice, then press the arrow next to the "Install via App" button. There, you'll get a prompt to manually download the mod's files, which you will then have to place in the proper folder.

Keep in mind that some mods cannot be installed via the app nor by being added to the Mods folder and have their own set of instructions that you need to follow. This is usually indicated in their mod descriptions, so be sure to thoroughly read them.
After you've downloaded the necessary files (and verified that the mod can, indeed, be installed the traditional way), navigate to your game's directory, then UserData, then the Mods folder. Simply place the file(s) (usually with the .jar extension) into the folder, and you're set.
Now you need to activate any installed mods.
You first need to create a world and, once you've done so, quit and navigate back into the "Worlds" tab. Then, right-click the world you wish to modify, and you'll find that a new "Mods" tab shows up under the image on the left, showing all the mods you have installed. Simply enable those that you want present in that world and press "Save world settings."
And that's it, the installed mods should be active on that world. You can change this at any time, toggling mods on or off, though be aware of the implications of removing crucial mods without starting a fresh world.
The post Hytale modding guide – How to install mods in Hytale appeared first on Destructoid. | ||||||||||||||||||||||||||||||||||||||||||||||||||||||||||||||||||||||||
Destructoid Tuesday, January 20, 2026 12:12 PM
Pro Open Matchday 8 brings a fresh Mystery Nation objective to complete, and you can gain rewards for doing so in FC 26 Ultimate Team.
Like the last seven matchdays, the trick is to solve the mystery nation. While EA Sports will ultimately reveal the nation, I believe that the community will once again decode it first. Let's look at how to complete the objective.
Disclaimer: The Mystery Nation is Ivory Coast.
How to complete the FC 26 Pro Open Mystery Nation (Matchday 8)
Let's first look at the official description of the new objective that's now live in Ultimate Team.
The first task is to decipher the mystery nation, which can be any country from around the globe. Countries that have already appeared previously as part of the objective can be excluded. I will be adding the name once the correct answer becomes public.
Then, pick a card from the same nation and put him/her in a squad. To finish the objective, score three goals with a finesse shot. You can do the objective in any Ultimate Team mode, and across multiple games if required. Hence, don't stress about trying to score three goals together in a single game.
Here are the rewards you'll get from completing the objective.
It's always useful to get free packs before the full TOTY promo drops in packs. Yesterday, we took a trip to Africa, with the nation being Nigeria. It will be interesting to find out which is the correct nation and continent on Matchday 8.
The post FC 26 Pro Open Mystery Nation revealed (Matchday 8) appeared first on Destructoid. | ||||||||||||||||||||||||||||||||||||||||||||||||||||||||||||||||||||||||
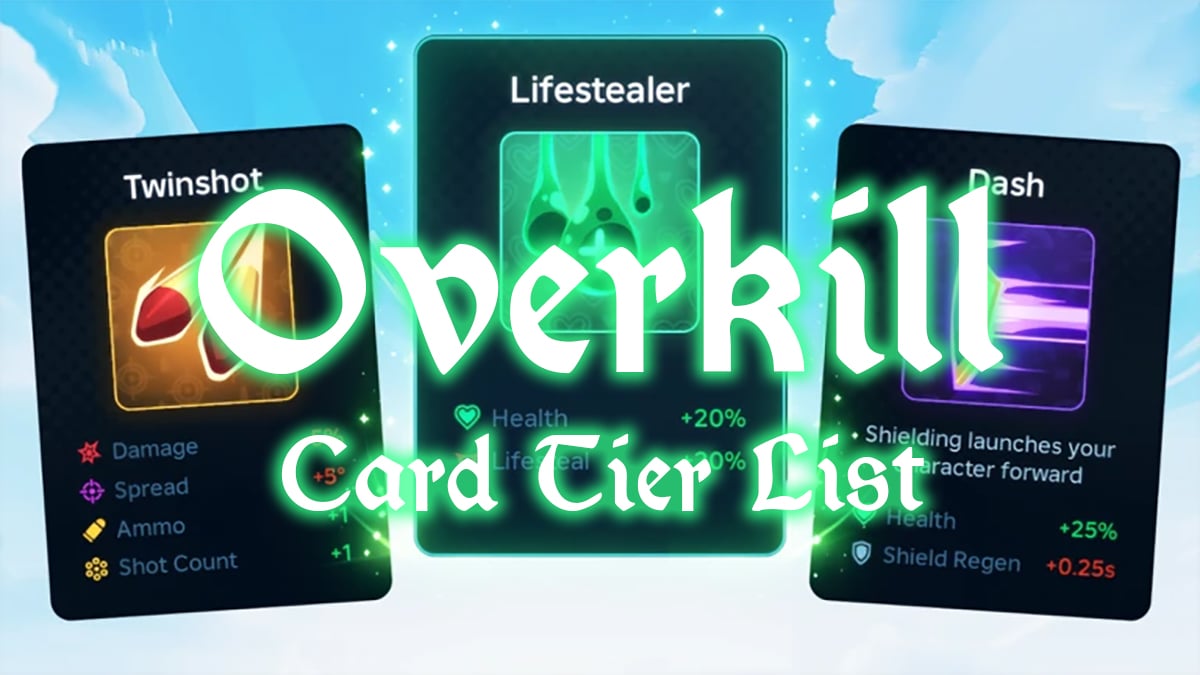
Destructoid Tuesday, January 20, 2026 11:35 AM
Below you'll find the best cards in Overkill sorted in S-Tier and A-Tier with situationally powerful B-Tiers and some of the weaker or unusable options in C and D-Tier. Note that card effectiveness can sometimes change based on if you're playing 1v1, 2v2, 3v3 or higher. Here's my Overkill card tier list and guide.
Table of contents
Best Overkill Cards Tier List
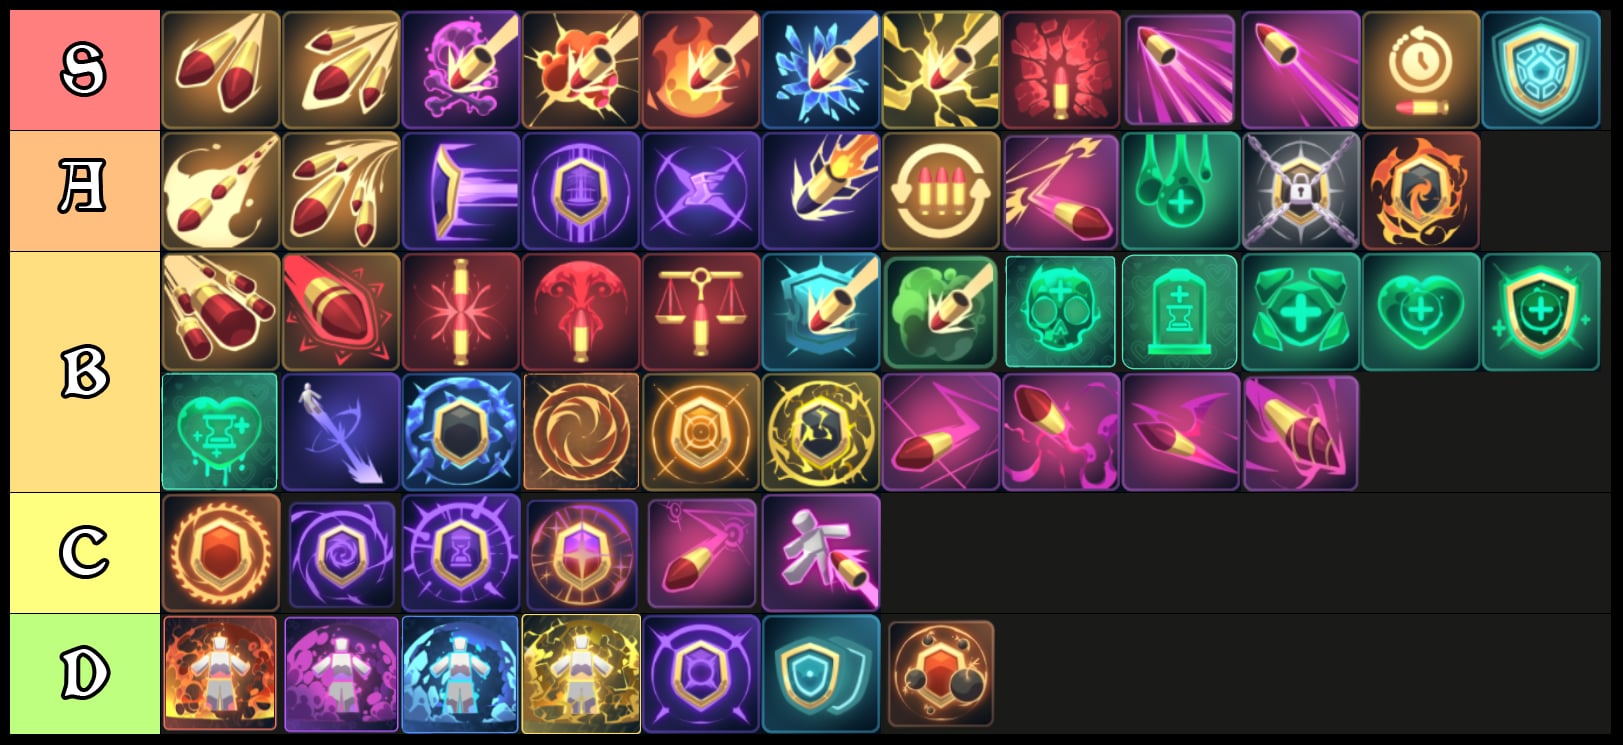
The best cards in Overkill can sometimes be standalone cards or some become much better when combined with others. That said there are some that are just straight up really strong or the opposite and shouldn't be used much. The S-Tier ones above are always a good choice regardless of builds, the A-Tiers are powerful alterantives and the B-Tiers are situationally powerful or build dependent. As for C and D-Tier it's full of beginner-friendly cards that are worse later or those that are underpowered or unusably weak. Here are some highlights from each tier below that I'll analyze in more detail.
S-Tier Highlights
A-Tier Highlights
B-Tier Highlights
C-Tier Highlights
D-Tier Highlights
That's it for my Overkill card tier list and guide. Check out our Overkill codes for free goodies.
The post Roblox Overkill Card Tier List – Best Cards appeared first on Destructoid. | ||||||||||||||||||||||||||||||||||||||||||||||||||||||||||||||||||||||||
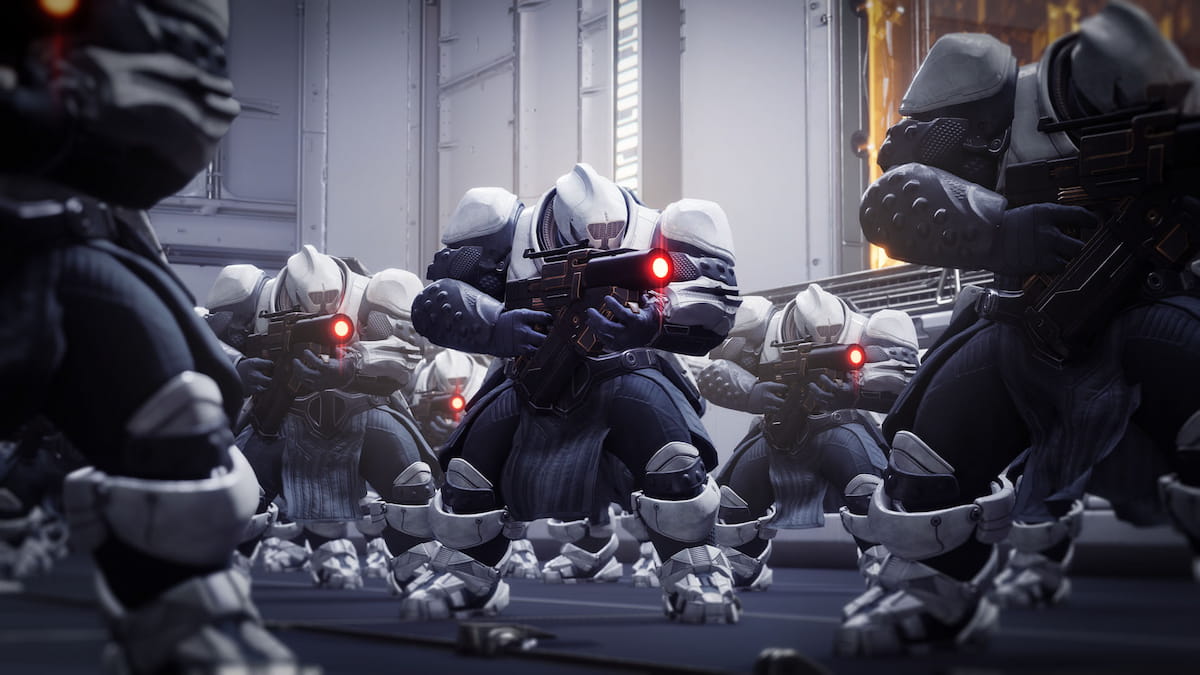
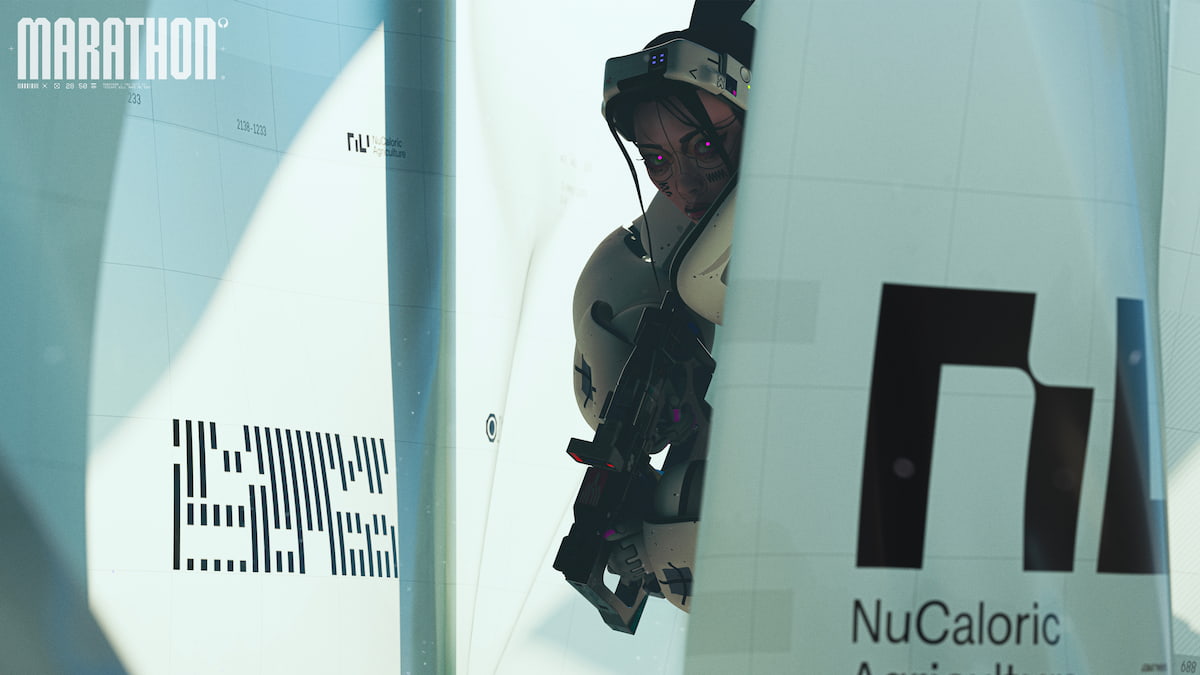
Destructoid Tuesday, January 20, 2026 10:44 AM Marathon surprisingly jumps into Steam's top five global best-sellers, excluding free-to-play titles
Marathon seems to have a bright future ahead of it after all, as it soars into Steam's best-selling titles. If the Steam Deck and free-to-play games are excluded, then Marathon holds the fifth spot, placing it in league with heavy-hitters like Kingdom Come: Deliverance 2 and a discounted EA Sports FC 26.
The top spot, unsurprisingly, still belongs to ARC Raiders, which is outselling just about everyone. However, it has the advantage of actually being out, with Marathon only recently receiving a March 5 release date. If that alone is taken into consideration, then it's the best-selling pre-order on Steam, a major achievement for a game that ran so many hurdles on its way to release.

Over the past couple of months, however, Marathon has been shaping up a lot better, with the devs releasing new footage and images that show major improvements over its first few alpha tests. Progress is thus quite evident, and it has to be good because players are obviously eating it up. Its neon aesthetics and punchy combat seem to have landed perfectly with some, driving these early sales up.
Whether or not that'll translate into huge sales post-launch remains to be seen, but it's undeniable that Marathon already has a spot under the sun without even being out yet. ARC Raiders has spent its time alone on the market carving out a position for itself, but Marathon's latest versions appear genuinely different enough for that not to make that much of a difference.
Still, on account of both being extraction shooters, there is bound to be some overlap, though if Bungie's latest title can stand out as a unique experience, then it may have a good chance of living up to fan expectations and thriving post-release.
I already tried to figure out if Marathon, even in its upgraded form, could last for long in an ARC Raiders world, but I never anticipated the game to resonate with so many players already.
That throws some shade on my arguments, to be completely frank, and I'm now eager to see where things will go from March 5.
The post Marathon surprisingly jumps into Steam's top five global best-sellers, excluding free-to-play titles appeared first on Destructoid. | ||||||||||||||||||||||||||||||||||||||||||||||||||||||||||||||||||||||||
Destructoid Tuesday, January 20, 2026 10:35 AM
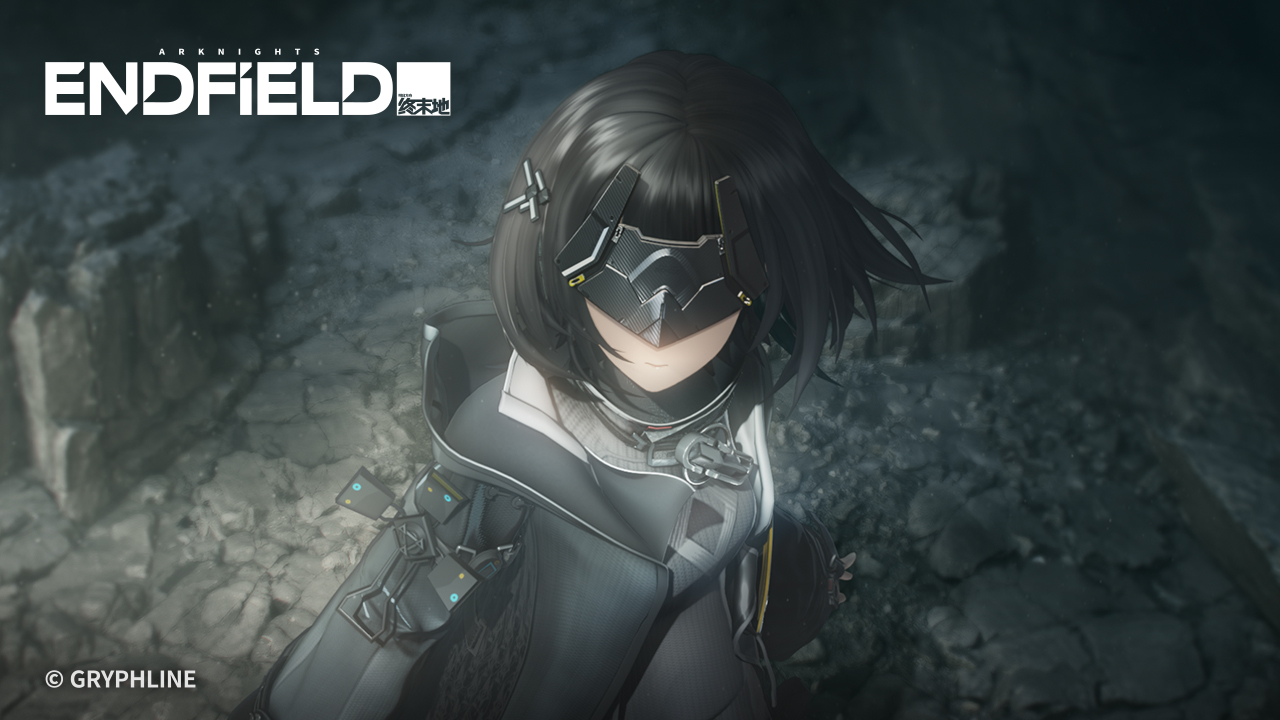
Arknights Endfield will release on PC, console, and mobile on Jan. 22, and we'll have plenty of operators, or characters, available at launch.
It's a gacha RPG, so characters will be obtained from banners. That means, as with most games of this type, you'll need some luck. Operators also have various rarities, so let's look at all the operators available at launch.
Table of contents
Complete list of Arknights Endfield operators
The table below has a list of all operators available at launch.
All Arknights Endfield character star ratings
Star ratings determine the rarity of a character. We have three different types at launch: Four Star, Five Star, and Six Star.
Four-Star characters
Five-Star characters
Six-Star characters
Some of the characters will be available for free, while others will drop in banners, as we witnessed in the betas. There are expectations for at least one special banner apart from the standard that will be available at all times.
A tier-list is also in the works, and it will be interesting which ones become a favorite for the community in the days to come.
The post All operators in Arknights Endfield appeared first on Destructoid. |


WGB Tuesday, January 20, 2026 2:53 PM Ubisoft announced that Far Cry 3: Classic Edition, Far Cry 3: Blood Dragon, and Far Cry: Primal will receive a current-gen update enabling 60FPS on January 21st, enhancing gameplay for these popular titles. |
Gaming Instincts – Next-Generation of Video Game Journalism Tuesday, January 20, 2026 3:50 PM Includes several games. The post Xbox Game Pass Adds Death Stranding Director's Cut, Ninja Gaiden Ragebound and More appeared first on Gaming Instincts - Next-Generation of Video Game Journalism. |
Gaming Instincts – Next-Generation of Video Game Journalism Tuesday, January 20, 2026 3:19 PM Announced in a new post. The post Hitman World of Assassination Will Be Getting Cross-Progression appeared first on Gaming Instincts - Next-Generation of Video Game Journalism. |
Gaming Instincts – Next-Generation of Video Game Journalism Tuesday, January 20, 2026 2:36 PM Confirmed on Twitter. The post Cyberpunk 2077 VR Mod Removed Due To Paywall appeared first on Gaming Instincts - Next-Generation of Video Game Journalism. |