GamersHeroes Wednesday, October 15, 2025 12:00 PM BALL X PIT is one of the most satisfying and engaging games we've played all year. No matter what type of gamer you are, BALL X PIT is a must-play. The post BALL X PIT Review appeared first on GamersHeroes. |
GamersHeroes Wednesday, October 15, 2025 10:44 AM While Sparrow Night and Twin Sails Interactive's News Tower will now fully launch for the PC via Steam November 18, one can listen in with some sweet tunes by members of the New Cool Collective. The post Newspaper Tycoon Sim News Tower Launching November 18 appeared first on GamersHeroes. |
GamersHeroes Wednesday, October 15, 2025 10:42 AM Hot off the heels of its new Steam demo, Gamers Heroes recently asked Cult of Blood's development team at Dusty Box questions around its survival horror roots, its modernized classic gameplay, and even the team's scary movie - learn more with our interview. The post Cult of Blood Interview – Dusty Box Talks Inspiration, Modernized Classic Gameplay, and Favorite Scary Movie appeared first on GamersHeroes. |
Kotaku Wednesday, October 15, 2025 4:56 PM
Most of the Saints Row franchise as well as Shadow of Mordor, Greedfall, Slime Rancher and more are currently very cheap on GOG The post A Lot Of Great Open-World Games Are Super Cheap Right Now appeared first on Kotaku. |
Kotaku Wednesday, October 15, 2025 4:35 PM
The limited engagement will include AMC theaters this time The post We Can Have Nice Things, <em>KPop Demon Hunters</em> Is Coming Back To Theaters appeared first on Kotaku. |
Kotaku Wednesday, October 15, 2025 4:25 PM
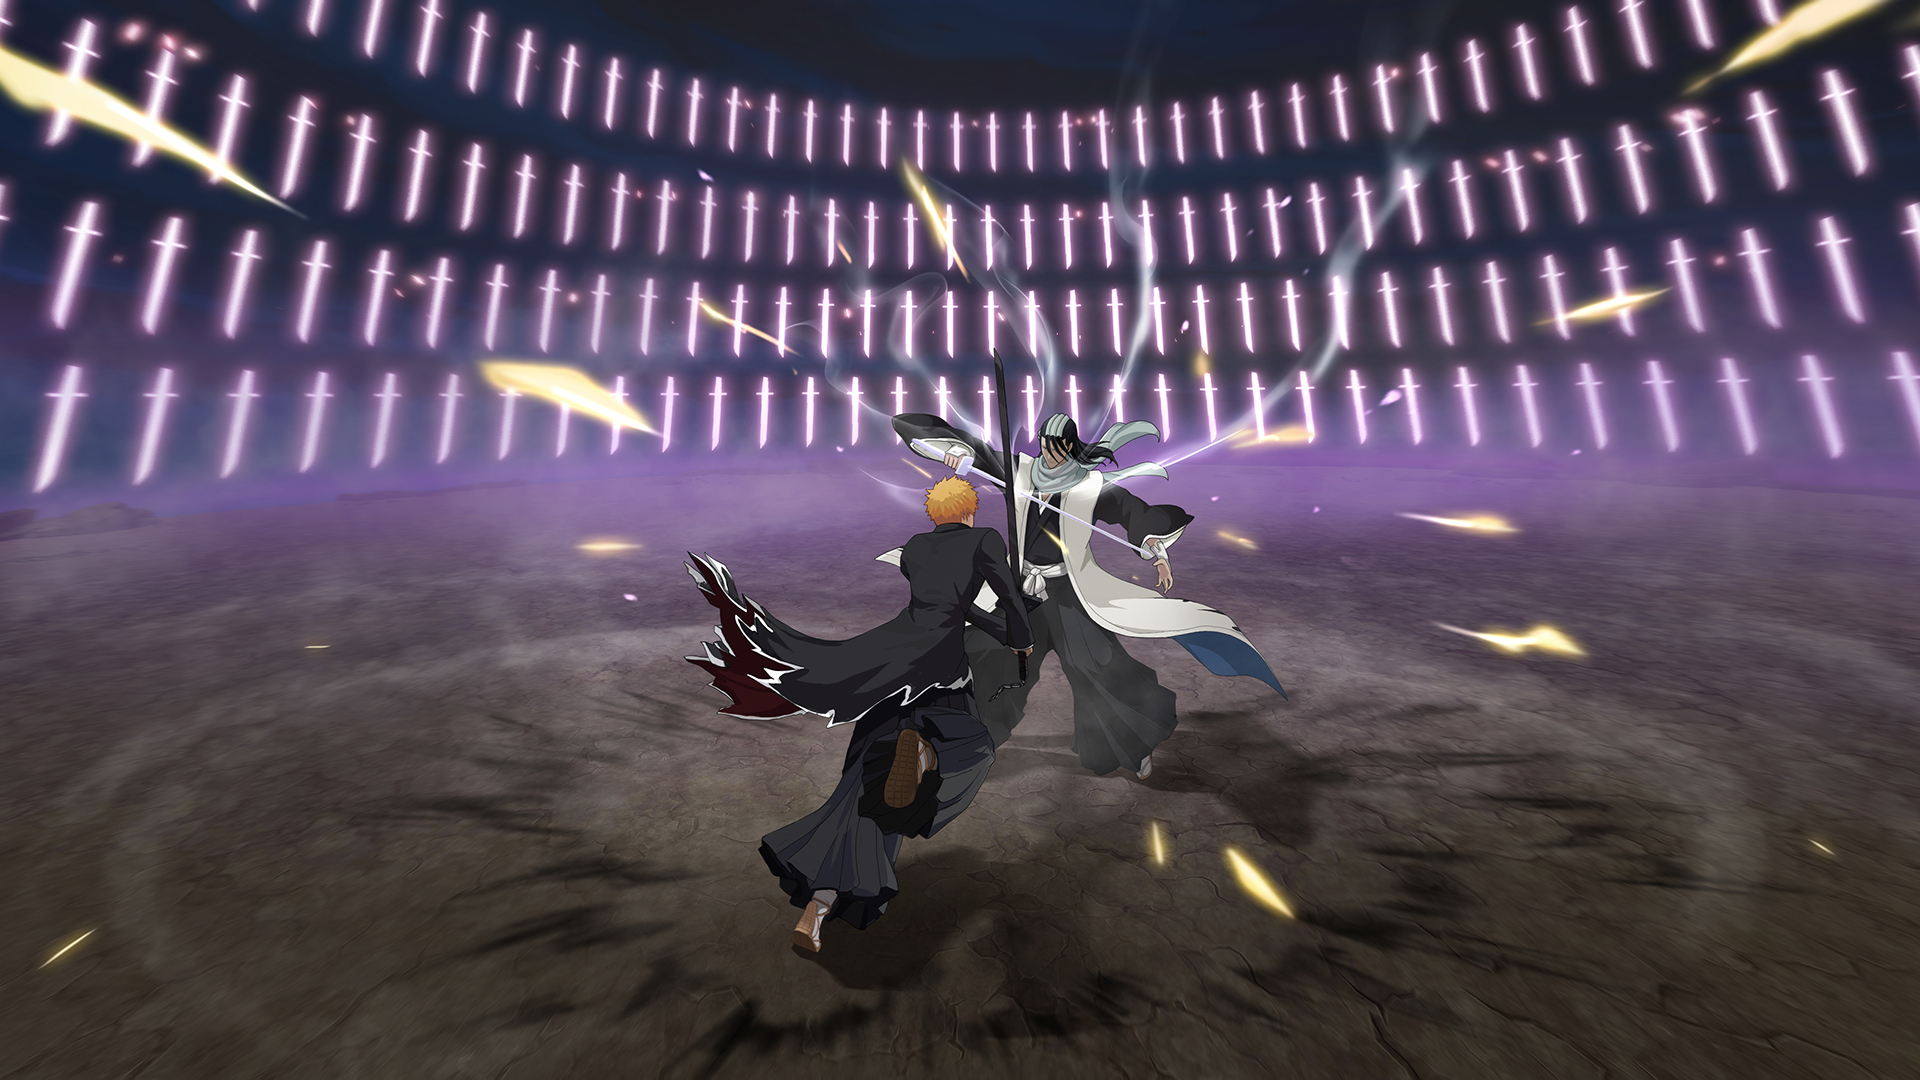
A girl's secret to her success is knowing her angles The post <i>BallxPit</i> Is So Much Fun It's Eating Up All My Free Time (Send Help) appeared first on Kotaku. |
Kotaku Wednesday, October 15, 2025 4:16 PM
A peek at Microsoft's gaming future comes at a high price The post ROG Xbox Ally X: The <i>Kotaku</i> Review appeared first on Kotaku. |
Kotaku Wednesday, October 15, 2025 4:01 PM
The latest patch for Dragon Ball FighterZ has made one of its Goku variants near untouchable The post Y'all Wanna See One Of The Filthiest Moves In Any Fighting Game? appeared first on Kotaku. |
Kotaku Wednesday, October 15, 2025 1:39 PM
I never want to hear from SpudBoi or NoCapShroom ever again, thank you very much The post This New <i>Plants Vs Zombies</i> Remastered Trailer Is Hard To Watch appeared first on Kotaku. |
Kotaku Wednesday, October 15, 2025 1:30 PM
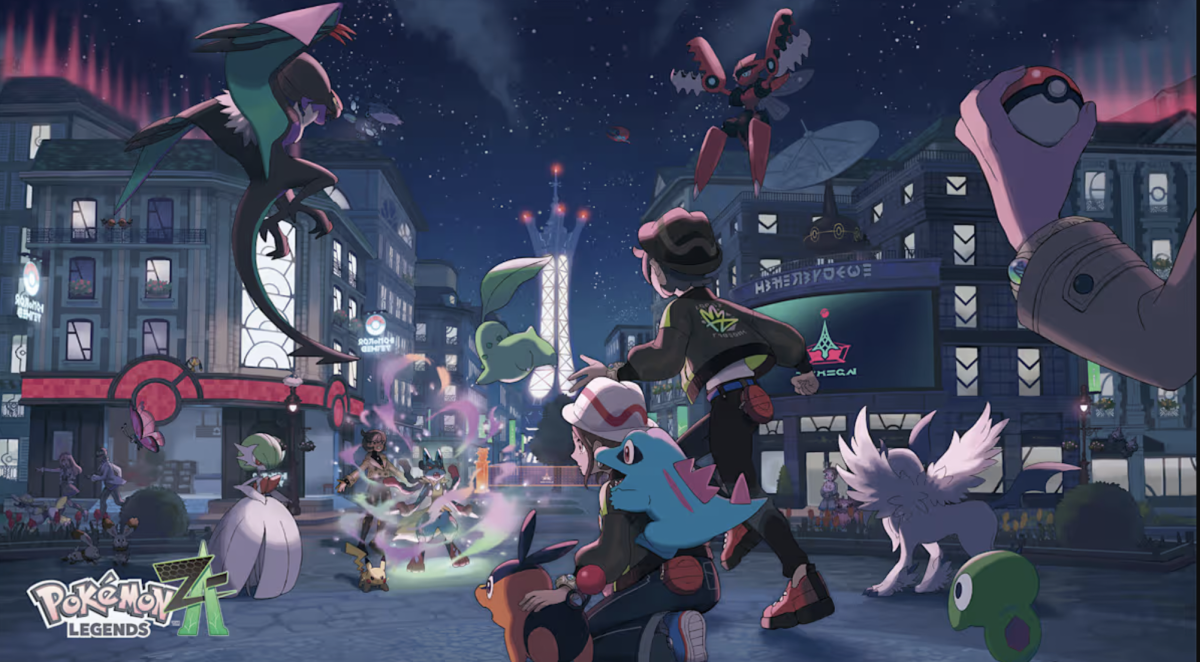
Raichu will join the others in the Mega Dimension DLC, but here's every new form in the base game The post Here's Every New Mega Evolution Added In <em>Pokémon Legends: Z-A</em> appeared first on Kotaku. |
Kotaku Wednesday, October 15, 2025 12:10 PM
Upgrading to Windows 11 Pro doesn't cost an arm and a leg today. The post At Over 90% Off, Microsoft Windows 11 Pro Feels Like a Month-Early Black Friday Deal appeared first on Kotaku. |
Kotaku Wednesday, October 15, 2025 11:53 AM
Obsidian didn't plan on including the option in the upcoming space RPG and tapped an outside studio to help make it happen The post The Only Reason <i>Outer Worlds 2</i> Has A Third-Person Mode Is Because Fans Begged For It appeared first on Kotaku. |
Kotaku Wednesday, October 15, 2025 11:40 AM
Keeping an eye on your kids and pets has never been easier. The post Roku Clears Out Its Indoor Security Camera 2-Pack at an All-Time Low, Like Getting One Free appeared first on Kotaku. |
Kotaku Wednesday, October 15, 2025 11:34 AM
It's not Halloween yet and already we're haunted by phantoms The post It's Not Just You, <i>Battlefield 6′</i>s Ghost Bullet Problem Was Real appeared first on Kotaku. |
Kotaku Wednesday, October 15, 2025 11:15 AM
From the Red and Blue to Scarlet and Violet, here's our ranking of every Pokémon journey The post Before <em>Legends: Z-A</em>, Let's Rank The <em>Pokémon</em> Games Worst To Best appeared first on Kotaku. |
Kotaku Wednesday, October 15, 2025 11:10 AM
Upgrade your iPad experience by adding a stylus pen to your setup. The post If the Apple Pencil Feels Pricey, This Stylus Pen for iPad Is Nearly 7x Cheaper and Amazon's Current Best-Seller appeared first on Kotaku. |
Kotaku Wednesday, October 15, 2025 10:40 AM
Display whatever you please on this Govee LED Panel for up to $50 off. The post Govee Gaming Pixel LED Light Panel Drops to Peanuts Pricing, Real-Time Info Display and 150+ Scenes Built In appeared first on Kotaku. |
Kotaku Wednesday, October 15, 2025 10:37 AM
The little yellow guy keeps getting skinnier as the years go by The post Pikachu Might Get A Redesign In The Next <em>Pokémon</em> Game, And My Guy Is Looking Rough appeared first on Kotaku. |
Kotaku Wednesday, October 15, 2025 10:22 AM
This 250W charger replaces all your chargers in one go. The post Anker 250W Charger at All-Time Low on Amazon, 6 Ports for Less Than a Single Fast Charger appeared first on Kotaku. |
Kotaku Wednesday, October 15, 2025 10:10 AM
The 74% off limited-time offer is a serious deal befitting a seriously good Chromebook, which is a total steal at just $250. The post Lenovo 14″ Chromebook Just Fell 74%, Turning a MacBook Air–Priced Laptop Into a Grand Theft Laptop appeared first on Kotaku. |
Kotaku Wednesday, October 15, 2025 10:06 AM LEGO Halloween Barn Building Is Selling for Pennies, Amazon Is Clearing Out Stock Before the Big Day
This special LEGO Halloween set is today's top-selling LEGO, just weeks before Halloween weekend. The post LEGO Halloween Barn Building Is Selling for Pennies, Amazon Is Clearing Out Stock Before the Big Day appeared first on Kotaku. |


PCGamesN Wednesday, October 15, 2025 3:00 PM Like a cleaver in a zombie's brain, Dead Island 2 lands as a smash hit, and you can grab it and all its DLC at the lowest price ever. |
PCGamesN Wednesday, October 15, 2025 2:35 PM New Crusader Kings 3 expansion All Under Heaven is a dramatic size increase, but Paradox says performance and optimization is under control. |
PCGamesN Wednesday, October 15, 2025 12:57 PM Combining Harry Potter and Stardew Valley, Witchbrook won't be arriving in 2025 after all as developer Chucklefish announces a delay. |
PCGamesN Wednesday, October 15, 2025 12:39 PM A Battlefield 6 update has reduced the starting ticket count for all Conquest maps, but extending the time limit would have been better. |
PCGamesN Wednesday, October 15, 2025 12:39 PM Ball x Pit is what happens when Pong gets a roguelike mode, and Devolver Digital looks like it has another indie banger on its hands. |
PCGamesN Wednesday, October 15, 2025 12:23 PM If you thought Dead by Daylight couldn't get any scarier, the annual Haunted by Daylight event is here with Haunts and jumpscares. |
PCGamesN Wednesday, October 15, 2025 12:03 PM Whether you want to help your team or just complete some challenges on the side, here's how to spot enemies and vehicles in Battlefield 6. |
PCGamesN Wednesday, October 15, 2025 11:36 AM This Fanatical mystery bundle offers up to 25 mystery games for $16.96 while also giving you the chance to win a 27-inch Alienware monitor. |
PCGamesN Wednesday, October 15, 2025 11:29 AM This sleek HP Omen 16 design also includes a 240Hz 2,560 x 1,600 display, Intel Core i7 14650HX gaming CPU, and 32GB of DDR5 system memory. |
PCGamesN Wednesday, October 15, 2025 11:23 AM Roman "Der8auer" Hartung has shown off a phase change spray cooling experiment on a bare CPU, and it made it through a run of Cinebench. |
PCGamesN Wednesday, October 15, 2025 11:04 AM The Chapter 6, Season 4 Fortnite map changes once again as Halloween descends on the island and gives us terrifying Fortnitemares. |
PCGamesN Wednesday, October 15, 2025 11:44 AM We've tested the top gaming handhelds to see which portables from the likes of Asus, Lenovo, and MSI can take on the mighty Steam Deck. |
PCGamesN Wednesday, October 15, 2025 11:03 AM If you're struggling to enter Magna on release day, you might want to know how to fix the Blue Protocol Star Resonance server list error. |
PCGamesN Wednesday, October 15, 2025 10:59 AM A bug in Total War Warhammer 3 patch 6.3.2 prevents some players from accessing free DLC unless they own the two previous TWW games. |
PCGamesN Wednesday, October 15, 2025 10:54 AM A guide to locate all of the Fortnite NPC locations in Chapter 6 Season 4, all the characters you can hire, and the items they all sell. |
PCGamesN Wednesday, October 15, 2025 10:17 AM Shadow of the Colossus creator Fumito Ueda explains how the revered game was inspired by Battlefield 1942, and nearly had multiplayer. |
PCGamesN Wednesday, October 15, 2025 1:08 PM With an AMD Ryzen Z2 Extreme CPU and its new Xbox app and overlay, this Steam Deck rival is the most compelling Windows handheld yet. |
Rock Paper Shotgun Latest Articles Feed Wednesday, October 15, 2025 12:47 PM 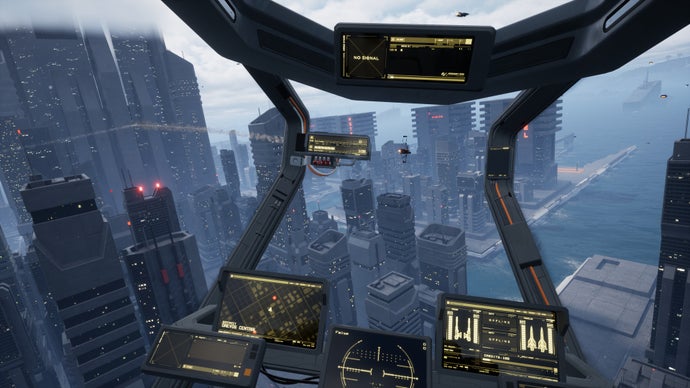 That psychic shockwave you just felt was my brain registering the words "Yes, G-Police was definitely an inspiration" in the Steam forums for G-Rebels, an upcoming cyberpunk flight combat simulator. You've never heard of G-Police? Oh my god. Get in here, you prancing summer child, you daughter of chaos, you strawman son of a gun. Sit the fuck down. Everything is going to be OK now. I am about to tell you of G-Police, the only good videogame ever made. |
Rock Paper Shotgun Latest Articles Feed Wednesday, October 15, 2025 12:32 PM  If you've been looking forward to Witchbrook, your broomstick's going to have to stay grounded for a little bit longer. Developers Chucklefish have opted to push the cosy magic schooler's release from this winter to 2026. At the same time, they've put out an interactive map offering the first proper look at its setting, Mossport. |
Rock Paper Shotgun Latest Articles Feed Wednesday, October 15, 2025 11:52 AM  I can't remember the first time I felt "immersed" in a videogame, but I can remember the first time I got stuck under a swimming pool float as a kid, scratching at a scabby foam ceiling roamed by mocking silver jellyfish of air. I can remember the first few times I drowned in videogames, fighting the waterlogged handling in Sonic's Labyrinth Zone, or operating the agile sarcophagus that is Lara Croft in Aztec print grottos of antiseptic blue. I find the continuing use of "immersive" to describe believable videogame worlds weird and a bit alarming. Partial immersion would be one thing - the videogame as nice hot bath at the end of the day, the videogame as splashing around in a stream of thought, the videogame as a kind of apple-bobbing. The "immersion" of the "immersive sim" is a different matter entirely: it's a box of clockwork you're invited to tease apart, not some hyperreal enclosure. But the "full" or "total" sensory immersion repeatedly offered by big-budget, photoreal 3D games seems a lot like suffocation. |
Rock Paper Shotgun Latest Articles Feed Wednesday, October 15, 2025 11:19 AM  The people on the platform attached to the 30 foot long and continually growing goose's neck applaud. They're easily impressed by bouncing tingi, those being the strange mutant babies the goose keeps vomiting out. Far below, the base of the goose's neck juts out of its human host's body, next to a piggy bank the tingi keep dropping into. Far above, another goose with a neck made out of hotdog says 'Come to me baby'. Everything's as it should be in the Steam Next Fest demo of Tingus Goose. |
Siliconera Wednesday, October 15, 2025 6:00 PM
Back when HoYoVerse announced the 3.6 Honkai: Star Rail update, it confirmed a Dan Heng Permansor Terrae five-star character alt would appear and be given away for free to all players. However, he wasn't immediately available once the update dropped on September 24, 2025. The giveaway would start once his banner would launch on October 15, 2025. That is today, and he's now free until the 4.0 update eventually appears.
This version of Dan Heng is a Physical Preservation type of character dedicated to protecting allies. His other two incarnations are more DPS-focused. The Wind Hunt four-star we all get for free is designed to deal major damage to one target. The Imbibitor Lunae Imaginary Destruction character prioritizes AOE attacks. His Terra-Omnibus provides a shield for all allies and makes one of them a "bondmate" that provides a shield and debuffs. His Ultimate is A Dragon's Zenith Knows No Rue, and it damages enemies while shielding allies.
There are two new trailers that accompanied his launch. One is basically an ASMR video called "Dan Heng's Exclusive Physiotherapy. You can watch that below.
There's also a more cinematic trailer for him called "Home."
Now, as usual, it is possible to upgrade Dan Heng Permansor Terrae by getting additional Eidolons for the free one we're all getting in Honkai: Star Rail. These can be acquired via his banner, which is live now. His Warp is available until November 4, 2025. That includes the five-star version of him and the focus four-stars Hanya, Serval, and Sushang. The other five-star banner now is an Anaxa rerun one.
Honkai: Star Rail is available for the PS5, PC, and mobile devices, and the Dan Heng Permansor Terrae five-star character alt is available for free until 4.0.
The post PSA: Don't Forget to Claim Free Honkai: Star Rail 5-Star Dan Heng appeared first on Siliconera. |
Siliconera Wednesday, October 15, 2025 5:00 PM
Following a delay that pushed Sonic Rumble out of May 2025, Sega now confirmed the multiplayer battle royale game will now launch in November 2025. An exact date hasn't been set for its debut, though the App Store listing mentioned November 30, 2025. A new trailer is also live.
The new November 2025 release window trailer for Sonic Rumble confirms the battle royal game will offer multiplayer for up to 32 people at once. Different avatars and skins will be present as customization options. The video only briefly shows overview of some of the stages and challenges that will appear.
When the game does launch, there will be a number of bonuses immediately doled out to players. The pre-registration campaign hit all five of its goals. As such, we will all get a Garnet Knuckles skin, a Movie Sonic skin, a Crystal Chao buddy, a Happy Chao sticker, and 5,000 Rings. It is still possible to pre-register for the game on both Apple's App Store and Google Play. The skins change the appearance of both characters. The Crystal Chao can be equipped as a cosmetic accessory. Rings are used as an in-game currency.
Sonic Rumble will come to mobile devices in November 2025, though we don't know the exact release date for the latest spin-off.
The post Sonic Rumble Multiplayer Battle Royale Arrives in November appeared first on Siliconera. |
Siliconera Wednesday, October 15, 2025 4:00 PM
Pathea Games and Seed Lab announced that Starsand Island will feature a crossover with My Time at Portia that will bring two characters from the one game to the other. These are the siblings Ginger and Gust. A trailer also showed how both will look in this game.
The announcement specifically stated that Ginger and Gust will be "visitors." It also confirmed their original voice actors will reprise their roles. So Ariel Marie Highwind will be back as Ginger, and DJ Horn will return as Gust.
Here's the first video showing the two arriving in Starsand Island. It shows them arriving via train for a vacation in the small town.
More exact details about what we can expect from My Time at Portia characters Ginger and Gust in Starsand Island aren't available yet. For example, we don't know if they will be available right at launch or added in a patch. In My Time at Portia, both are possible love interests. Since they are described as visitors here, it is possible they will just be additional people we can interact with as we explore the town.
Starsand Island is in development and expected to launch in Q1 2026 on PCs. A demo is available for Steam Next Fest 2025. My Time at Portia is available for the Switch, PS4, Xbox One, PC, and mobile devices.
The post My Time at Portia Characters Are in Starsand Island appeared first on Siliconera. |
Siliconera Wednesday, October 15, 2025 3:00 PM
It seems we could learn more about the Magic Knight Rayearth new revival anime in the next few days, as the Japanese social media account for the series has been hinting at an announcement. It seems a statement will be made in Japan on October 17, 2025.
Over the past two days, two teaser messages appeared on the social media account. The first one mentioned news was three days away. It also seemed to reference Princess Emeraude, as it featured a note saying, "Help me." As the manga and anime start, she's calling out to Hikaru, Fuu, and Umi in our world asking for their aid. The second one more clearly references her call and request for the legendary knights to save the world of Cephiro.
The reason this is likely related to the Magic Knight Rayearth revival anime is that the new announcement will appear on October 17, 2025. The original debuted on October 17, 1994 in Japan. It's been over a year since the new anime was announced, as the teaser showed up in July 2024.
In case you missed it, here is that teaser video:
News about Magic Knight Rayearth will come on October 17, 2025, and the manga is available worldwide via Kodansha and the original anime is streaming on Crunchyroll.
The post Magic Knight Rayearth Reveal Being Teased Ahead of New Anime appeared first on Siliconera. |
Siliconera Wednesday, October 15, 2025 2:00 PM
Chucklefish announced that Witchbrook, the life sim about attending a school to learn magic, is delayed and won't launch in 2025. Its new release window is 2026. The developer also noted that it is investigating additional platforms aside from the already announced Switch and PC versions. It also shared the game's map online.
Witchbrook has been in development at Chucklefish since March 2018. Following that initial reveal, the developer took it slow and sparingly released screenshots and updates in 2020 and 2021. In 2022, the product page debuted on Steam. It also noted in 2023 that the pacing was due to them shooting for no crunch. March 2025 is when the Winter 2025 release window finally came up, with a major trailer appearing during a Nintendo Direct. When discussing this delay, the developer noted a desire to ensure overall quality, more possible platforms, and maybe additional localizations. It also noted there will be updates on avatars and the world before 2025 ends.
As for the Witchbrook Mossport map, that is on a dedicated site. Chucklefish confirmed that any area that is in color and not sepia-toned is a place we will be able to visit. It is possible to zoom in and out. There are also a few point of interest icons that include details and screenshots about specific places and attractions, such as Arcane Arts, Lecture Theatre, North Hallway, Shadhollow Forest, Tea-Making Class, and Witchbrook College.
Witchbrook is in development for the Switch and PC, and its release date is delayed out of 2025 into 2026.
The post Chucklefish Witchbrook Life Sim Delayed appeared first on Siliconera. |
Siliconera Wednesday, October 15, 2025 1:00 PM
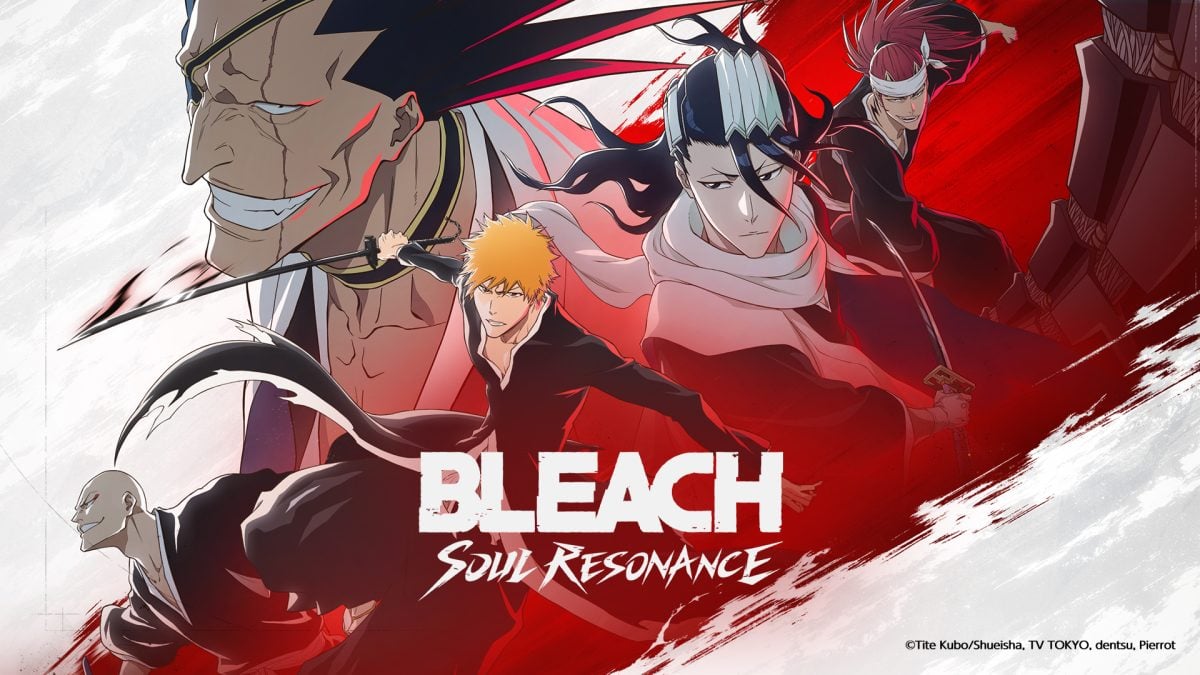
Crunchyroll and A Plus Japan announced that they will release the Nuverse Bleach: Soul Resonance mobile game in English worldwide. There's no release date yet, but it will debut before 2025 ends. The official product pages are live on the Apple App Store and Google Play store, so Apple iOS and Android device owners can pre-register.
Initial details about what we can expect from this new Bleach game are rather vague. It is a gacha title that involves pulling on banners to get characters. Both product pages mentioned "80 pulls" to start. When you head into fights inspired by the manga and anime, it is also apparently possible to immediately swap between units you own.
Here are three initial screenshots:
There's also an announcement trailer:
This will mark the second new Bleach game to debut in English in 2025. the first was Bleach: Rebirth of Souls. That is the fighting game from Bandai Namco. It covered all the way up through The Thousand Year Blood War revelations.
Bleach: Soul Resonance will appear on Android and iOS devices in English in 2025. Viz Media handled the manga in English, and the anime adaptations are available on Disney streaming services like Hulu and Disney+.
The post Bleach: Soul Resonance Mobile Game Will Appear in English appeared first on Siliconera. |
Siliconera Wednesday, October 15, 2025 12:00 PM
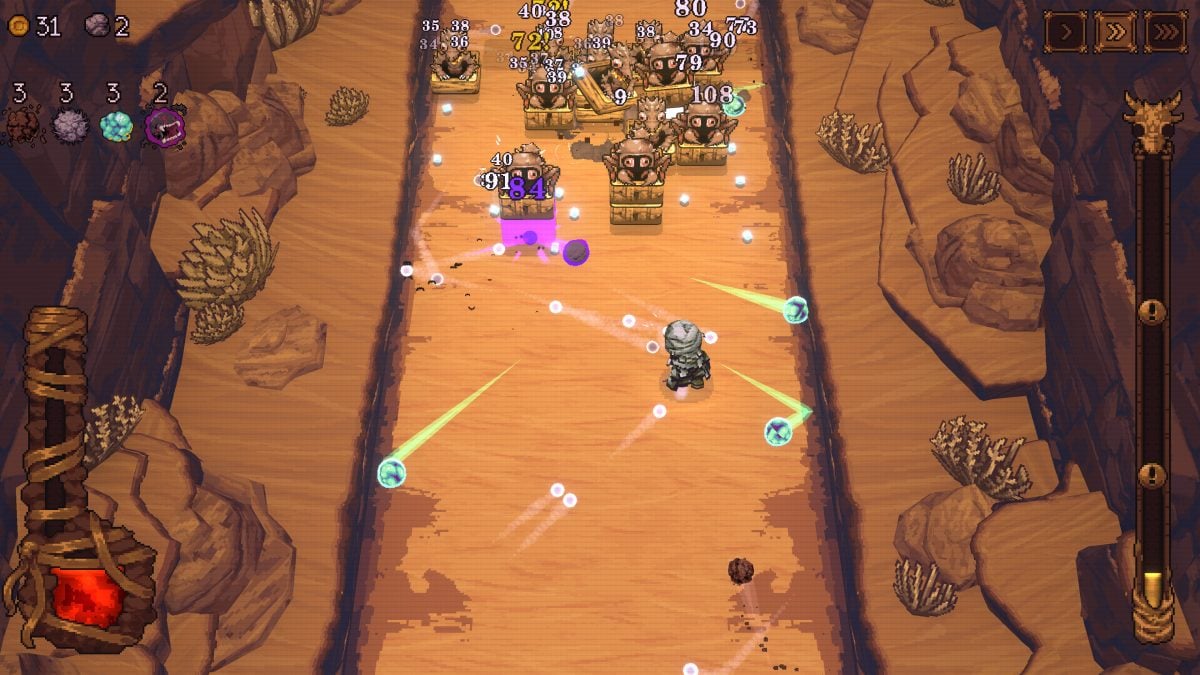
It feels like Kenny Sun sort of tossed everything together when making Ball x Pit. Vampire Survivors style weapon combinations and evolutions? Sure! Breakout clone elements of block-like enemies descending and in need of smashing? Right there. Piffle sorts of projectile firing in a steady, rapid-fire line for maximum damage? Yeah. Shoot'em up elements when it comes to boss projectiles and unit movement? Absolutely. The thing is that while we can see all the inspirations and it does seem like a lot, it al also does come together and work.
We begin Ball x Pit by returning to what was once Ballbylon. It used to be a thriving city and tower. However, a strange ball attacked it and turned it into a pit in the ground. An elevator ended up constructed at the wreckage, and adventurers are now taking it down to explore the depths, deal with the monsters there, and gradually rebuild New Ballbylon at its outskirts. It's up to a player to continually run in and advance, acquiring the means of building up a new village and selection of characters who gradually get stronger and more capable of handling the horrors below. Each new ally can play a bit differently due to their innate moveset and RNG determines what upgrades you acquiring, ensuring each journey feels a little different.
Ball x Pit is a roguelike that combines elements and mechanics of Breakout block-busting games such as Piffle and titles such as Vampire Survivors and Peglin. Your character is essentially the paddle. They can fire a stream of balls upward at the enemies that drop down from the top of the screen. Rather than bounce them back, it's instead like Piffle in that you have a set number and, once those are expended, you need to basically catch them to use them again. (These will eventually come back to you anyways, but there's a slight delay.) An autofire option is possible. As you level up, you get new types of balls and passives can be selected with one per level. As a stage in an area goes on, the field widens, and a gauge on the side lets you know when you're reaching the Boss. Once you do reach that major foe, you'll actually start moving backwards while it advances. There are different biomes for each of the tiers you head into, with different foes at each level, so it can feel like you're gradually building up skills and familiarity with each run.
There will also be drops that allow you to randomly level up X number of your equipped items, as well as evolve or fuse your balls. Part of the genius of it is while there are ball Evolutions in Ball x Pit like there are in Vampire Survivors with its weapons, there are also general fusions. This means if you get the right balls, such as say Bleed with Vampire, you get an evolved Vampire Lord that is stronger and combines the two traits for bleeding status for enemies and health restoration for your character. But even if you pair up types that don't result in a good evolution, you can make room and get some sort of combination.
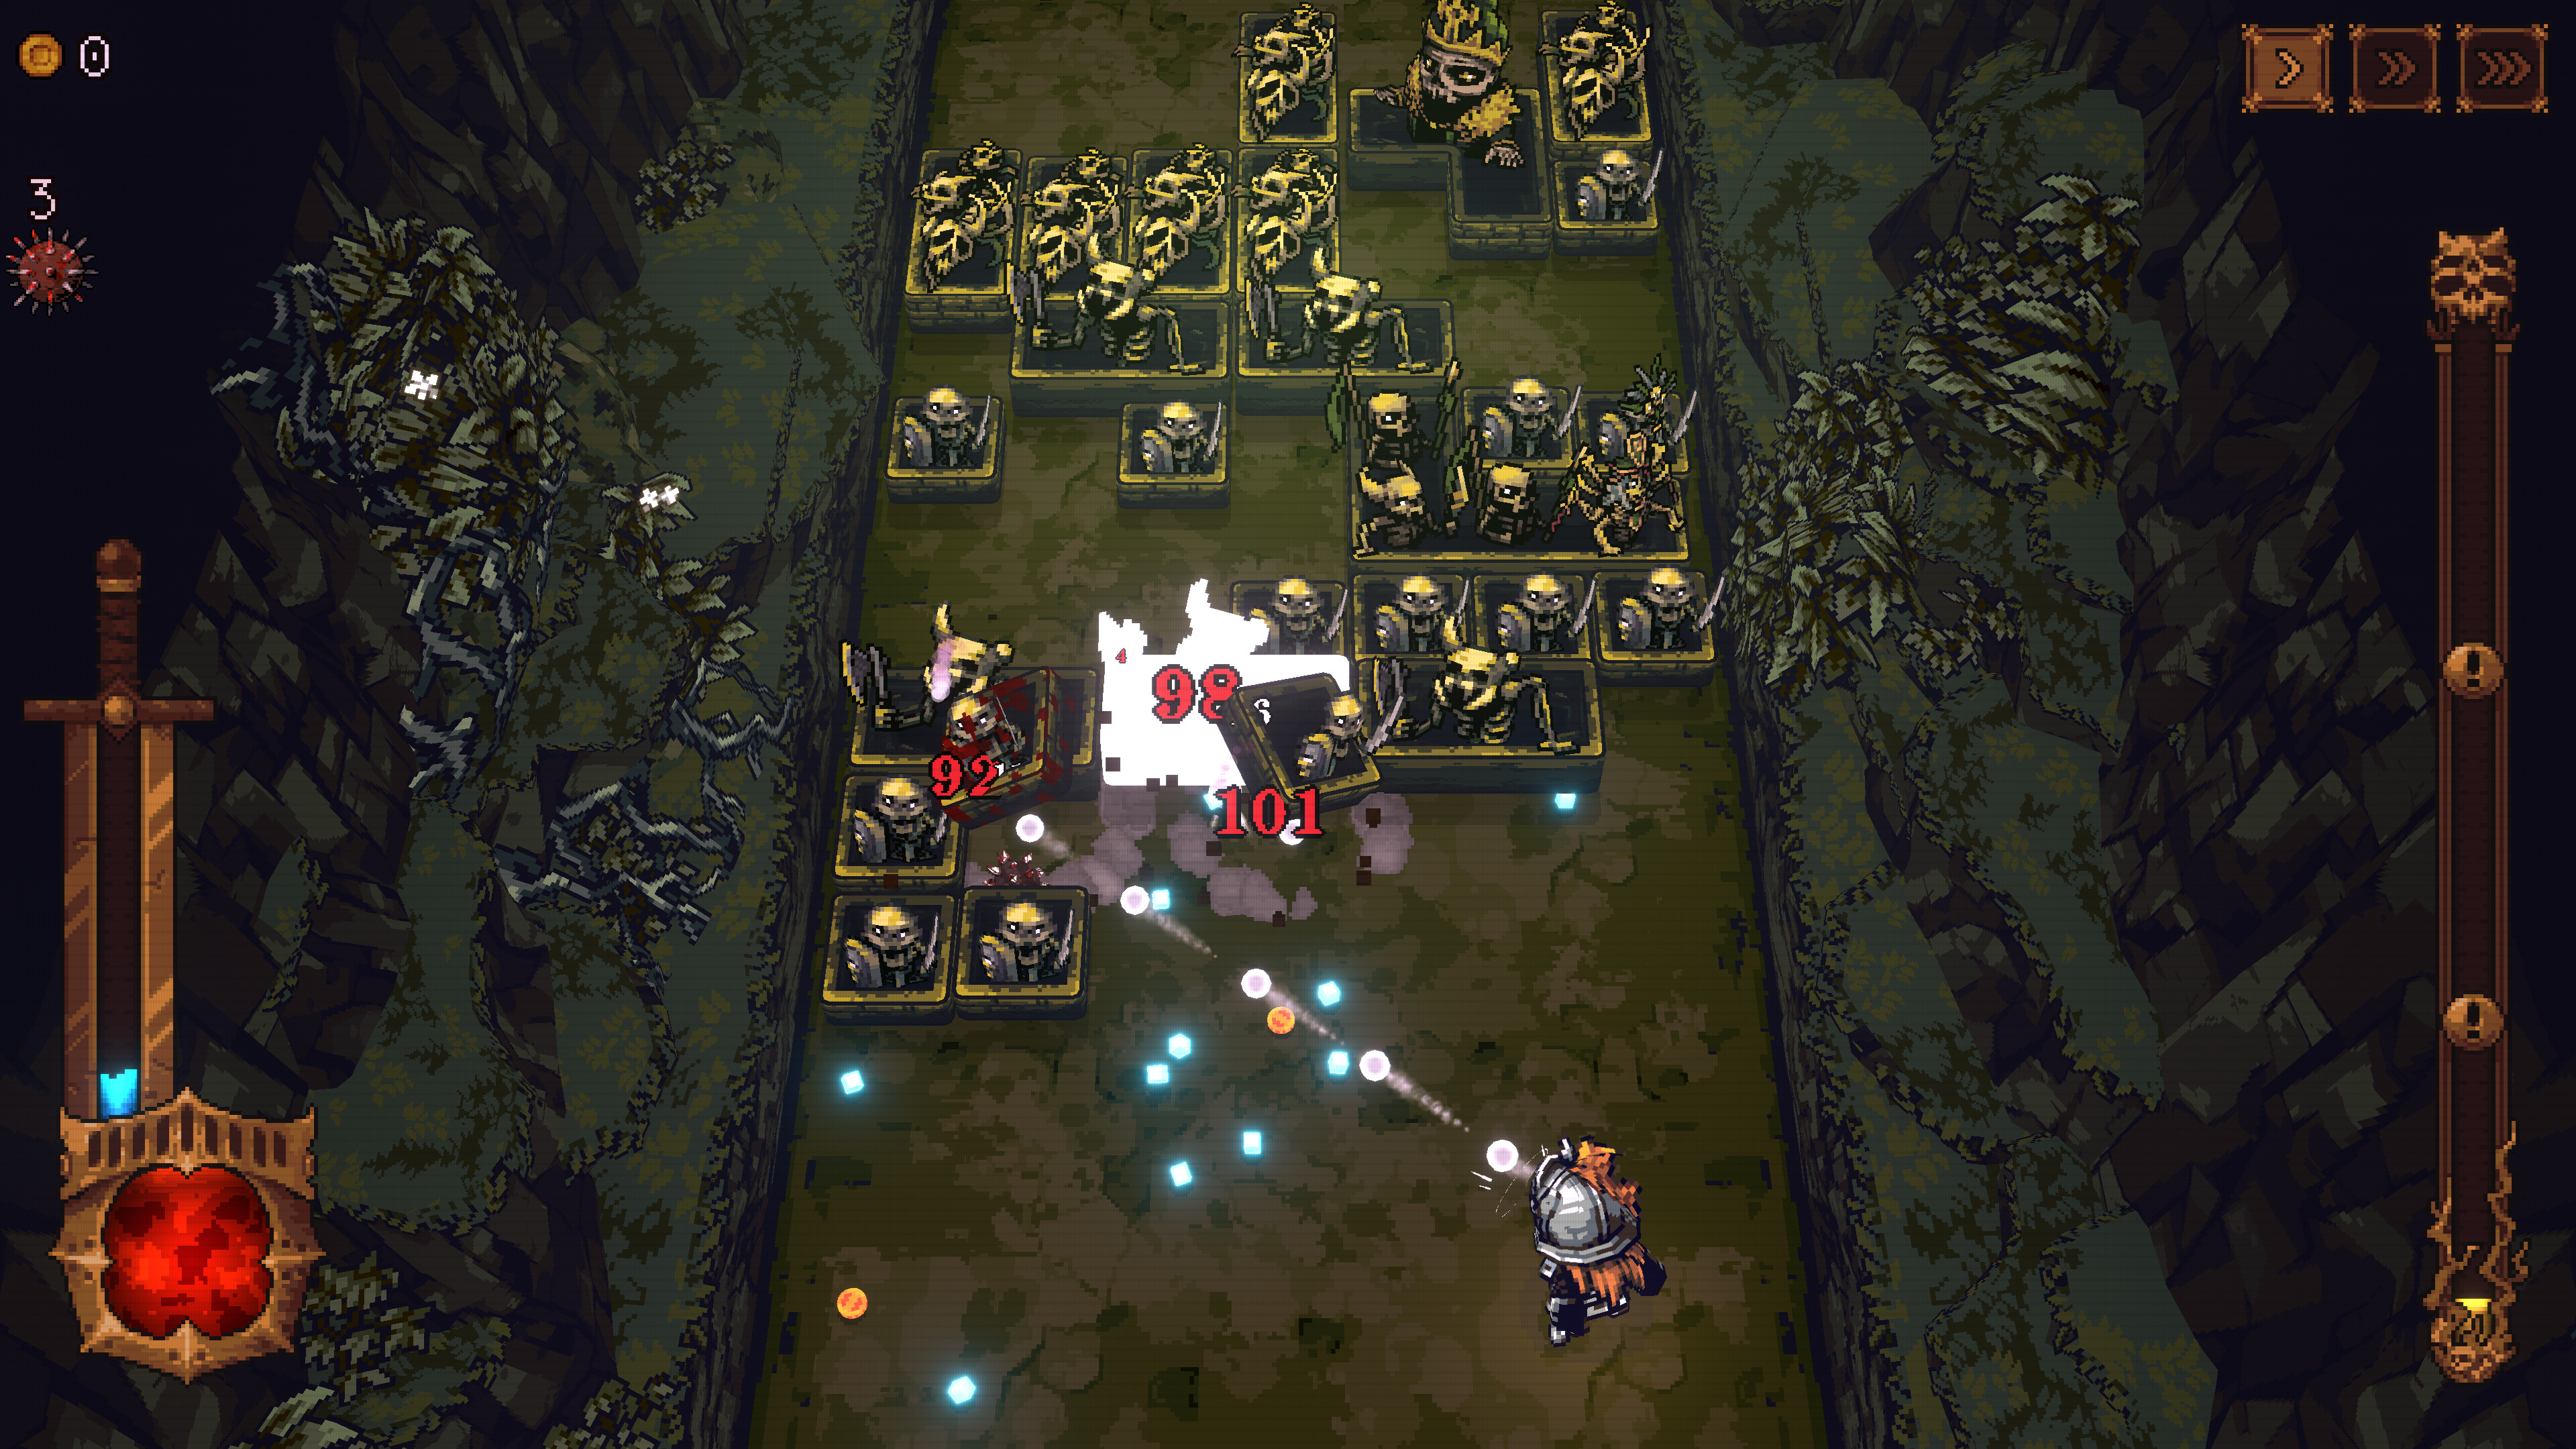
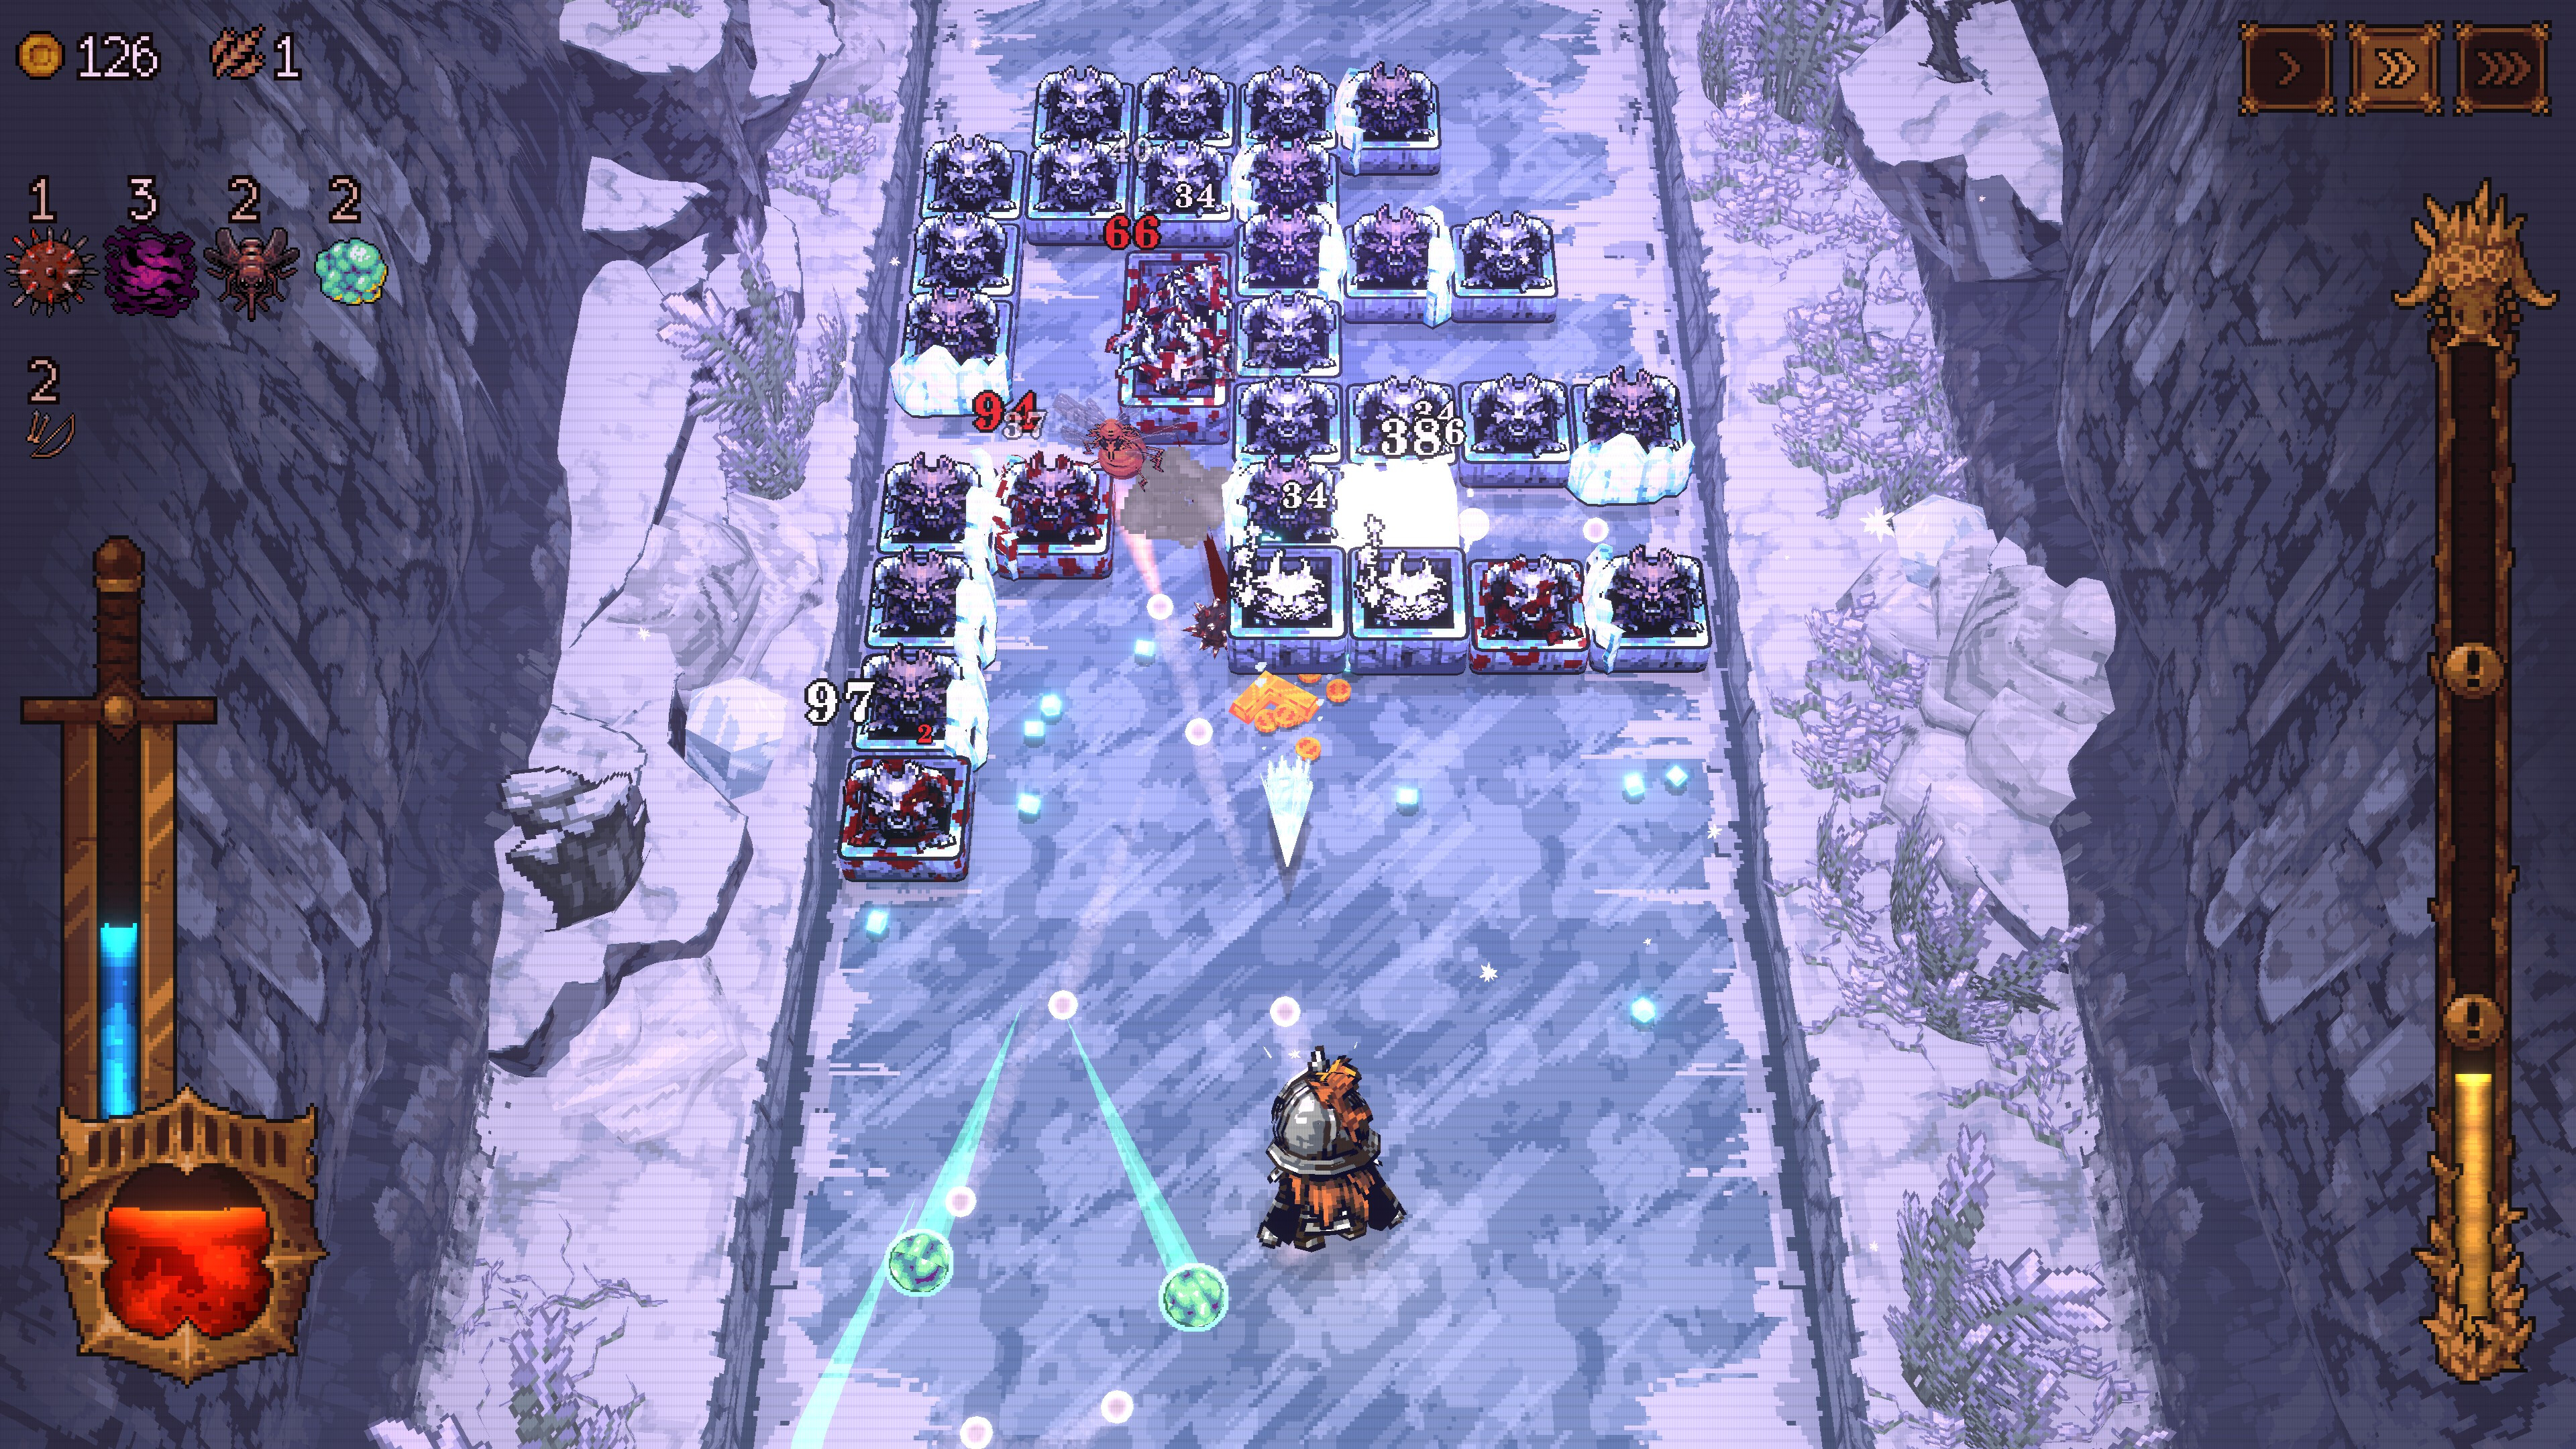
My only issue with Ball x Pit is that once you hit one of these major Bosses for an area, I feel like they can be damage sponges. They are also clever, to be clear! Hitting their weak spots usually involve bouncing the balls at certain angles while dodging attacks like bullet patterns. And since you're moving backwards instead of advancing like in the rest of the level, it changes things up. But I got the impression early on that some bosses seemed especially HP-heavy as a means of also sort of "forcing" us to engage with the New Ballbylon rebuilding project, which offer certain perks to attacks, materials for building, and additional characters. Like even though I was skilled enough to reach the first area's boss on the first try, It felt impossible to put a dent into that Skeleton King's HP bar because I didn't develop the town at all yet. I felt like it could be a bit of a bummer to reach a boss and then find that because I hadn't gone through enough runs to build things up, I couldn't last long enough to drop that health fast. Especially since the ball combination system means there is the potential to succeed with whatever random equipment is thrown at you.
Not that the New Ballbylon part is bad. It's relatively simple. You place buildings and material gathering points. Between runs, you aim and fire your units (like balls) at the space so they bounce around, hitting things to gather things up. Placing certain buildings is also how you unlock new characters. And we do very obviously feel the effects of these areas by developing the town. There's no penalization for not placing things optimally initially, since we can move parts around. And experimenting with layouts means you could work out ways to maximize hits when you do revisit the area between runs.

Ball x Pit is a novel game that combines many roguelike, block-busting, and city organization elements in a way that makes sense. It's quite clever, and I felt like it was pretty fair too! Due to the way ball fusions work and the nature of characters, it's pretty easy to feel empowered as you play. I did feel a bit disappointed to find actually taking down some bosses right away wasn't exactly an easy prospect due to not having build up New Ballbylon enough ahead of time. It is both creative and satisfying though, and scratches the same sort of itch as Vampire Survivors.
Ball x Pit is available on the Switch, PS5, Xbox Series X, and PC. A demo is available.
The post Review: Ball x Pit Combines Breakout and Vampire Survivors appeared first on Siliconera. |
Siliconera Wednesday, October 15, 2025 11:00 AM
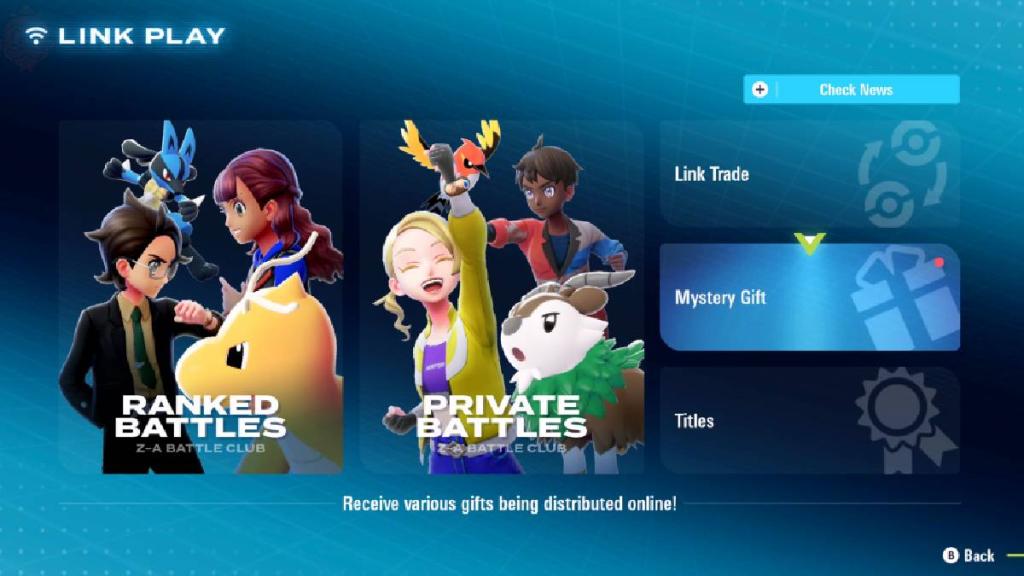
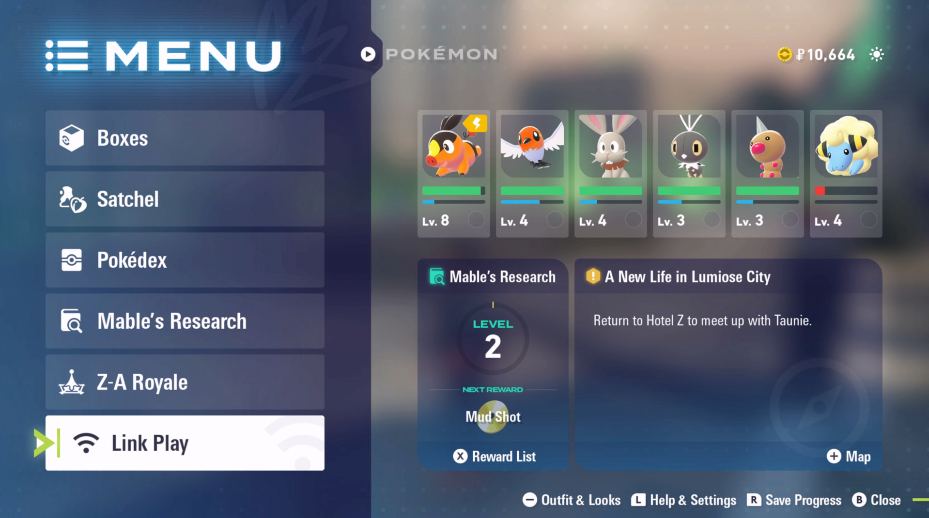
Nintendo and Game Freak announced the first patch for Pokemon Legends: Z-A, and it is an update that essentially gets folks online. The Japanese official site already updated with the incredibly brief patch notes, but the English support sites haven't as of time of writing. The only thing 1.0.1 does is apparently enable online elements like the Pokemon Legends: Z-A online multiplayer and trading.
Ahead of launch, Nintendo already talked about the online elements on the official site and store pages. After getting started, people can gain access to Link Play. This allows someone to take part in the four-player Battle Club. These are ranked or private battles that put a group of folks against each other all trying to be number one.
In addition to the battles, that section features a few other expected elements. There's a Link Trade feature for swapping Pokemon with other people. The Mystery Gift feature will return for getting special characters direct from Nintendo. There is also a section for Titles earned.
Here's the official photo of that Link Play menu Nintendo shared on the site:

Pokemon Legends: Z-A will come to the Switch and Switch 2 on October 16, 2025, and a day one update patch for online multiplayer and trading is available.
The post Pokemon Legends: Z-A Day 1 Patch Activates Online Multiplayer appeared first on Siliconera. |
Siliconera Wednesday, October 15, 2025 10:00 AM
Bandai Spirits and Sony Music Entertainment have announced that they will hold the second trial session for High Quality Gunpla Scan in Tokyo in late 2025. The companies will also add more optional content that users can access by paying extra.
Users would first have to pay ¥2,200 (~$14.50) to get a reservation to access the scanner. After completing the scan process, they will receive an email with a link to view their Gunpla's 3D model and modify its joint rigging.
The three new additional content will be available with separate purchases. More action types in the Action Studio will be available at ¥330 (~$2.20). Users can also pay ¥1,650 (~$10.90) to unlock an Action Simulator game that is playable on mobile devices. Last but not least, they can purchase a ¥1,100 (~$7.25) ticket to generate an MP4 movie starring one of their scanned kits.
High Quality Gunpla Scan is the continuation of 2022's Road To Gunpla Battle project, where the Bandai Namco group aims to produce a scanner that can generate playable 3D models of real Gunpla kits similar to the Gundam Build Divers anime series, the Gundam Build Real live-action drama, and the Gundam Breaker games. The first trial for this newer scanner took place in Fukuoka in February-April 2025.
The second trial session for High Quality Gunpla Scan will take place at The Gundam Base Tokyo from November 15 until December 14, 2025.
The post High Quality Gunpla Scan Will Get More Extra Content appeared first on Siliconera. |

Destructoid Wednesday, October 15, 2025 4:18 PM
Ratings Reload Team 2 is coming soon to FC 26, and the first set of leaks has started to make their rounds on social media.
The release of the first team confirmed that there will be at least one more promo team from Ratings Reload. So far, EA Sports has remained tight-lipped about which footballers will be present on them. Thankfully, the leaks can give us an early indication of what to expect from our packs for the coming week, starting Oct. 17.
Table of contents
All FC 26 Ratings Reload Team 2 players (leaks)
As of writing on Oct. 15, the full team 2 cards have been leaked.
More leaks are expected to arrive closer to the release date of Team 2 in Ultimate Team. Moreover, look out for cards that will be released as SBC and objectives. Obtaining those items will be significantly easier since you won't have to rely on luck.
As usual, expect to see names of footballers who might have received lower ratings than expected. That has been the central theme of the Ratings Reload promo, and it's expected to continue with Team 2.
FC 26 Ratings Reload Team 2 release date
Ratings Reload Team 2 will be in packs when Team 1 gets removed. In simple terms, the new cards will be available in packs starting Friday, Oct. 17. They will be in packs starting from 6pm BST/12pm CT, and you can obtain them if you're lucky.
Alternatively, you can also buy them directly with coins from the market. The prices of higher-rated items will be steep, so pay attention to that. The lower-rated items will be cheaper, and some could even prove to be a bargain.
Like our content? Set Destructoid as a Preferred Source on Google in just one step to ensure you see us more frequently in your Google searches!
The post FC 26 Ratings Reload Team 2 players leaks and release date appeared first on Destructoid. | ||||||||||||||||||||||||||||||||||||||||||||||||||||||||||||||||||||||||||||||||||||||||||||||||||||||||||||||||||||||||||||||||||||||||||||||||||||||||||||||||||||||||||||||||||||||||||
Destructoid Wednesday, October 15, 2025 4:09 PM
Evolution Stones have returned to Pokémon Legends Z-A, and there are plenty of types.
The function of these stones remains the same as in any other game in the Pokémon series. You will require them to evolve certain Pokémon, and they can be of immense use. Let's find out how you can find them all.
Disclaimer: We are still finding out more about the stones and which Pokémon each of them evolves. This guide will be updated accordingly.
Table of contents
All Evolution Stones in Legends Z-A

Here's a brief list of all the Evolution Stones inside the game and where you can find them. Do note that while the location remains the same, you'll unlock more options as you progress through the game and clear more content.
The Stone Emporium is what you are looking for, and it can be found around the south of the map, north of Zone one. From there you can get every stone you want. There are some Evolution Stones you can
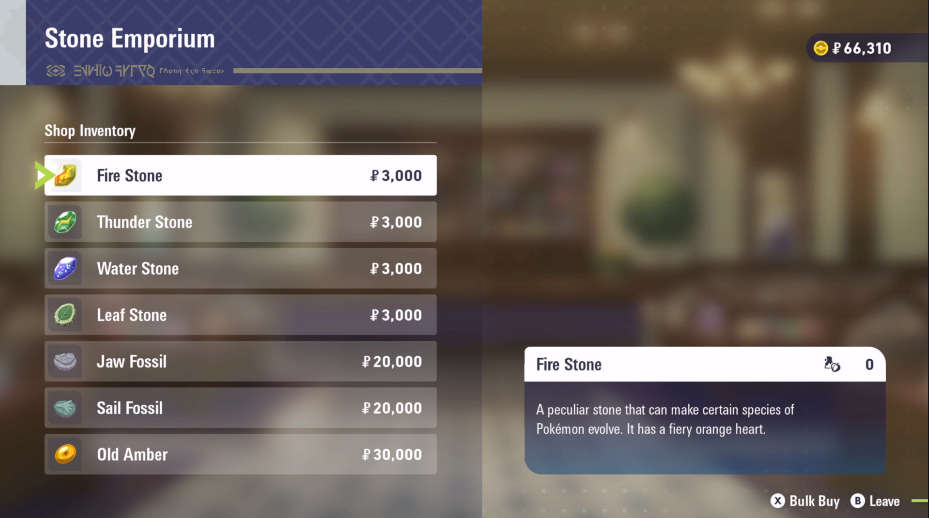
How to find a Fire Stone in Legends Z-A
This Evolution Stone is sold at the Stone Emporium, located in the southern part of the map, and it costs 3,000 Poké Dollars.
Pokémon that evolve with Fire Stone
How to find a Thunder Stone in Legends Z-A
Head to the Stone Emporium in the south of the map to buy this evolution stone for 3000 Poké Dollars.
Pokémon that evolve with Thunder Stone
How to find a Water Stone in Legends Z-A
You'll need to visit the Stone Emporium down south on the map to purchase this evolution stone for 3000 Poké Dollars.
Pokémon that evolve with Water Stone
How to find a Leaf Stone in Legends Z-A
The Evolution Stone can be bought for 3000 Poké Dollars at the Stone Emporium found in the southern area of the map.
Pokémon that evolve with Leaf Stone
How to find a Moon Stone in Legends Z-A
You can obtain this evolution stone by purchasing it at the Stone Emporium south of the map for 3000 Poké Dollars. This item will not be available from the start and will unlock over time as the story progresses.
Pokémon that evolve with Moon Stone
How to find a Shiny Stone in Legends Z-A
Visit the Stone Emporium in the southern section of the map; the Evolution Stone is available there for 3,000 Poké Dollars. You won't have access to this item right away— it becomes available later as you progress through the story.
Pokémon that evolve with Shiny Stone
How to find a Sun Stone in Legends Z-A
This evolution stone is available at the Stone Emporium in the map's southern region for a price of 3000 Poké Dollars. You don't get this item from the start; it unlocks as you move forward in the storyline.
Pokémon that evolve with Sun Stone
How to find a Dusk Stone in Legends Z-A
To get this evolution stone, go to the Stone Emporium located south on the map—it costs 3000 Poké Dollars. This item becomes obtainable over time through story progression rather than being available immediately.
Pokémon that evolve with Dusk Stone
How to find an Ice Stone in Legends Z-A
The Stone Emporium in the southern map area sells this evolution stone for 3000 Poké Dollars. Initially, this item is unavailable, but it will become accessible as the story progresses.
Pokémon that evolve with Ice Stone
How to find a Dawn Stone in Legends Z-A
The Ice Stone can be found at the Stone Emporium, located in the southern part of the map. It can be found in the screenshot near the marked Wild Zone 1. This item is not available at the beginning and will only be unlocked by progressing through the story.
Pokémon that evolve with Dawn Stone
Like our content? Set Destructoid as a Preferred Source on Google in just one step to ensure you see us more frequently in your Google searches!
The post All Evolution Stone locations in Pokémon Legends Z-A appeared first on Destructoid. | ||||||||||||||||||||||||||||||||||||||||||||||||||||||||||||||||||||||||||||||||||||||||||||||||||||||||||||||||||||||||||||||||||||||||||||||||||||||||||||||||||||||||||||||||||||||||||
Destructoid Wednesday, October 15, 2025 3:42 PM
Nokko conquered Warframe fans before his release thanks to his unique theme, fun kit, and all-around goofy demeanor. The sporeslinger uses a shrapnel of fungi to take down his foes and even defy death, which is far more hardcore than you'd expect from a guy who throws mushrooms at enemies.
It's not often you see the words "chaotic ballistic mushroom that seeks enemies" as an official description, and that alone may be enough to give Nokko a chance. The mushroomancer (to borrow a term from Tiny Tina's Wonderlands) boasts an impressive kit with a mix of damage and support, so it's worth adding him to your arsenal.
The Vallis Undermind update introduced Nokko and brought a new NPC to Fortuna: Nightcap, the foraging fungiphile. His new syndicate advances by finding mushrooms in Deepmine bounties instead of the usual Standing system, which likely indicates no daily caps. Here's how to get this unique Warframe.
How to get Nokko in Warframe

Nokko's parts are available as a reward for Nightcap's Deepmine bounties in Fortuna. The forager has three fixed, non-rotating missions, each with a chance to drop one of his parts and his Blueprint. Enemies are level 30-40, so don't expect heavy resistance.
If you'd like a jump in difficulty, the Nightcap also has a Steel Path version of one of the three bounties, which changes every couple of hours. It has a similar loot pool with better rewards, and the mode's signature Acolytes will also drop by around every five minutes.
Deepmine bounties have a different reward structure. Bonus objectives award more mushrooms at the end of a run, so players will get a Common, Uncommon, and Rare reward upon each completion.
If you can't get lucky with Nokko's RNG, Nightcap offers all of Nokko's parts for Fergolyte, though you must reach rank four with the vendor before you can purchase them this way. Building Nokko uses regular materials from Fortuna, so don't worry about new resources.
The post How to get Nokko in Warframe appeared first on Destructoid. | ||||||||||||||||||||||||||||||||||||||||||||||||||||||||||||||||||||||||||||||||||||||||||||||||||||||||||||||||||||||||||||||||||||||||||||||||||||||||||||||||||||||||||||||||||||||||||
Destructoid Wednesday, October 15, 2025 2:47 PM
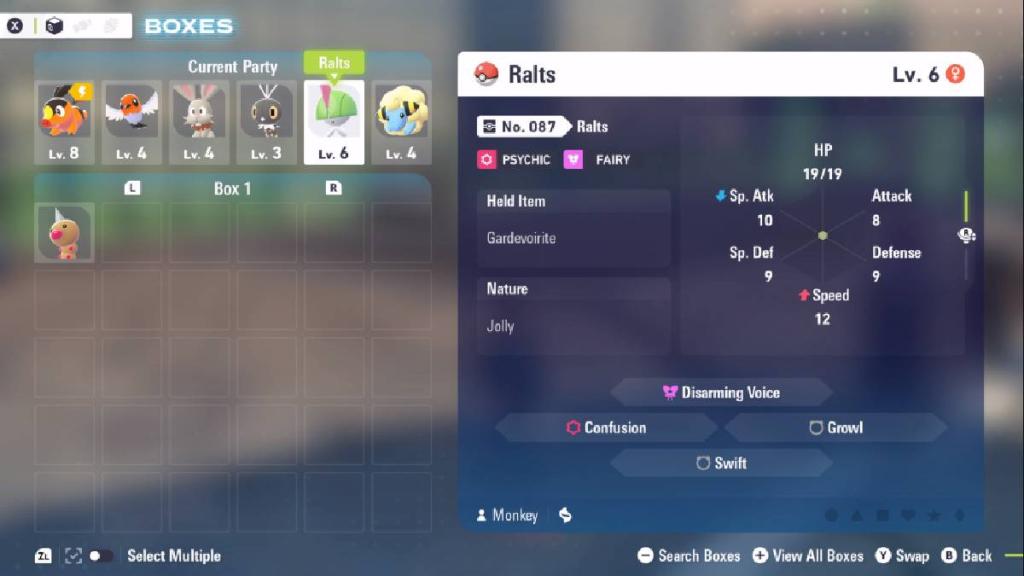
Pokémon Legends Z-A is finally here, and the latest entry in the long-running franchise continues one tradition, which is giving early adopters a gift Pokémon. This time around, folks who pick up the title in the first few months can grab a free Ralts, but there's even more to it after that.
If you do pick up this Ralts, it is holding a Gardevoirite, so you can easily add Mega Gardevoir to your party. Having access to such a good Psychic and Fairy-type Pokémon from the beginning can affect the team you want to build. So, to help you grab these lovely freebies, we're explaining everything in this guide.
How to unlock Mystery Gift in Pokémon Legends Z-A
You can unlock the Mystery Gift feature in Pokémon Legends Z-A simply by catching your first five Pokémon and unlocking Mable's Rewards. From here, you have access to online features like the Mystery Gift and Link Play.
How to get the Ralts Mystery Gift in Pokémon Legends Z-A
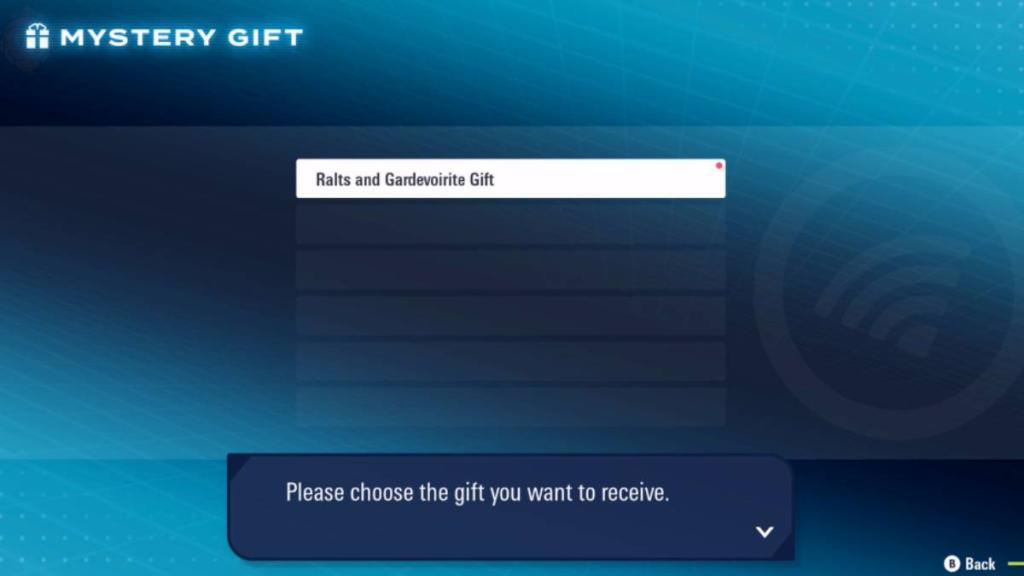
To get the Ralts Mystery Gift in Pokémon Legends Z-A, first unlock the Mystery Gift feature, then press X to open the menu, click Link Play, and then click Mystery Gift and select Connect To The Internet. From here, the game will scan for active Mystery Gifts, and Ralts holding a Gardevoirite will appear.
When does the Ralts Mystery Gift in Pokémon Legends Z-A end?

The Ralts Mystery Gift is live in Pokémon Legends Z-A until February 28th, 2026. This gives players around four months after the launch of the game to snag this free bonus, so be sure you don't miss out.
Can Mystery Gift Ralts in Pokémon Legends Z-A be Shiny?
No, the Ralts you receive through Mystery Gift in Pokémon Legends Z-A cannot be Shiny.
The post How to get Ralts and Gardevoirite Mystery Gift in Pokémon Legends Z-A appeared first on Destructoid. | ||||||||||||||||||||||||||||||||||||||||||||||||||||||||||||||||||||||||||||||||||||||||||||||||||||||||||||||||||||||||||||||||||||||||||||||||||||||||||||||||||||||||||||||||||||||||||
Destructoid Wednesday, October 15, 2025 2:40 PM
Days and nights in Pokémon Legends Z-A work based on a clock, and knowing when and how to change it is going to be super helpful.
Paying attention to the time and hour of the day is essential if you want to progress smoothly in the game. Certain actions can only happen at a specific time of the day. Instead of waiting for that particular hour, you can change the timings to your benefit. Let's find out how you can do so inside ZA.
Table of contents
How to change between night and day in Pokémon Legends Z-A
Changing time inside the game is straightforward, but the method isn't laid out in the open. To gain the ability, you'll have to progress through a fair amount of in-game content by following the main campaign. You'll first gain access to the hotel, and then get introduced to the remaining areas.
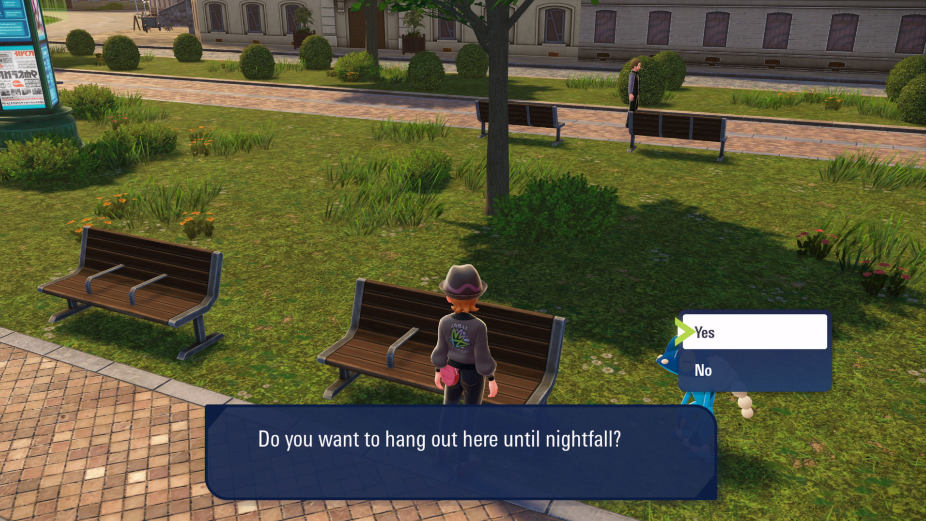
When you travel the city, you'll find benches like the one shown in the screenshot above. You can then interact with the bench to spend time, and the game just skips past the hours. While the system is neat, there are some limitations. You can only change the day and night cycles, which is enough. Alternatively, you can wait inside the game by doing nothing, but why would you even want to do that?
Should you change time in Pokémon Legends Z-A?
As you will find out, certain actions of the day happen in a specific hour. For example, certain Pokémon will only spawn at a given time of the day. Similarly, certain evolutions also require you to pay attention to the day/night cycle. To manage such situations, your only logical option is to use a bench and change time to your benefit.
Like our content? Set Destructoid as a Preferred Source on Google in just one step to ensure you see us more frequently in your Google searches!
The post How to change time of day in Pokémon Legends Z-A appeared first on Destructoid. | ||||||||||||||||||||||||||||||||||||||||||||||||||||||||||||||||||||||||||||||||||||||||||||||||||||||||||||||||||||||||||||||||||||||||||||||||||||||||||||||||||||||||||||||||||||||||||
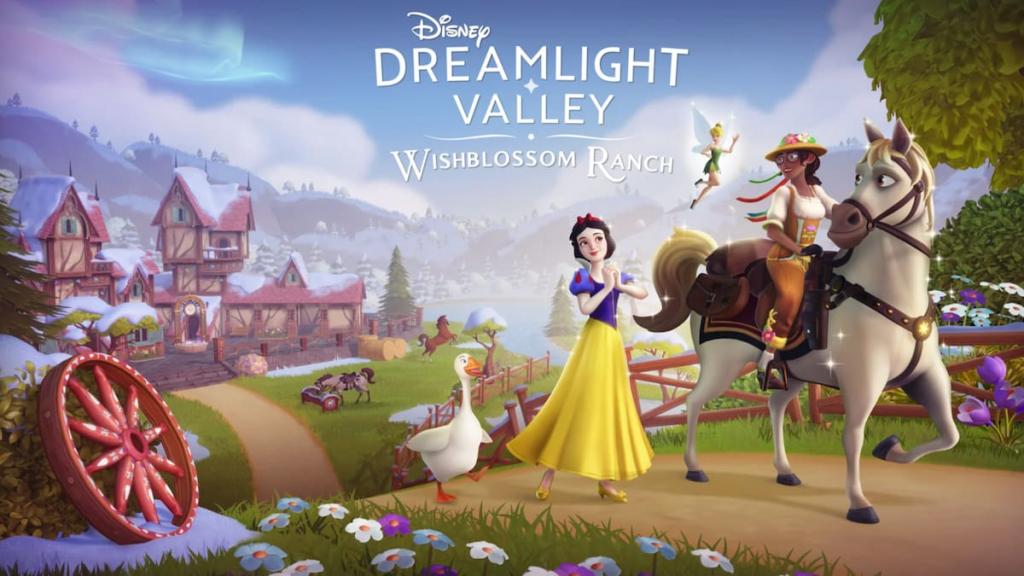
Destructoid Wednesday, October 15, 2025 1:30 PM
A fresh expansion is arriving soon for Disney Dreamlight Valley, and it looks like it could be the biggest one yet. Wishblossom Ranch is bringing horse mounts, a vast world, and plenty of characters to meet, so you'll want to know exactly when it's available so you can dive in as soon as possible.
DLCs are the largest batches of new content we get for DDV, so there's loads to uncover in this exciting expansion. If you want to ensure you're ready to get going as soon as possible, here's the exact time and date when the Wishblossom Ranch DLC will be released for Disney Dreamlight Valley.
Table of contents
When does Wishblossom Ranch release in Disney Dreamlight Valley?
The Wishblossom Ranch DLC officially launches in Disney Dreamlight Valley on Nov. 19. A precise release time hasn't been shared, but all DDV content, including The Storybook Vale DLC, has gone live at the exact same time in recent years, which is 8am CT. This means we can expect the DLC to launch at this time, too.
Although all past DDV updates and DLCs have launched at the same time, there's always a chance the release time could change. If it does, we'll update our timer here. It can also take up to two hours for new DDV content to roll out across all platforms, so depending on where you play, it may take a bit of extra time. We've set our countdown to exactly 8am CT and translated this time across major time zones to help you check when the DLC will be available in your area.
Wishblossom Ranch features in Disney Dreamlight Valley

Wishblossom Ranch has a wide variety of fresh content, including new characters, biomes, mounts, and much more. Here's a full breakdown of all key features you get in this pack.

To learn more about this expansion, you may want to review the official Wishblossom Ranch patch notes. And while you wait for the DLC to arrive, consider tackling important quests around the valley like Spirit Hunters, Belle, Book, and Candle, Serenade of Memory, and Here, There, and Everywhere.
Like our content? Set Destructoid as a Preferred Source on Google in just one step to ensure you see us more frequently in your Google searches!
The post Disney Dreamlight Valley Wishblossom Ranch release countdown: Exact start time and date appeared first on Destructoid. | ||||||||||||||||||||||||||||||||||||||||||||||||||||||||||||||||||||||||||||||||||||||||||||||||||||||||||||||||||||||||||||||||||||||||||||||||||||||||||||||||||||||||||||||||||||||||||
Destructoid Wednesday, October 15, 2025 1:30 PM
There's plenty to uncover in Wishblossom Ranch, including fresh faces to meet, new sights to see, and adorable animal companions you can befriend in Disney Dreamlight Valley. This world is unlike any other, so you may want to learn more about it before jumping in.
Reviewing key components of this DLC is also a good way to determine whether or not buying it is worth it for you. There's a lot to learn about in this one, so here are all of the biomes, horses, and critters features in Disney Dreamlight Valley's Wishblossom Ranch DLC.
Table of contents
Disney Dreamlight Valley Wishblossom Ranch biomes

There are three vast new biomes included in this DLC, all of which offer plenty of new items to obtain and secrets to uncover. Here's a breakdown of all three areas and what you need to know about each one.
Disney Dreamlight Valley Wishblossom Ranch horses and mounts

There are three iconic Disney horses and one additional mount featured in the Wishblossom Ranch pack. It's possible more could be unveiled in the future, perhaps as optional Premium Shop items, but for now, there are four to choose from, including:
In addition to the Disney horses and mounts, you can also customize your own horses and save them as presets. There are loads of customization options, including colors, patterns, clothing, hair types, and much more.
Disney Dreamlight Valley Wishblossom Ranch critters

Wishblossom Ranch comes with three critter companions you can befriend and unlock. Each type is exclusive to one biome in this pack, just like how critters in past DLCs have worked. The animals included in this pack are:
There's plenty more to uncover in this DLC, so check out the official Wishblossom Ranch patch notes next. If you're not sure what to do next, you might want to work on some key tasks around the valley, like finding all Painting Scraps in the Beauty and the Beast Realm, changing your Dream Castle skin, placing stalls in DLC worlds, and completing the A Guide to Better Castle-Keeping quest.
Like our content? Set Destructoid as a Preferred Source on Google in just one step to ensure you see us more frequently in your Google searches!
The post All Disney Dreamlight Valley Wishblossom Ranch biomes, horses, and critters appeared first on Destructoid. | ||||||||||||||||||||||||||||||||||||||||||||||||||||||||||||||||||||||||||||||||||||||||||||||||||||||||||||||||||||||||||||||||||||||||||||||||||||||||||||||||||||||||||||||||||||||||||
Destructoid Wednesday, October 15, 2025 1:30 PM
There are many iconic Disney characters you can unlock and befriend in Disney Dreamlight Valley. Most of them are available to all players, but there are some that are exclusively available in DLCs like Wishblossom Ranch.
Since all DLCs for DDV cost extra beyond the price of the base game, having a good understanding of what they include is crucial so you can decide if buying them is worth it. The characters included in the pack are perhaps the biggest factor to consider, as they offer loads of quests, rewards, and interactions you otherwise can't get. If you're unsure whether this one is right for you, here are all the characters featured in the Wishblossom Ranch DLC in Disney Dreamlight Valley.
Wishblossom Ranch villagers in Disney Dreamlight Valley

Wishblossom Ranch has four key characters you can unlock and befriend, which are Snow White from Snow White and the Seven Dwarfs, Cruella from One Hundred and One Dalmatians, Tinker Bell from Peter Pan, and Tigger from Winnie-the-Pooh.

There are also four iconic animal mounts you can meet and befriend in this pack. Although they're classified differently from regular characters, they do still come with special abilities and interactions. They're more detailed than critters, but less so than villagers, so they fall somewhere between the two. All of the iconic mounts you can get to know and ride around the valley are as follows.
If you're interested in adding more characters to your village, there are plenty of other ones to recruit outside of this DLC. Some good characters to work on unlocking are Lumiere and Cogsworth, Joy, Cheshire Cat, Maleficent, Sadness, and The Forgotten.
Like our content? Set Destructoid as a Preferred Source on Google in just one step to ensure you see us more frequently in your Google searches!
The post All Disney Dreamlight Valley Wishblossom Ranch characters appeared first on Destructoid. | ||||||||||||||||||||||||||||||||||||||||||||||||||||||||||||||||||||||||||||||||||||||||||||||||||||||||||||||||||||||||||||||||||||||||||||||||||||||||||||||||||||||||||||||||||||||||||
Destructoid Wednesday, October 15, 2025 1:28 PM
As part of the "Get Well, Fennekin" quest in Pokémon Legends ZA, you're tasked with finding a Revitalizing Twig in Wild Zone 5. While the zone itself is tagged on the map, the item's location isn't.
First, you will need a Water-type Pokémon with a Water-type move. If you haven't picked Totodile as your starter, an easy choice for this quest is Binacle, which has Water Gun as early as level seven. You can capture one in Wild Zone 2.
With the water Pokémon in your party, head to the East side of Wild Zone 5. That Wild Zone is the one directly southwest of the Lumiose Tower, which is in the center of the city. You can see the exact spot you need to head to on the map below.

In that area, you'll see two big mounts of purple goop blocking a stairway headed down. To clear them, select your Water pokémon with your D-Pad, aim for the goop, and use a move like Water Gun. The purple matter will disappear and unblock the stairs, which you will use to head down.

Going down, you will see a tunnel blocked by the purple goop once again. Repeat what you just did in the surface: bring out your Pokémon, aim for the goop, use a Water-type move, and clear the material to enter the tunnel.

You'll spot a strong Lv. 28 Alpha Whirlipede in the enclosed area that the tunnel leads to. That's likely too strong for you to take on, so I suggest you just avoid it and collect the five glowing spots in the area until you get the Revitalizing Twig.

With the Twig in hand, you can return it to Branche to get Fennekin after completing the "Get Well, Fennekin" quest in ZA. Remember that this Fennekin in particular is shiny-locked, like all Pokémon you get as gifts in ZA.
The post How to find a Revitalizing Twig in Pokémon Legends Z-A appeared first on Destructoid. | ||||||||||||||||||||||||||||||||||||||||||||||||||||||||||||||||||||||||||||||||||||||||||||||||||||||||||||||||||||||||||||||||||||||||||||||||||||||||||||||||||||||||||||||||||||||||||
Destructoid Wednesday, October 15, 2025 1:08 PM
The Max 87 Base Hero Upgrade SBC is now live in FC 26, and you can add a guaranteed Hero to your Ultimate Team squad by completing the challenge.
While the structure and format of this SBC are similar to the one we had over the last couple of weeks, the rewards are better. The 87-rated Heroes have been added to the pool of rewards, and there are some amazing cards you can get.
Complete list of FC 26 Max 87 Base Hero Upgrade SBC rewards
The Max 87 Base Hero Upgrade SBC only offers Hero items rated between 85 and 87 overall ratings. The following list contains every card available in the pool of rewards.
Once again, not all cards of this SBC are worth the completion cost. Only gamble away your fodder or coins if you're willing to take the risk.
Like our content? Set Destructoid as a Preferred Source on Google in just one step to ensure you see us more frequently in your Google searches!
The post All FC 26 Max 87 Base Hero Upgrade SBC rewards appeared first on Destructoid. | ||||||||||||||||||||||||||||||||||||||||||||||||||||||||||||||||||||||||||||||||||||||||||||||||||||||||||||||||||||||||||||||||||||||||||||||||||||||||||||||||||||||||||||||||||||||||||
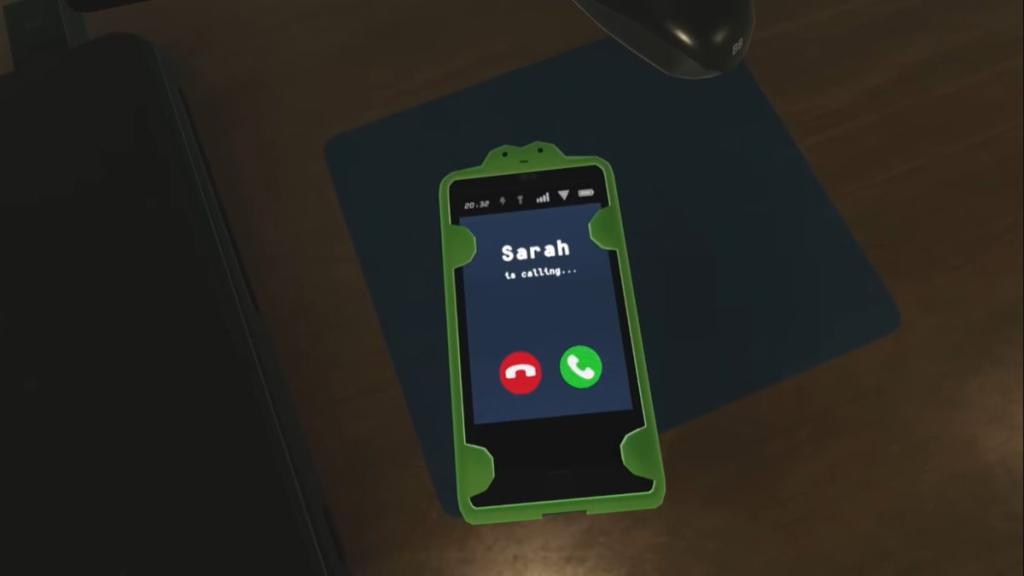
Destructoid Wednesday, October 15, 2025 12:49 PM
A missing friend whose face becomes more blurry as each day passes, Face of Another pulls you into a glitchy world where you must figure out what happened to her before it happens to you too.
Face of Another isn't an adaptation of the 1986 film with the same title. Rather, it's an indie horror title with a clear message: social media can be extremely harmful. While this is something we are all very much aware of, I feel this game executes the dark side of the internet and our obsession with comparing ourselves to others better than Silent Hill: A Short Message.
Here is our explanation of the Face of Another game, diving into its story and what both endings mean for Emma.
Content warning for dark themes: self-harm and suicide.
Table of contents
Face of Another story, explained
Face of Another has a strange and ominous start that quickly sets a foreboding tone. Knowing off the bat that Emma's friend has been missing for the last three days, yet she cannot remember her face without checking her phone's lock screen, is rather worrying. How could you forget a friend's face so quickly? While Emma works on her school assignment, she's distracted by her laptop running out of charge and the shower running by itself.
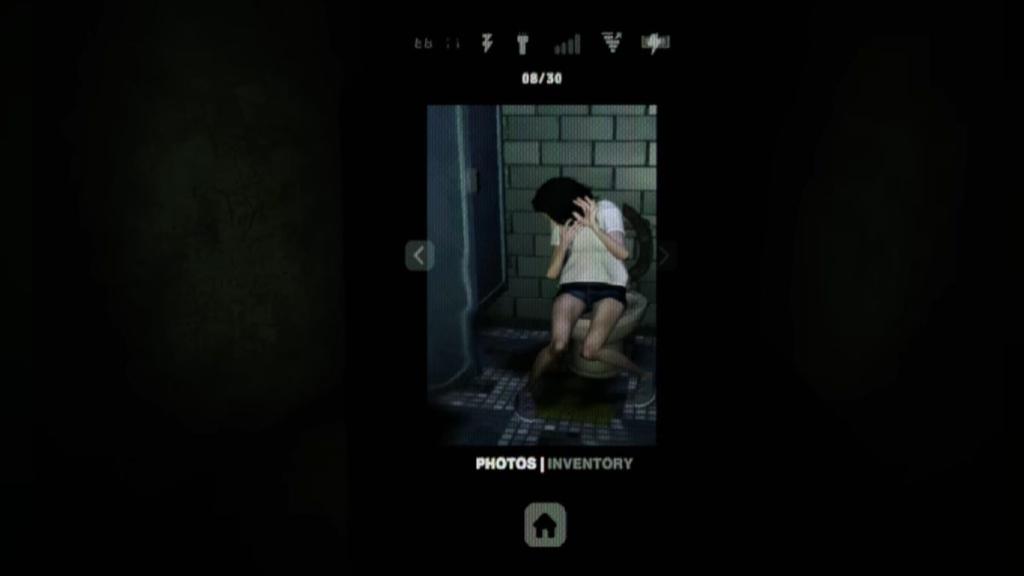
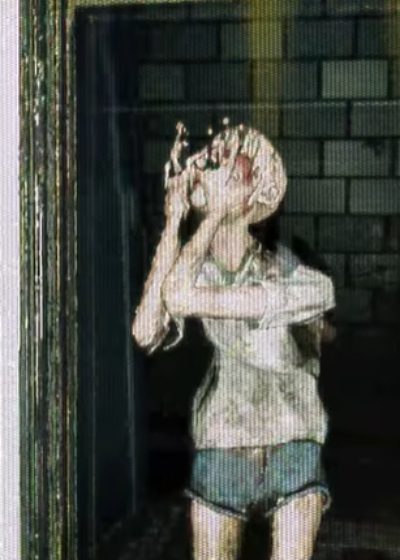
The distinct sound of a camera flash appears in front of her as she investigates the bathroom. Someone's messing with her. She's forcibly removed from reality through a malware attack disguised as a slot machine game on her laptop, showing the unsolicited bathroom picture that was just taken without Emma's consent. This would later become a full circle moment for Emma as she's brought into a glitchy digital realm where she must rely on her camera phone to pave the way forward.
Emma has to navigate across this digital world while being actively pursued, toyed with, and tricked by an entity that masquerades as others. Similar to Junji Ito's The Face Burglar, Face of Another has a trickster of a villain who steals the faces of others—presumably to fit in. It's much like how social media fuels jealousy and competitiveness, where we pretend to be better off than we actually are, just to enforce a higher status or greater importance than our peers. We—like the entity Emma's fleeing from—are a projection of those we copy and want to so desperately be. Even when we're captured by the entity, our face is added onto Sarah's, clearly labeling us as two-faced.
"Technology distorts reality," as written on the Steam product page, showcasing that what we see online isn't real life. Social media can contribute to declining mental health, especially if you're a victim of cyberbullying. This was the case for Mia. The places we visit aren't of Emma's memories, but rather of Mia's. We look at pieces of her suicide note, explaining her dark thoughts of wanting nothing more than to disappear. She was only a kid. The fact that Emma is writing up a school assignment about social media at the start tells us that Sarah's disappearance didn't happen too long after Mia's death.
The reveal is that Emma and Sarah took pictures of Mia following an accident at school, where she wasn't allowed to go to the restroom. The camera flashes, taking three pictures of Emma trying to cover her face as she's trapped in the stall, unable to retaliate against the bullies. It's implicitly suggested that Emma took her own life following the bullying. She feared the images would spread like wildfire, making it impossibly hard for Mia to continue as if nothing happened. Instead of fearing the entity chasing us, our attention switches to judgment and betrayal as we were looking for—and playing as—pathetic bullies.
Consumed by the darkness of media, Mia chose to leave the world, opting to go into the phone screen instead. It could be viewed that we are running from our guilt and the twisted version of Mia that we forced on her. It's unlikely anything we've seen is real, but if it is, then Mia was lured by the faceless entity, which consumed and posed as her, choosing Emma and Sarah as its next victims. The entity takes the form of Mia, wearing the same clothes as seen in the toilet stall pictures. Alternatively, the entity could be Mia, whose reality has been completely distorted, where she became a vengeful spirit who desires to be anyone but herself.
Face of Another endings, explained
There are two endings in Face of Another, determined by your first and only choice in the game that arrives at the finale. After warding off the evil and finding Mia submerged in a bathtub full of a black substance, we can either sever the ties to those photographs or leave them alone. We believe this symbolizes the act of deleting the photos and letting Mia move on, or leaving them up, and maybe even posting them online.
Ending one (Bad)

Emma will become part of the glitchy world she was trying to leave if you choose to take a photo of Mia without pulling the wires to the pictures of her helplessly trying to cover herself in the toilet stall. This is her punishment. She disappears into the ether, much like Sarah did. Her face, her entire image vanishes from existence. The game promises no one will remember her—a fate that many would fear.
This is exactly what happened to Sarah, who was taken in front of her laptop by the entity consuming her essence and stealing her face. The entity purposely left remnants of Sarah behind through the blurred images on Emma's phone, luring Emma in so that she'd suffer the same fate. If we look at it from the psychological horror perspective, her disappearance alongside Sarah could mean they've succumbed to their guilt and followed in Mia's footsteps—"into the screen."
Ending two (Good)
The better ending for Emma is to escape the world after severing the wires between Mia and those stall photos. We believe this means the pictures were deleted; however, it appears that the damage is already done. For this is a psychological horror, we can only assume the digital world doesn't actually exist in this form and that this was the guilt manifested in Emma and Sarah following Mia's death. I suppose deleting the images would more so act as a way for Mia to find peace, and that the girls didn't post the images after all, but the overwhelming and suffocating fear that they might is what killed Mia.
Emma wakes to the sound of her phone ringing. It's Sarah. The conclusion is rather ambiguous, for the last call we got from her was the entity's creepy message: "Oh, how nice it must feel...to wear your skin." But we believe Sarah's phone call at the end means they've moved on, grown as people, and know never to humiliate a person again, for the repercussions are too severe, and you can never truly take it back.
Like our content? Set Destructoid as a Preferred Source on Google in just one step to ensure you see us more frequently in your Google searches!
The post Face of Another story and endings, explained appeared first on Destructoid. | ||||||||||||||||||||||||||||||||||||||||||||||||||||||||||||||||||||||||||||||||||||||||||||||||||||||||||||||||||||||||||||||||||||||||||||||||||||||||||||||||||||||||||||||||||||||||||
Destructoid Wednesday, October 15, 2025 12:12 PM
If you're looking to add Pikachu to your party pretty quickly in Pokémon Legends Z-A, this guide will help you out with all the steps.
While you can find plenty of Pokémon when you start exploring the map, it takes a bit more time to reach Pikachu. This is mainly due to Pikachu being part of the A Use for an Evolution Stone quest. This guide will help you complete the side quest and add the Electric Pokémon to your roster.
How to complete "A Use for an Evolution Stone!" side quest in Legends Z-A
Starting the "A Use for an Evolution Stone" side quest is relatively simple. First, keep clearing the main content of Legends Z-A till you unlock side quests. Finding Pikachu is actually the final step of the quest. All the prior tasks should be self-explanatory.
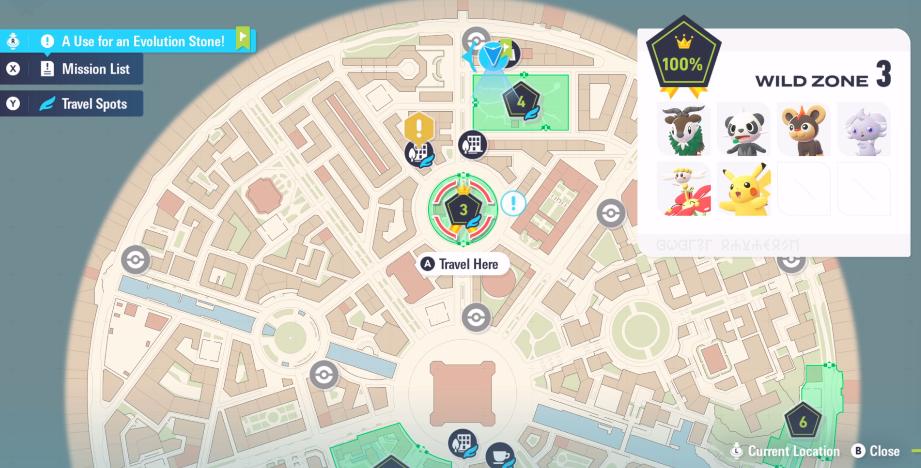
So how do we find Pikachu? Once you reach the final step, you'll have to travel to the marked location that says "Travel Here" on the screenshot above. The marked location on Wild Zone 3 is typically where Pikachu spawns, and you can capture one by being a bit patient. The area is towards the north of the center.
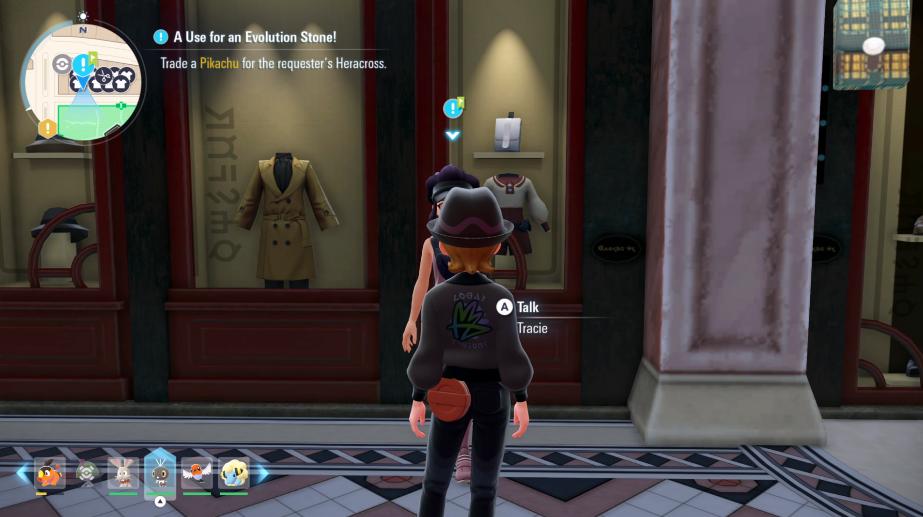
Once you have captured Pikachu, return to the NPC who gave you the quest (her location will be marked on the map). Give her your catch, and you'll get a Heracross for your efforts. This will also complete the "A Use for an Evolution Stone" mission, which rewards you with the following items:

It's a neat payout for what's essentially a straightforward side quest. Additionally, you can always go back to the location to find a Pikachu for your own party, while keeping all the goodies that you just earned.
Like our content? Set Destructoid as a Preferred Source on Google in just one step to ensure you see us more frequently in your Google searches!
The post How to find Pikachu in Pokémon Legends Z-A appeared first on Destructoid. | ||||||||||||||||||||||||||||||||||||||||||||||||||||||||||||||||||||||||||||||||||||||||||||||||||||||||||||||||||||||||||||||||||||||||||||||||||||||||||||||||||||||||||||||||||||||||||
Destructoid Wednesday, October 15, 2025 12:11 PM
Season 2 is coming to NBA 2K26 very soon, and we have confirmation about the exact date and time.
NBA 2K and Visual Concepts will follow the same schedule, as the second season will directly succeed the first one. As of writing on Oct. 15, you still have a few days to complete the Season 1 Pass. If you're all done with that, this guide will help you keep track of when the new season goes live in NBA 2K26.
Table of contents
NBA 2K26 Season 2 release countdown
The release timing for the new season was confirmed when NBA 2K released the patch notes for update v2.0. The countdown below will expire once the new season is live.
The countdown is set to the following times.
The season goes live at the same time on both PC and console, and the Season 2 Pass will be available for all modes.
NBA 2K26 Season 2 Pass rewards
We now have information about the highlight rewards that will be available in Season 2. The rewards will be spread across MyCareer and MyTeam. Here are the highlight items that you can use in MyCareer.
MyTeam players will be getting plenty of special cards throughout the course of the new season.
If you opt for the paid upgrade, you'll get 40 additional rewards, featuring VC, promo cards, and more. Doing so will cost you upwards of $10. The complete list should be available with the new season when it goes live on Friday.
Like our content? Set Destructoid as a Preferred Source on Google in just one step to ensure you see us more frequently in your Google searches!
The post NBA 2K26 Season 2 release countdown: Exact date and time, season pass rewards, and more appeared first on Destructoid. | ||||||||||||||||||||||||||||||||||||||||||||||||||||||||||||||||||||||||||||||||||||||||||||||||||||||||||||||||||||||||||||||||||||||||||||||||||||||||||||||||||||||||||||||||||||||||||
Destructoid Wednesday, October 15, 2025 12:00 PM
Ball x Pit is what you get when you combine a ball-launching brick breaker game with roguelike elements and base-building. If it sounds ridiculous, that's because it kind of is, but in the best ways.
From lead developer Kenny Sun, Ball x Pit was a game that caught my eye immediately during Steam Next Fest earlier this year, and it lived up to the hype and then some as one of the more unique twists on a tried and true genre that is worth every penny of its shockingly low price tag, and more.
You've gotta have balls

Break bricks with balls while dodging enemy attacks on a vertically scrolling battlefield, build your base, use more bouncing balls to farm materials, rinse and repeat. This is the simple, basic gist of the gameplay for Ball x Pit, but it's utterly addictive and presented in a way that scratches a very specific itch for me, making it a must-play for anyone who enjoys any of these sorts of genres.
In my 20-plus hours with Ball x Pit during the review period, I would constantly find myself playing in small increments of anywhere from 15 minutes to an hour (either on my PC or on my Steam Deck with its perfect performance), and I somehow always found myself coming back to it soon after to keep the progression flowing.
There's next to no narrative to speak of in Ball x Pit, so if you're looking for a strong story or dialogue, it's not here. But that's fine, because the gameplay loop is what brings you back in for more every time. "Ballbylon has fallen," the game's description reads. "After a meteoric and completely unexpected event annihilated the great city, all that remains is an ominous, yawning pit. Treasure hunters from far and wide flock to the city's tomb to seek their fortune, plumbing the depths in search of Ballbylon's scattered riches. Few return."
Using these unique characters and special balls to break enemy-shaped bricks in the pit below to help rebuild your growing city of New Ballbylon, you unlock new ability-based balls, playable heroes, and blueprints to build out your base as you complete successful runs on a variety of stages. Advancing up the screen and clearing out the brick-like enemies in front of you is your task, with a boss awaiting at each level's end. Watching the screen fill up with balls as they bounce to and fro while chipping away at enemies is a delight that never gets old.

Combining balls to evolve them into something new entirely is a blast, like taking one that causes bleed damage and fusing it with one that spawns baby balls, creating a Leech that attaches to enemies and saps them for HP. Using and discovering different combos is a good amount of fun as you focus on progressing through the pit's various environments.
There are 15 playable characters who come with different abilities and starting balls, and a few dozen different combinations you can create by fusing and evolving balls together, so each run feels unique depending on what upgrades you choose and who you play with. It never really gets too mundane, and if it does, there's a late-game character who quite literally plays the game for you if you want to play passively as you do something else.
Building something special

Outside of the addictive ball-bouncing and brick-breaking in the pit, your home base grows over the course of the game with new buildings and structures that supply buffs to base gameplay or resource farming, along with housing all of your characters.
Each run in the pit takes anywhere from 12 to 15 minutes, at which point you then return to New Ballbylon to focus on upgrades and resource-farming before heading back in for some more ballsplosions and boss fights with different character and ball combinations.
Filling out New Ballbylon with wheat, trees, and rocks to farm for materials to continue building and progressing is done by launching your playable characters into the city itself, bouncing off everything in a satisfying fashion along the way. Fitting buildings next to farming areas that maximize your resources feels a bit like a puzzle minigame, and there's a lot of swapping and rotating to be done to make sure you get as much as you can so you can afford upgrades.
There's a dedicated endpoint to Ball x Pit, and it came rather suddenly for me and thrust me into New Game Plus before I was able to finish out a few achievements, and that was quite annoying. But it's one of the very few faults in a game that should easily supply a couple dozen hours of enjoyment for completionists.
I also do wish there was a bit more of a challenge to the game, as there's a base difficulty level and then NG+, but by the end of my hours with Ball x Pit, I felt pretty overpowered with all of the upgrades I had acquired. This did little to take away my overall enjoyment, however, and I'll remember the game fondly long after, especially since it's somehow just $15. I think an argument could be made that it's easily worth double that in today's environment.
Like our content? Set Destructoid as a Preferred Source on Google in just one step to ensure you see us more frequently in your Google searches!
The post Ball x Pit review – The most fun I've ever had with balls appeared first on Destructoid. | ||||||||||||||||||||||||||||||||||||||||||||||||||||||||||||||||||||||||||||||||||||||||||||||||||||||||||||||||||||||||||||||||||||||||||||||||||||||||||||||||||||||||||||||||||||||||||
Destructoid Wednesday, October 15, 2025 12:00 PM
Do you have the balls required to enter the pit?
In Ball x Pit, the brick-breaking and ball-bouncing bonanza from Kenny Sun and Devolver Digital, it's all about using your balls to defeat enemies. But you can also combine your balls to create special ones to deal more damage to the field, and it's a blast.
Here's a list of all the balls you can find and combine in Ball x Pit, along with all of the characters that start with each different basic ball.
Table of contents
All Balls in Ball x Pit

These are the basic Special Balls that can be found in the game by picking up gems and leveling up in each run of Ball x Pit, and some of them are starter items held by specific characters.
All Ball x Pit Special Balls
All Ball x Pit Evolution Balls

Once two Special Balls are level three, they can be combined to create new Evolution Balls. After 20-plus hours, six Evolution Balls are still missing from our collection. They will be added in once we have found them.
Like our content? Set Destructoid as a Preferred Source on Google in just one step to ensure you see us more frequently in your Google searches!
The post All Special Balls in Ball x Pit appeared first on Destructoid. | ||||||||||||||||||||||||||||||||||||||||||||||||||||||||||||||||||||||||||||||||||||||||||||||||||||||||||||||||||||||||||||||||||||||||||||||||||||||||||||||||||||||||||||||||||||||||||
Destructoid Wednesday, October 15, 2025 12:00 PM
After making waves as a surprise Steam demo earlier in 2025, Ball x Pit is here for all of your ball-bouncing and brick-breaking needs across a few dozen hours of fun.
There are 15 unique characters in Ball x Pit that all have their own starting Special Ball and special ability that sets them apart from the rest. Eventually, you unlock the ability to use two characters at once, and combining their balls and abilities to create unique combos is some of the most fun the game offers.
Here are all of the characters in Ball x Pit and what you need to know about them.
Table of contents
All Ball x Pit characters
How to unlock new characters in Ball x Pit
New characters in Ball x Pit are unlocked by completing levels with characters for the first time. Each time you progress and finish an existing level, you unlock blueprints to build new buildings at your base.
Some of these blueprints are for houses that house the characters. Simply play and complete each level with a character who has not finished the level before, and you will unlock blueprints. Then, build the character's house and place it in your base to unlock them as a new playable character.
Like our content? Set Destructoid as a Preferred Source on Google in just one step to ensure you see us more frequently in your Google searches!
The post All characters in Ball x Pit appeared first on Destructoid. | ||||||||||||||||||||||||||||||||||||||||||||||||||||||||||||||||||||||||||||||||||||||||||||||||||||||||||||||||||||||||||||||||||||||||||||||||||||||||||||||||||||||||||||||||||||||||||
Destructoid Wednesday, October 15, 2025 11:51 AM
Pokémon Legends: ZA brings back many long-running Pokémon traditions, including the ability to give your Pokémon a unique nickname to set it apart from the rest of its kind.
If you're like me, you've probably given one of your Pokémon a nickname you immediately regretted ever thinking of at least once. Luckily for us, Pokémon Legends: ZA has made it easier than ever to change your Pokémon's nicknames.
How to change your Pokémon's nickname in Legends ZA

The ability to change your Pokémon's nickname becomes available to you after your first battle with your chief rival, Urbane or Taunie. Thankfully, beating these two isn't very hard, since they follow post-Generation 6 rival rules and always pick the starter Pokémon that's weak to yours. Just keep hitting their starter with your starter's Grass, Fire, or Water move until they're thoroughly KO'd.
Once you've beaten Urbane/Taunie, you can change your Pokémon's nickname through the menu. To open it, press the X button. The menu shows you all the Pokémon you have on your team. To change a Pokémon's nickname, highlight its icon, then click the "Check Summary" option. Once you're on this page, hit the minus button to change their nickname.
As is tradition, your Pokémon's nickname can be twelve letters long at most. While I haven't dabbled around with the nickname generator too much, I'd watch what you plug in: previous Pokémon games censored inappropriate nicknames, and I doubt Pokémon Legends: ZA has broken away from that tradition.
While Eggs and breeding may not be available in Pokémon Legends: ZA, I'm ecstatic that Game Freak's made it easier to change your Pokémon's nickname. Looks like the days of tracking down the Name Rater and subjecting ourselves to his merciless judgment are well and truly past us.
The post How to change Pokémon nicknames in Legends Z-A appeared first on Destructoid. | ||||||||||||||||||||||||||||||||||||||||||||||||||||||||||||||||||||||||||||||||||||||||||||||||||||||||||||||||||||||||||||||||||||||||||||||||||||||||||||||||||||||||||||||||||||||||||
Destructoid Wednesday, October 15, 2025 11:44 AM
It's time to return to Kalos, with the thrilling new entry in the monster-taming franchise, called Pokémon Legends Z-A. However, unlike Pokémon X and Y, your starters this time are Chikorita, Tepig, and Totodile, continuing the inter-generational trend started in Pokémon Legends Arceus.
If you're one of the many folks hoping to find the original X&Y starter trio, namely Chespin, Fennekin, and Froakie, you are thankfully in luck. There are a couple of different ways to find the Kalosian starters in ZA, so we're detailing them all right here.
Where to find Froakie
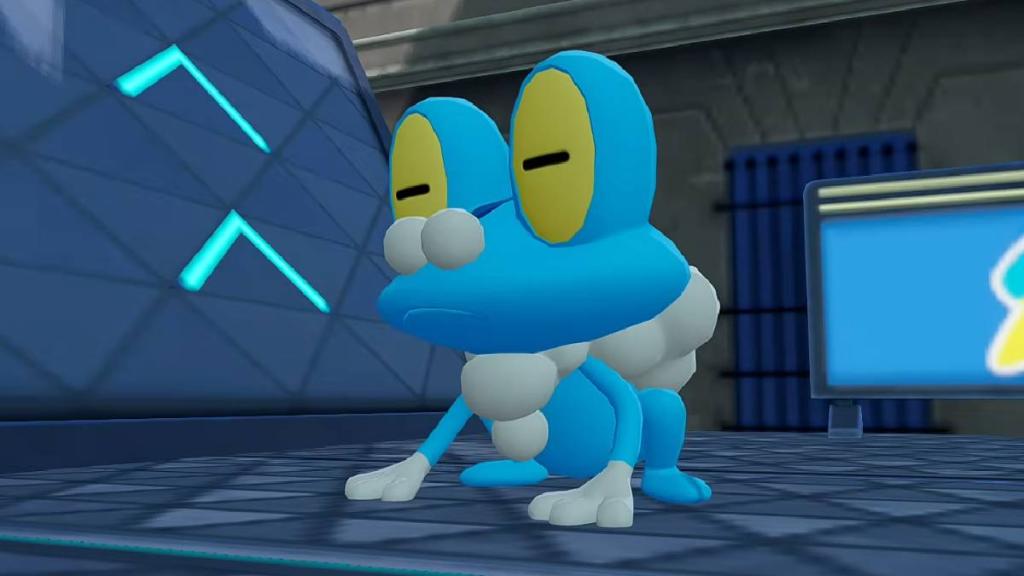
To find Froakie in Pokémon Legends Z-A, head to Jaune Sector 8 and speak to the NPC named Surv, and begin Side Mission 009, 'A Challenge from Froakie.' Complete the three obstacle courses within the time limit, and you will be gifted a Froakie.
Where to find Fennekin
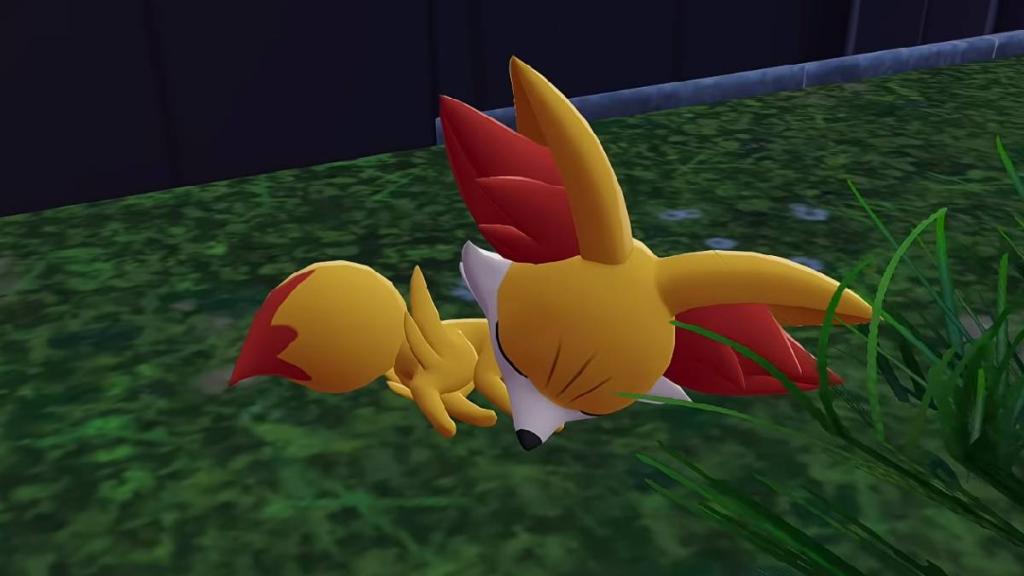
To find Fenekkin in Pokémon Legends Z-A, you must first talk to Branche in Magenta Sector 2 to begin Side Mission 008, titled 'Get Well, Fennekin.' Follow the objective marker, and after speaking to the old man, head to Wild Zone 5. Follow the objective markers within Wild Zone 5 to eventually find the Revitalizing Twig, and upon returning to Branche with the item, she will gift you the now healthy Fennekin.
Where to find Chespin
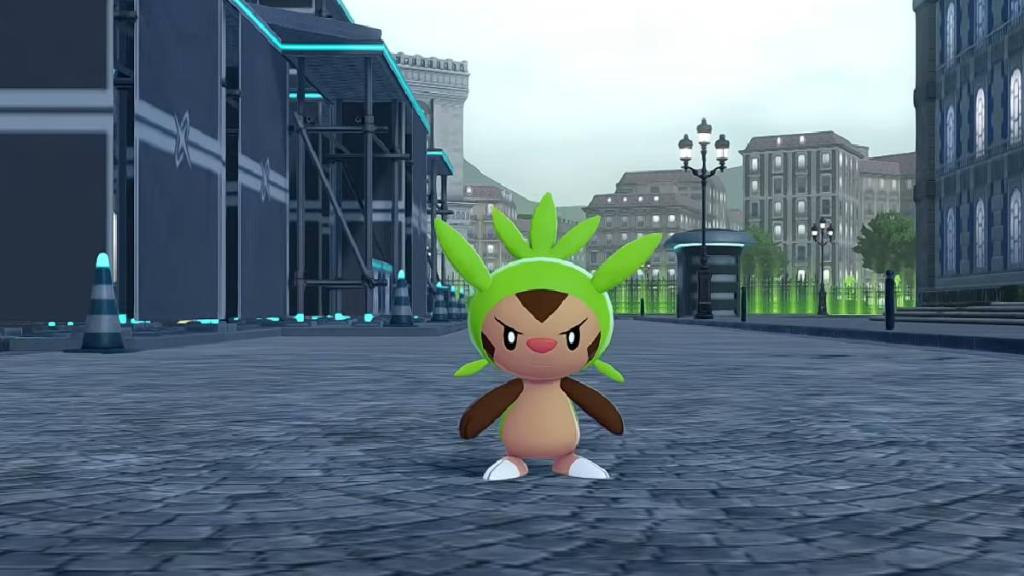
To find Chespin in Pokémon Legends Z-A, first speak to the character Axi, found outside Restaurant Le Wow, and start Side Mission 007, 'A Feisty Chespin.' Simply battle and defeat Chespin three times, and then it will join your party.
How to get the Kalos starters in the wild in Pokémon Legends Z-A
The Kalos starters (Chespin, Fennekin, and Froakie) become available in the wild after completing the main story of Pokémon Legends Z-A. At the time of writing, there exact location is not known, but we will update this guide in the future as soon as that information becomes available.
Can Chespin, Fennekin, and Froakie be Shiny in Pokémon Legends Z-A?
The version of the Kalos starters you encounter through Side Missions are not available in their Shiny forms. But any you encounter in the wild after completing the main Legends ZA story do have the regular chance of being Shiny.
The post How to find Froakie, Chespin, and Fennekin in Pokémon Legends Z-A appeared first on Destructoid. | ||||||||||||||||||||||||||||||||||||||||||||||||||||||||||||||||||||||||||||||||||||||||||||||||||||||||||||||||||||||||||||||||||||||||||||||||||||||||||||||||||||||||||||||||||||||||||
Destructoid Wednesday, October 15, 2025 11:14 AM
To trade Pokémon with friends in Pokémon Legends ZA, you need to unlock online functionalities first. You get them right after catching your first five Pokémon and unlocking Mable's Rewards.
When you leave the building after this segment, simply open the main menu with X and you'll see the Link Play option at the bottom. Select it. If you don't have an active Nintendo Switch Online subscription, you will need to start one to trade with friends in ZA.
On the new menu, select Link Trade. If you and your friend are next to each other, you can select the Nearby Players option to trade. Otherwise, you need to pick the Faraway Players to trade online using Link Codes.
Here's the step-by-step process:
How to use Link Codes to trade Pokémon
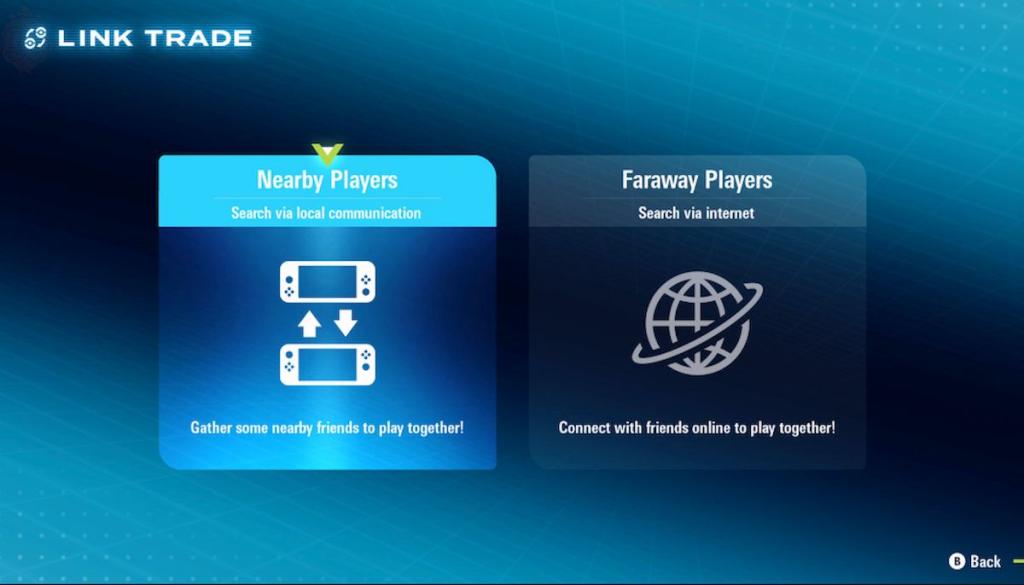
To trade Pokémon online using Link Codes in ZA, you and your trade partner must pick the Faraway Players option in the Link Trade menu and use the same eight-digit Link Code, at the same time.
You can use any code you come up with, but note that anyone entering that same string of numbers simultaneously will be able to match with you for a trade. For example:
That's why, if you want to keep your trade restricted to your friend, you should avoid easy sequences like 1111-1111, because other people might also be using it, and you run the risk of matching with a random instead of with your friend.
If you and the other party are the only ones using that code at the same time, you will soon be connected and be able to trade Pokémon online.
The post How to trade Pokémon with friends in Legends Z-A appeared first on Destructoid. | ||||||||||||||||||||||||||||||||||||||||||||||||||||||||||||||||||||||||||||||||||||||||||||||||||||||||||||||||||||||||||||||||||||||||||||||||||||||||||||||||||||||||||||||||||||||||||
Destructoid Wednesday, October 15, 2025 10:38 AM
Legends Z-A has plenty of options when it comes to Mega Pokémon inside the game, and you can try adding them when you begin your journey.
Given their strengths and power, any Mega is going to have significantly stronger stats and power. However, you'll need plenty of resources to reach their Mega stage, and having the list will be immensely helpful.
First, let's look at the list of all the new Mega Pokémon that have been confirmed for ZA.
Disclaimer: list in progress.
Table of contents
All New Mega Pokémon in Legends ZA
Here's a list of all the new Mega evolutions that have been added to Legends ZA.
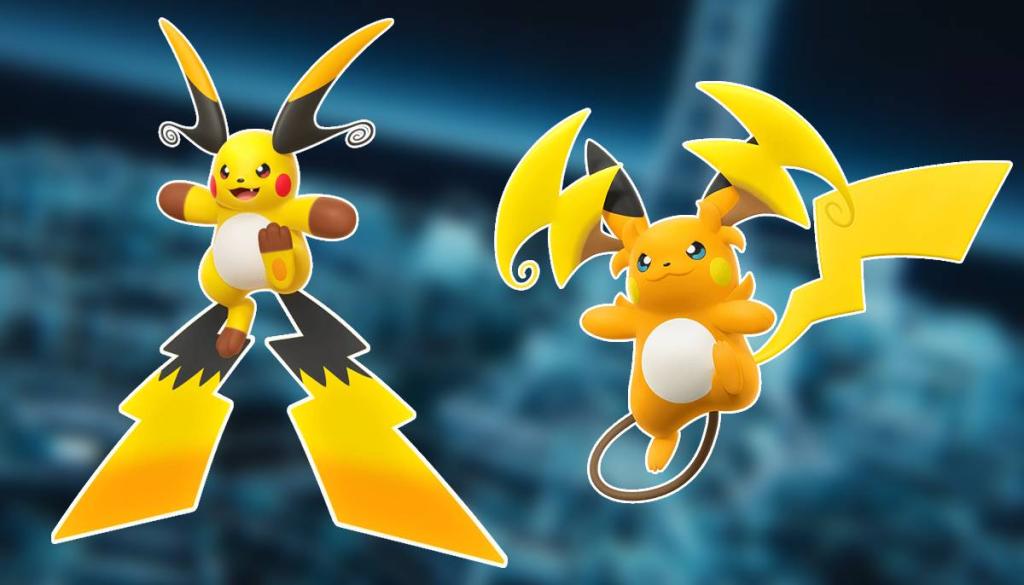
Some, like Mega Raichu, will be exclusive to the Mega Dimension DLC, so you'll need to have access to the expansion. Others, like Mega Greninja, can only be obtained if you grind the Ranked mode and rank up in the process.
The Pokémon Company has already confirmed all these Pokémon before ZA's launch, so the only question is how we can evolve them all.
All returning Mega evolutions in Pokémon Legends ZA
While the new additions will be the more attractive targets for most, it's best not to sleep on the returning ones. This includes a few fan-favorites from previous games.
Like our content? Set Destructoid as a Preferred Source on Google in just one step to ensure you see us more frequently in your Google searches!
The post All new Mega Pokémon in Legends Z-A appeared first on Destructoid. |

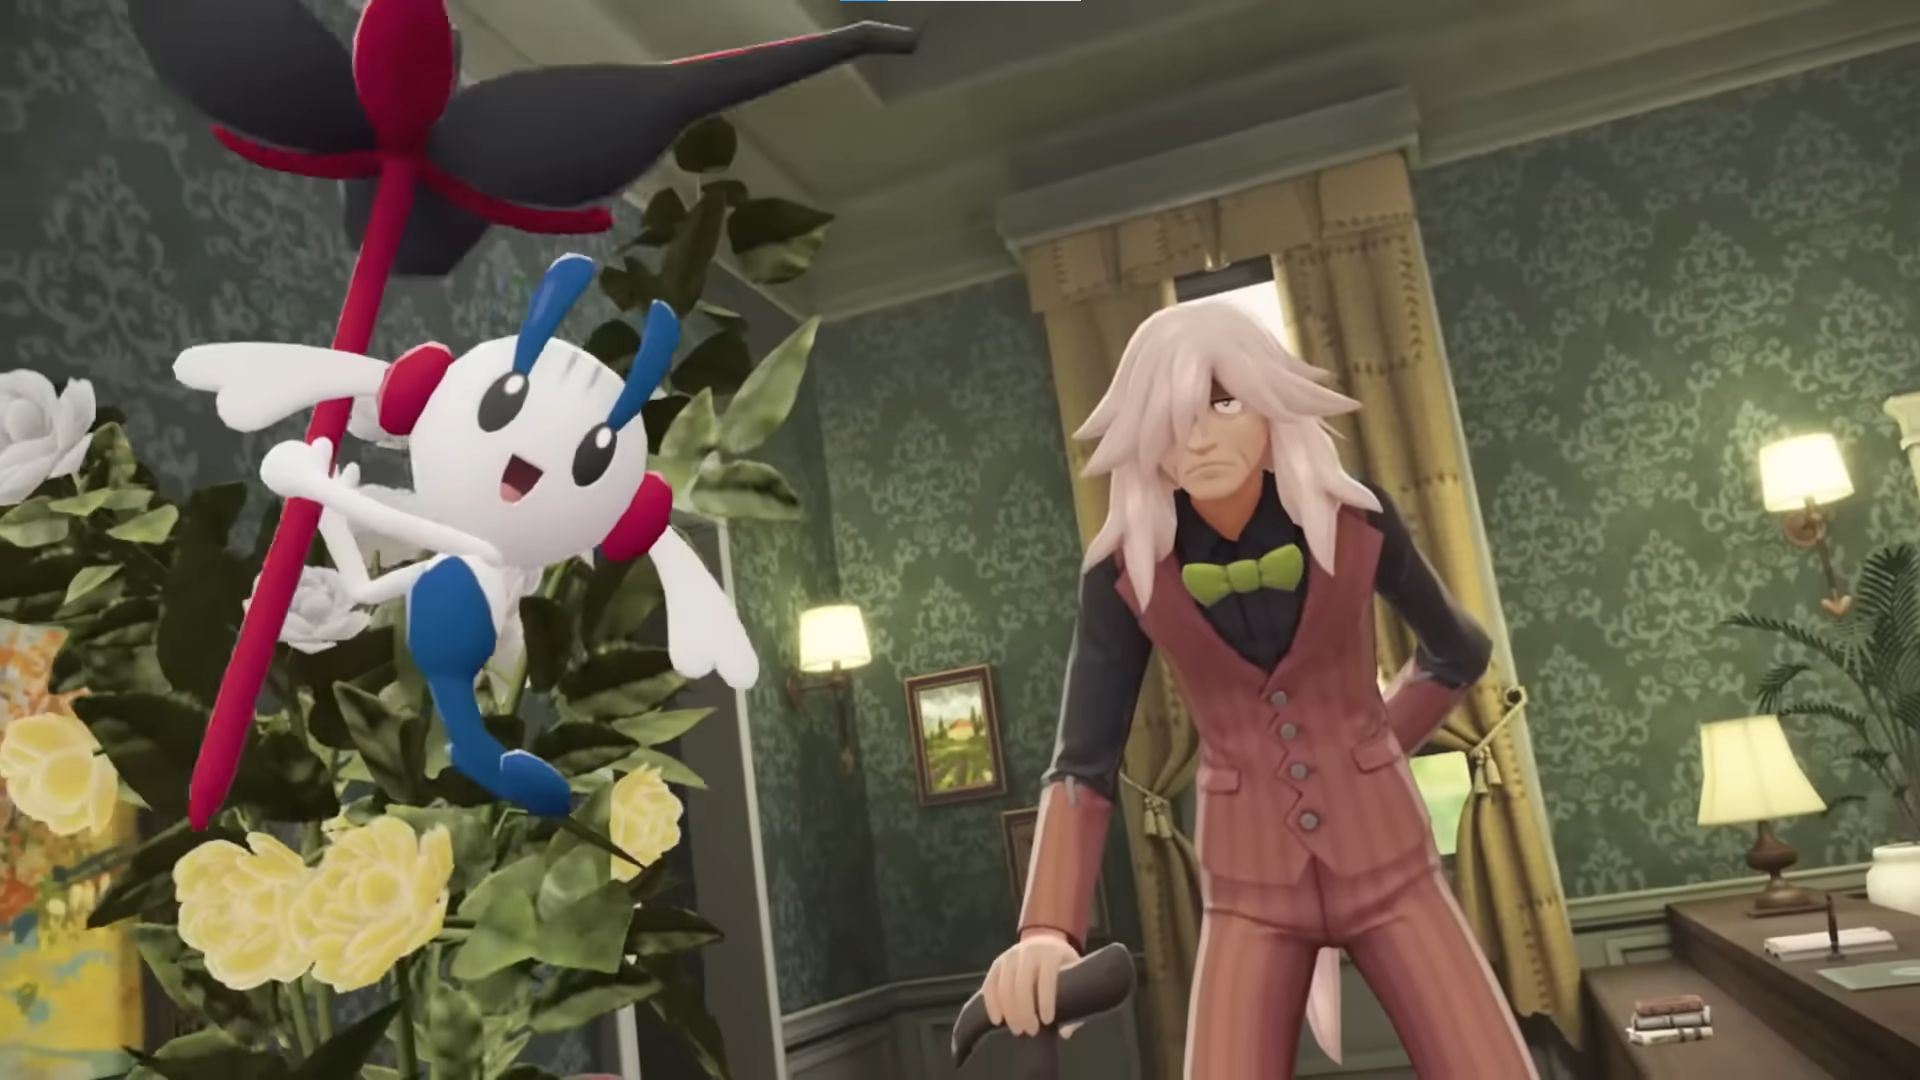
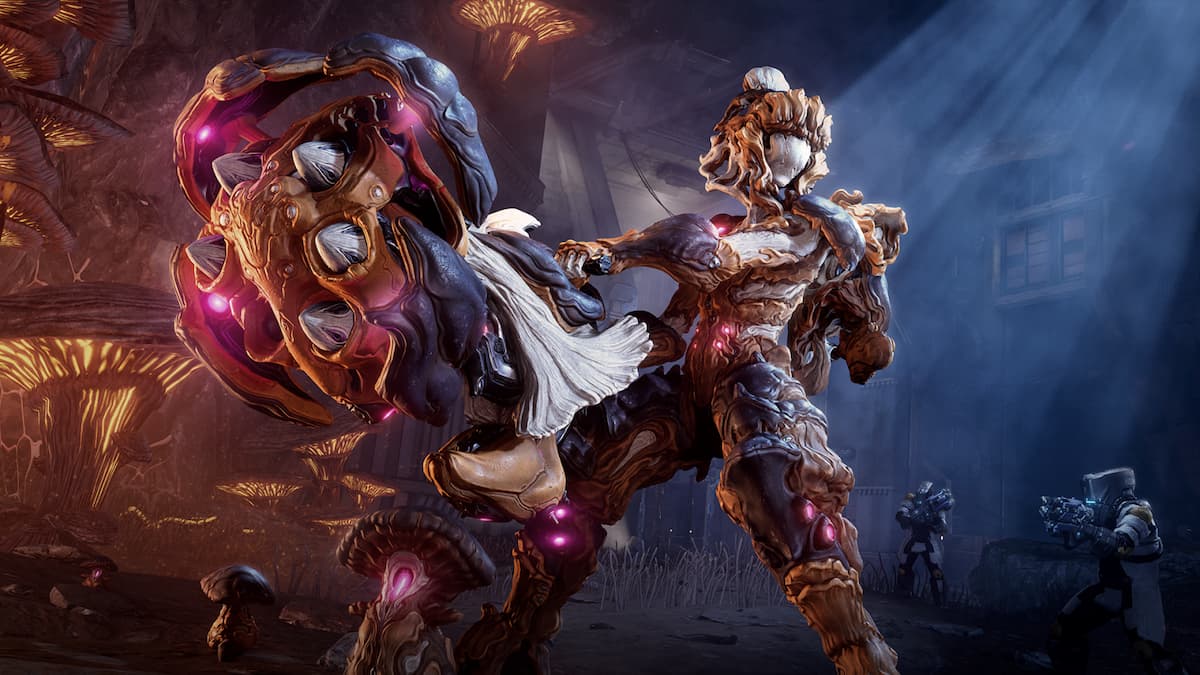
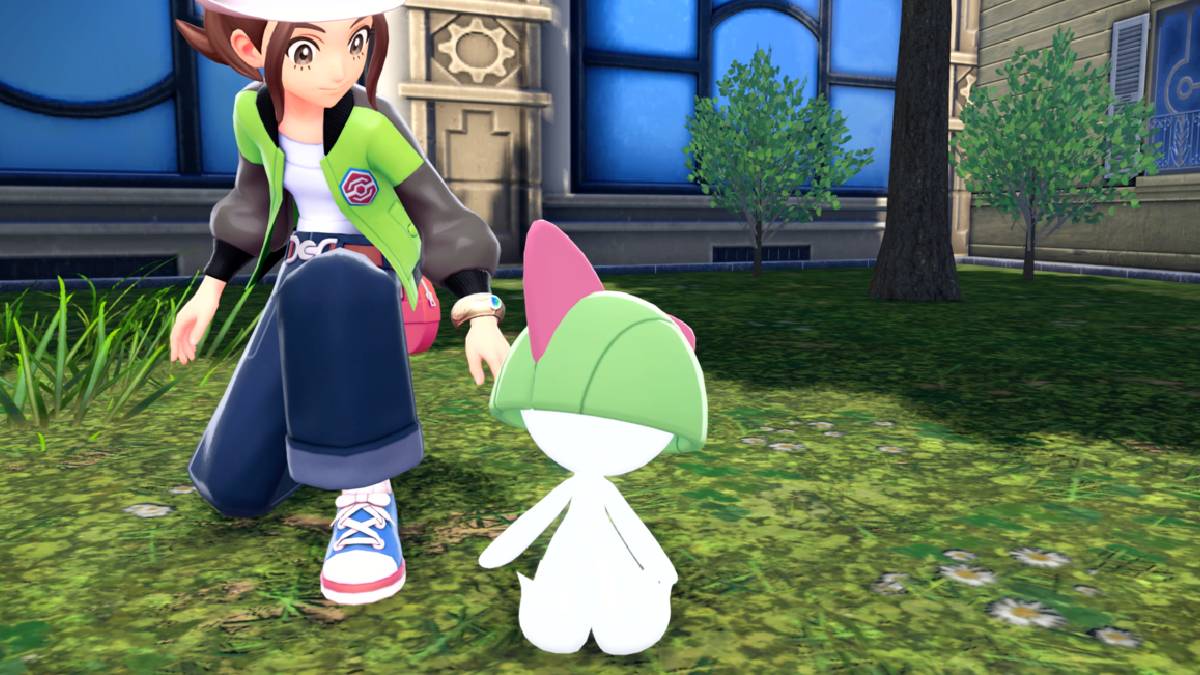
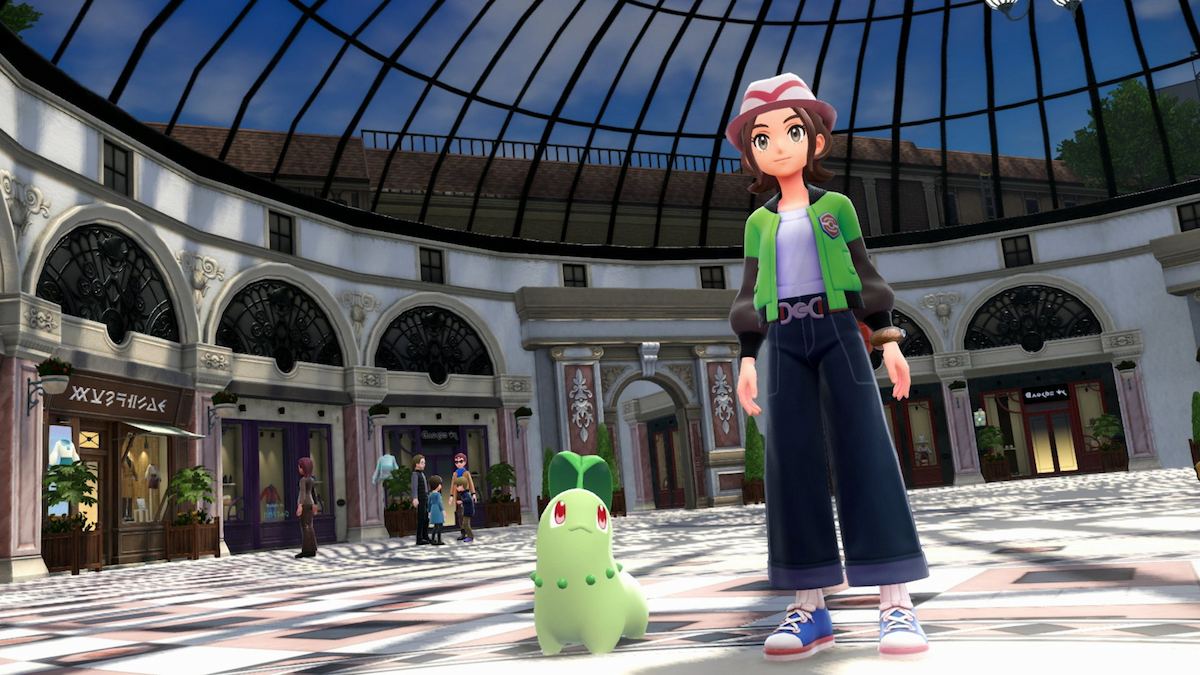
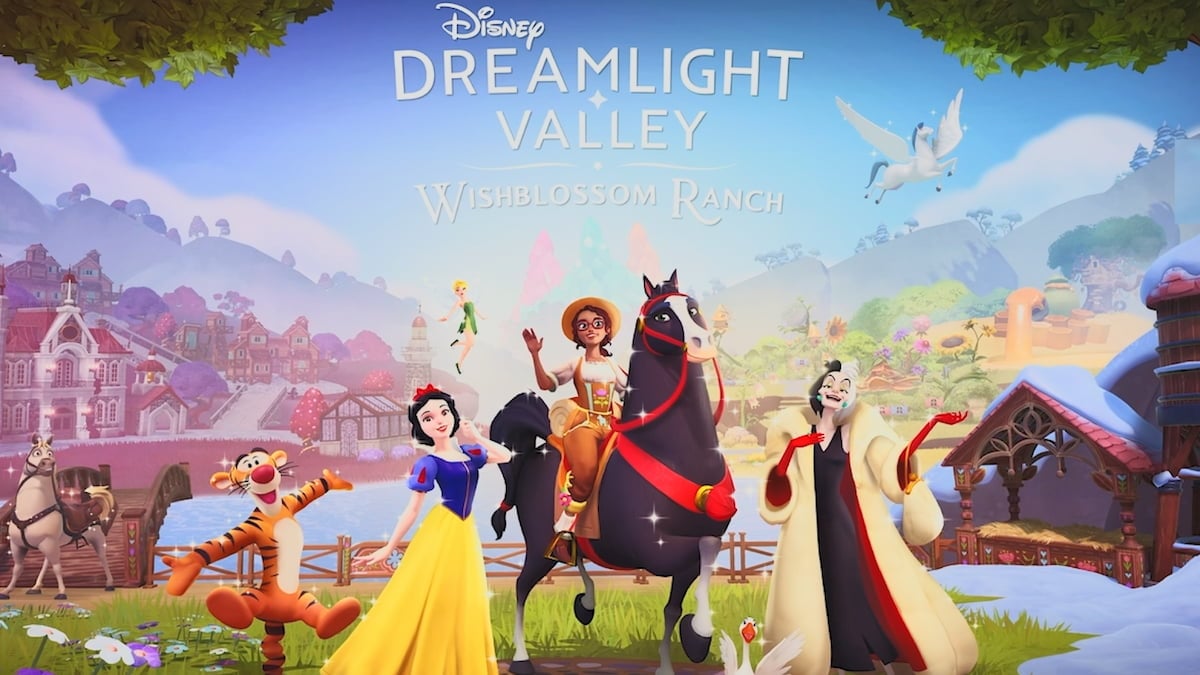
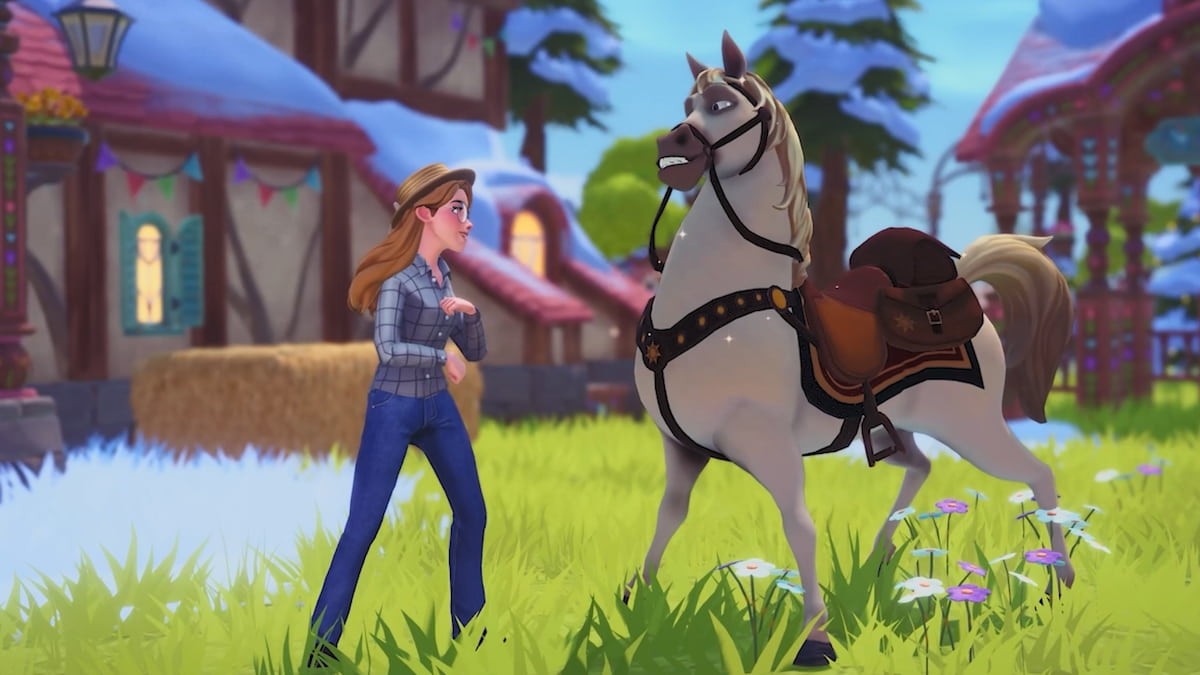
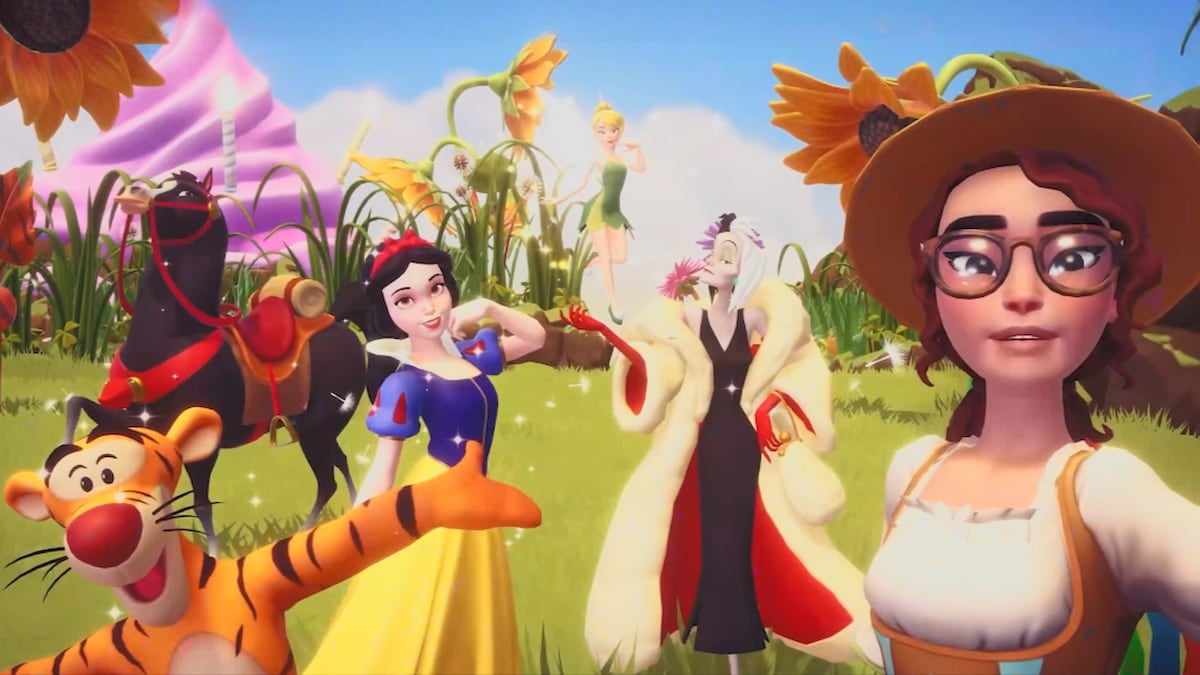
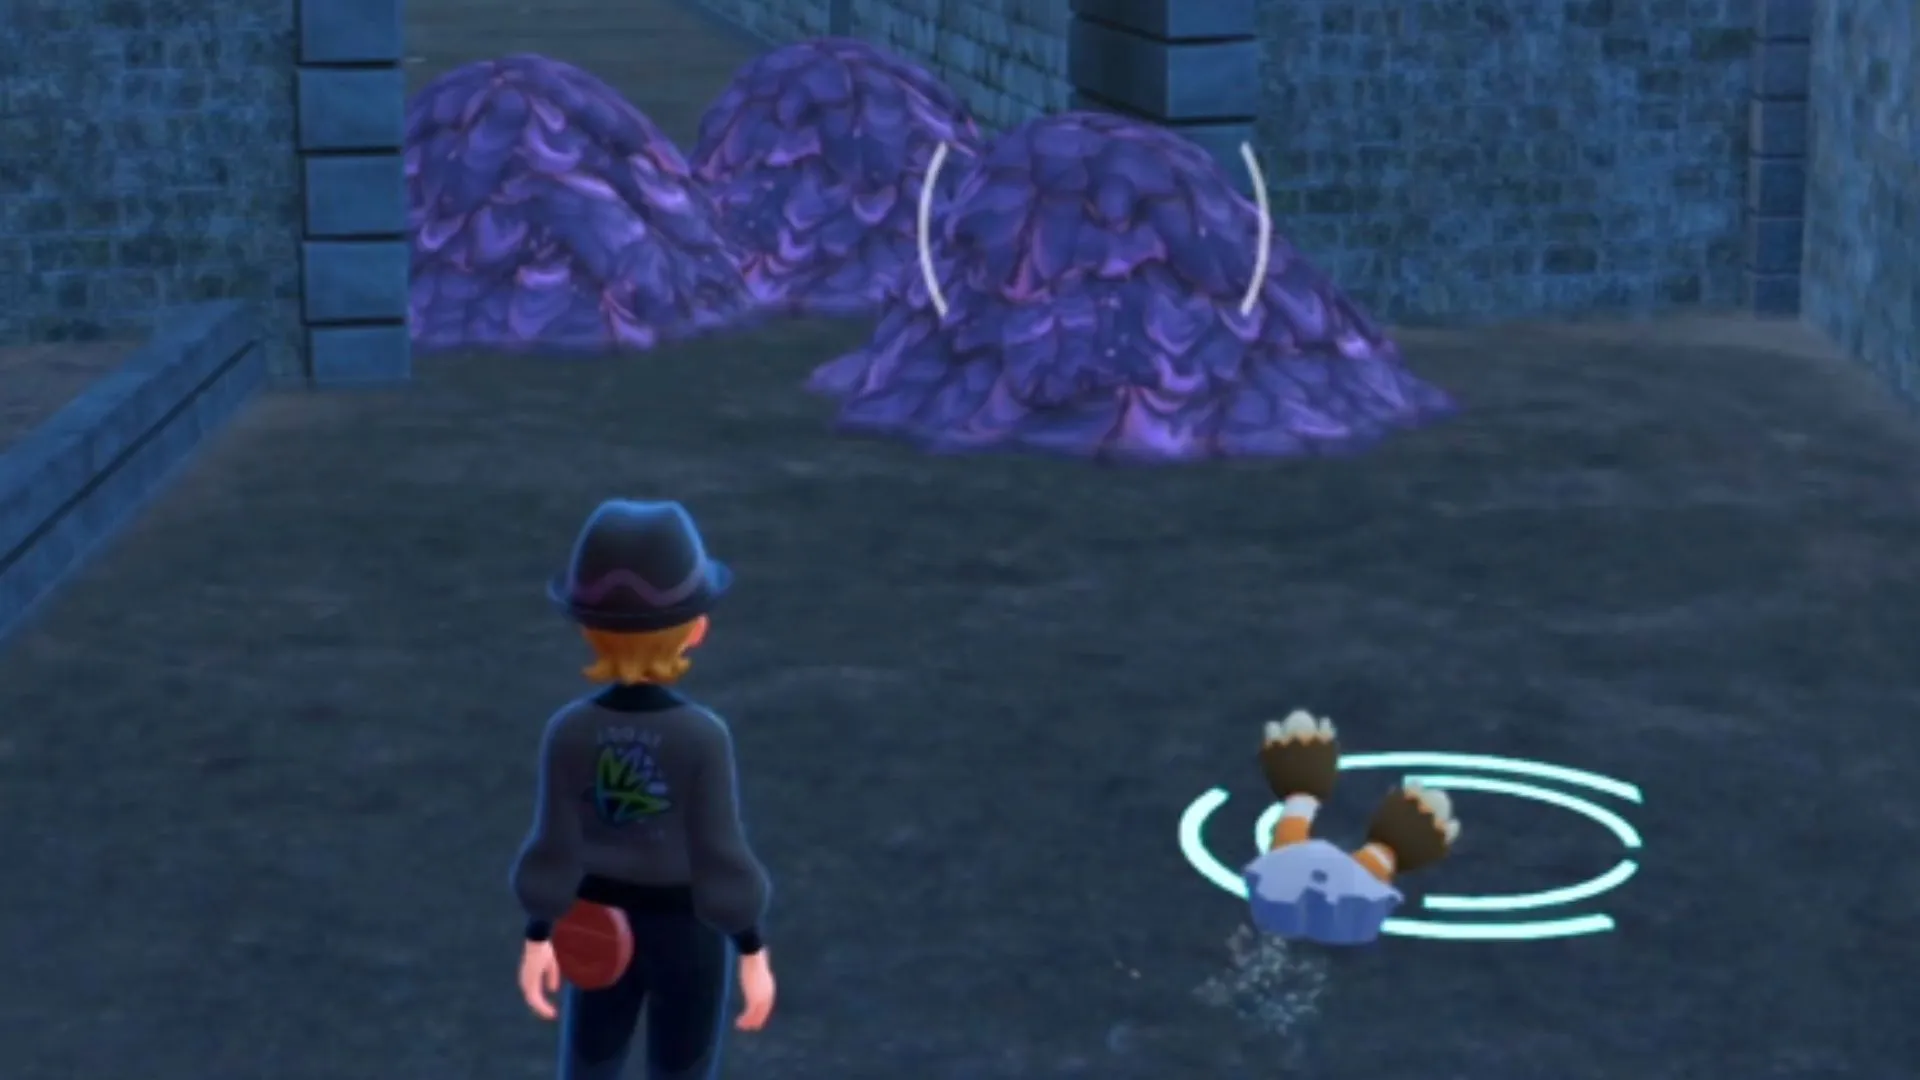
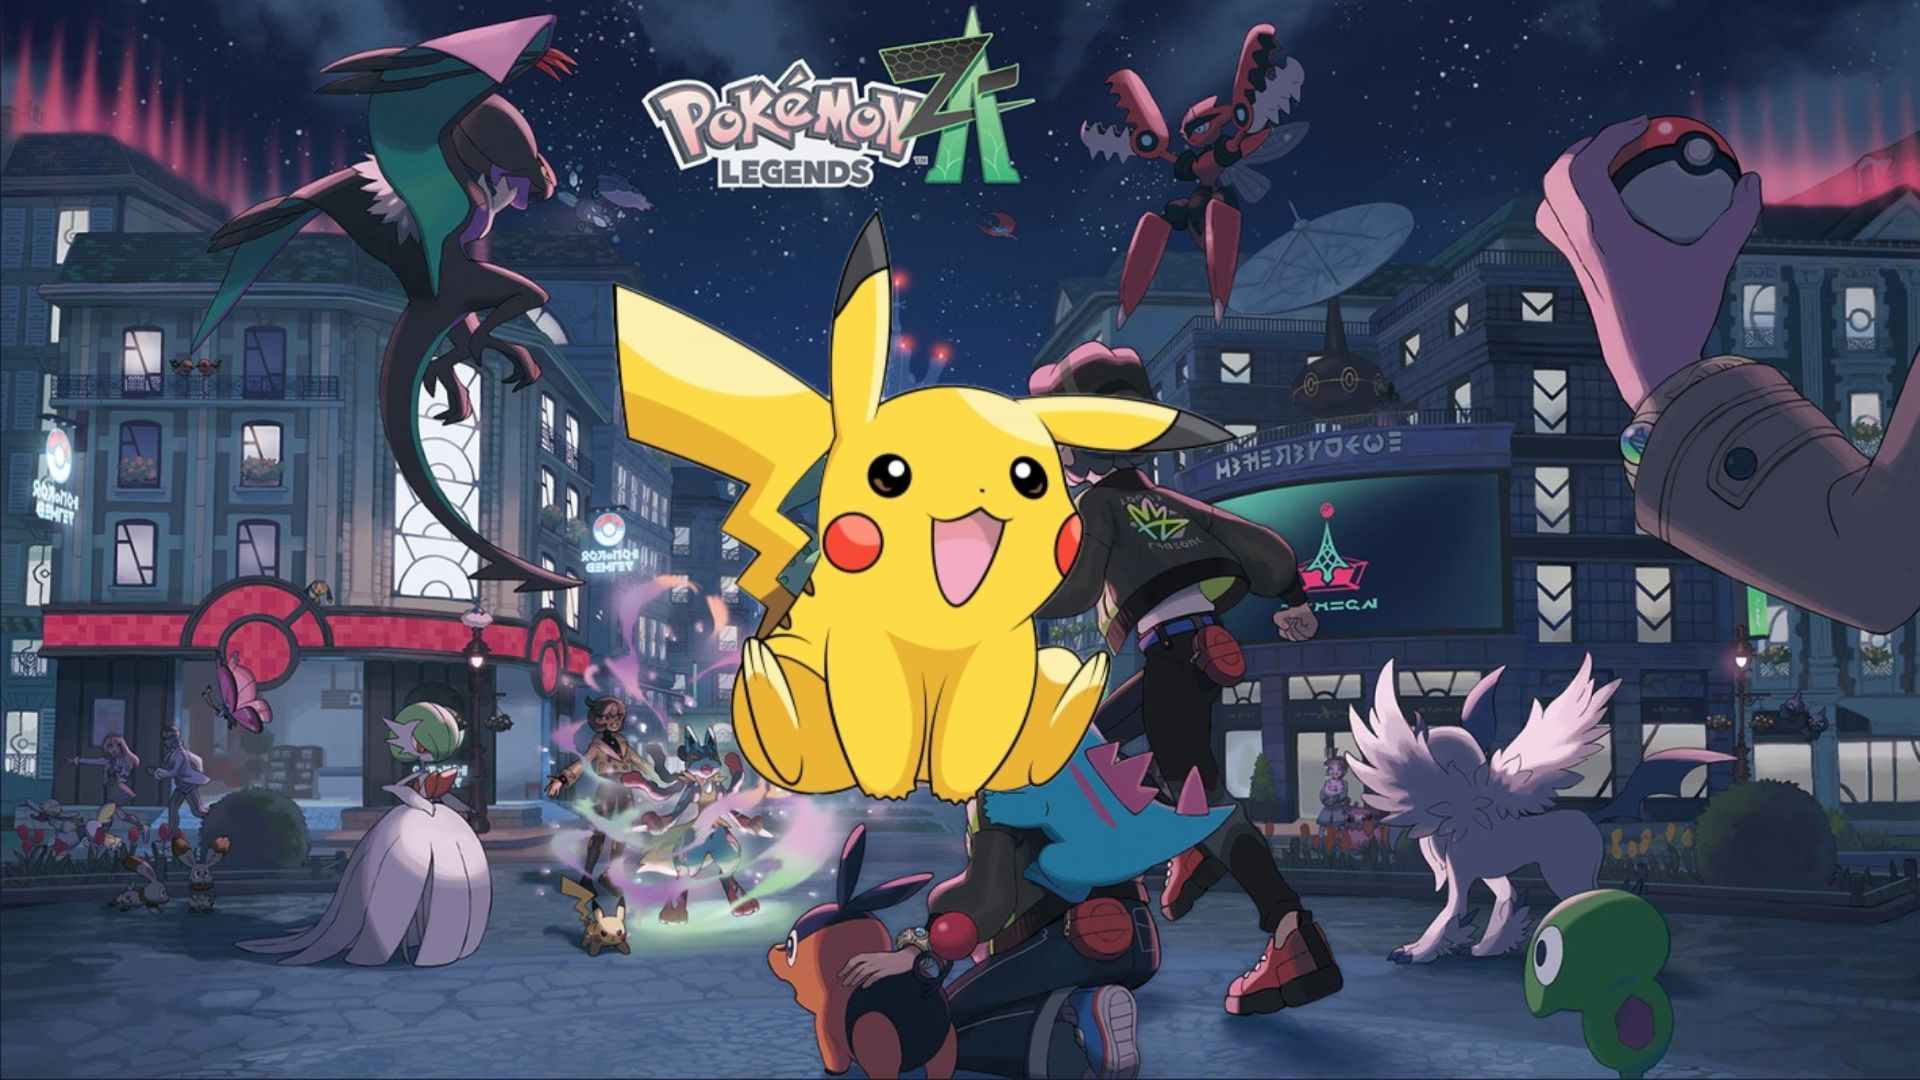
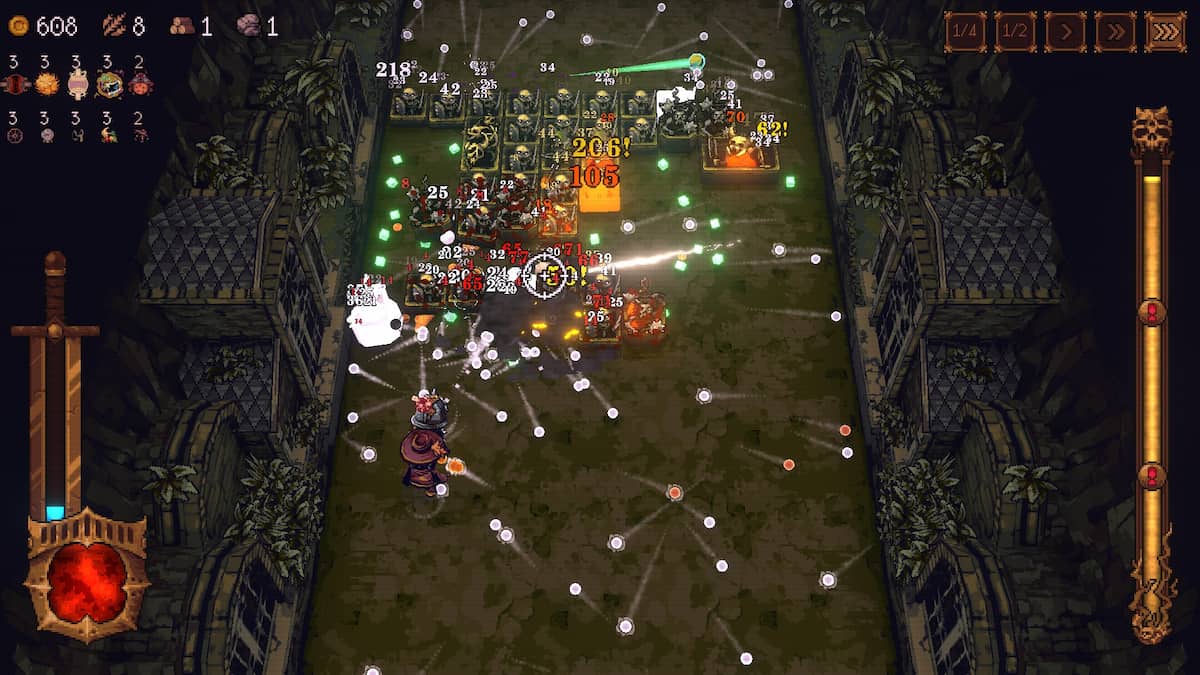

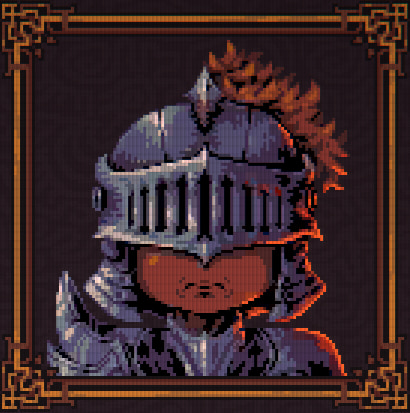


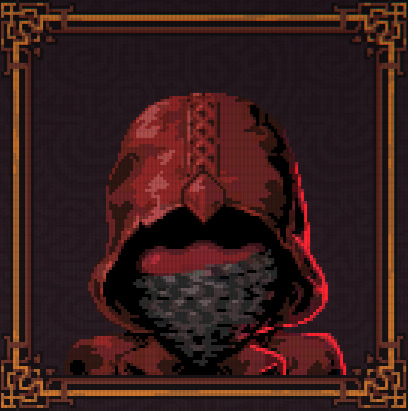
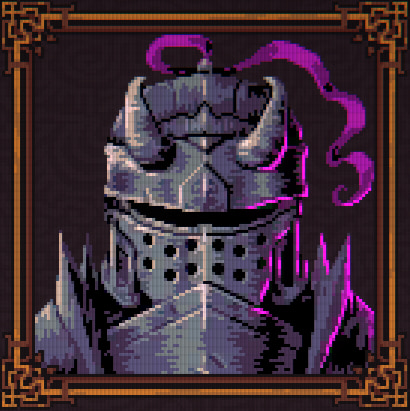
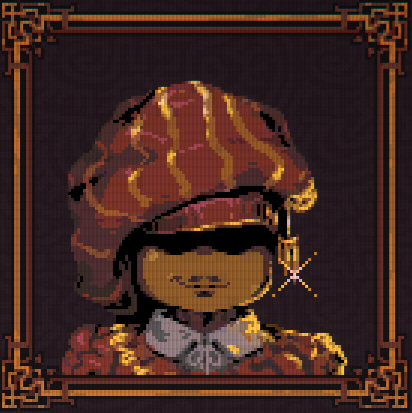
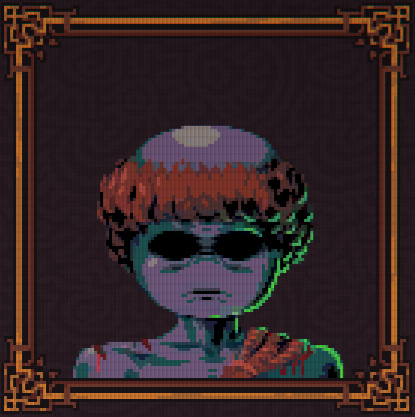
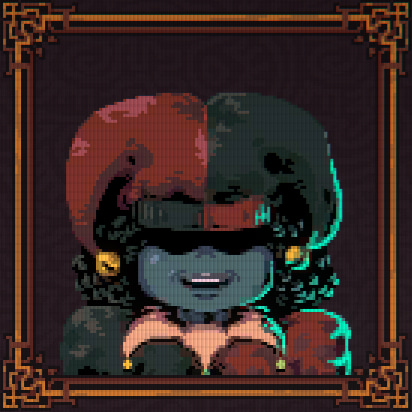

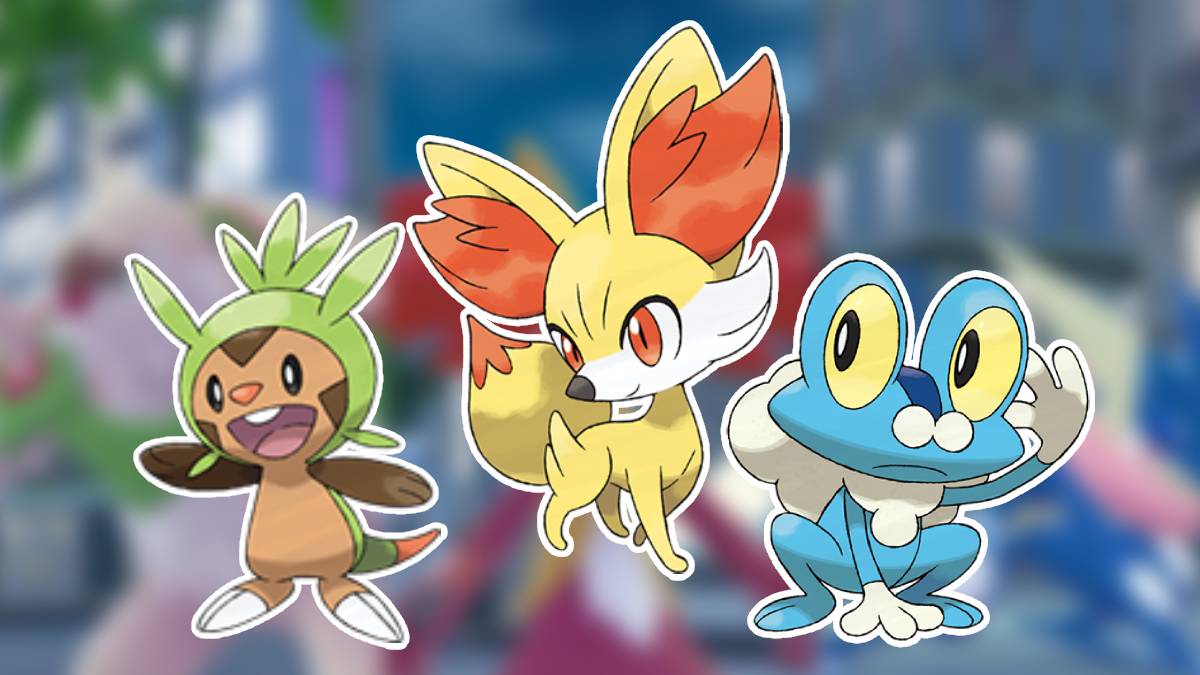


Gaming Instincts – Next-Generation of Video Game Journalism Wednesday, October 15, 2025 3:06 PM Includes several games. The post October 2025 PlayStation Plus Extra and Premium Games Announced appeared first on Gaming Instincts - Next-Generation of Video Game Journalism. |
Gaming Instincts – Next-Generation of Video Game Journalism Wednesday, October 15, 2025 2:45 PM Two trailers were released. The post 'Horrorverse' Tactical RPG Shooter Rules of Engagement: The Grey State Announced appeared first on Gaming Instincts - Next-Generation of Video Game Journalism. |
Gaming Instincts – Next-Generation of Video Game Journalism Wednesday, October 15, 2025 2:21 PM A trailer was also released. The post Sonic Rumble Release Window Announced appeared first on Gaming Instincts - Next-Generation of Video Game Journalism. |
Gaming Instincts – Next-Generation of Video Game Journalism Wednesday, October 15, 2025 2:05 PM Showing a princess rescue mission. The post Dragon Quest I & II HD-2D Remake Gets New Gameplay Video appeared first on Gaming Instincts - Next-Generation of Video Game Journalism. |
MonsterVine Wednesday, October 15, 2025 1:00 PM Over the weekend, Atlus celebrated the one-year anniversary of its critically acclaimed RPG Metaphor: ReFantazio with a special livestream event. The broadcast, now available on the Atlus West YouTube channel and Steam, featured reflections from the development team, appearances by voice actors and fans, and a commemorative illustration from character designer Shigenori Soejima, which is […] |
MonsterVine Wednesday, October 15, 2025 12:00 PM Fellowship is a game that wears its inspiration on its entire shirt. What if, instead of rolling a new character in an MMORPG, leveling that character up, and THEN crawling through dungeons and experiencing endgame, was a little less personal but expedited? Enter Fellowship, a hero-based dungeon crawler. Immediately, I noticed that Fellowship had taken […] |
MonsterVine Wednesday, October 15, 2025 12:00 PM The nice thing about BALL x PIT is that everything you need to know about the game is in the title. There are balls, you're in a pit, that's the meat of it. And what BALL x PIT taught me is that's really all you need to make an engaging video game. BALL x PIT […] |
MonsterVine Wednesday, October 15, 2025 11:33 AM Indie narrative label Fellow Traveller and developer sunset visitor have announced that their Peabody Award-winning sci-fi adventure 1000xRESIST will launch on Xbox Game Pass, Xbox Series X|S, and PlayStation 5 on November 4, 2025. The new release will also feature expanded localization support, adding Brazilian Portuguese, French, and Korean to the already available language options, […] |
MonsterVine Wednesday, October 15, 2025 10:00 AM Wired Productions and developer Camel 101 have announced that their retro-inspired first-person survival horror shooter Beneath will launch on PC via Steam on October 27, with PlayStation 5 and Xbox Series X|S versions following on October 28. Ahead of release, players can dive into a free playable demo as part of Steam Next Fest, available […] |